Stop settling for the same ponytail every single day. Braids can transform your look in minutes.
They protect your natural hair from damage and breakage. You do not need professional skills to start braiding.
Some styles take just five minutes to complete. Others require a salon visit and several hours. Either way, you have options. Lots of them.
This guide breaks down over thirty braid styles into four simple categories. Find what works for your hair type, your schedule, and your personal style.
Let’s get started.
Classic Braids You Can Do at Home
Basic Three-Strand Braid
The basic three-strand braid starts everything.
Divide your hair into three equal sections. Cross the right strand over the middle one. Then cross the left strand over the new middle. Repeat this pattern all the way down your hair. Secure the end with a simple elastic.
This braid is the foundation for countless other styles. It might take a few tries to get right, but it will become a breeze once you do.
You can wear it alone or use it as a building block for more complex looks.
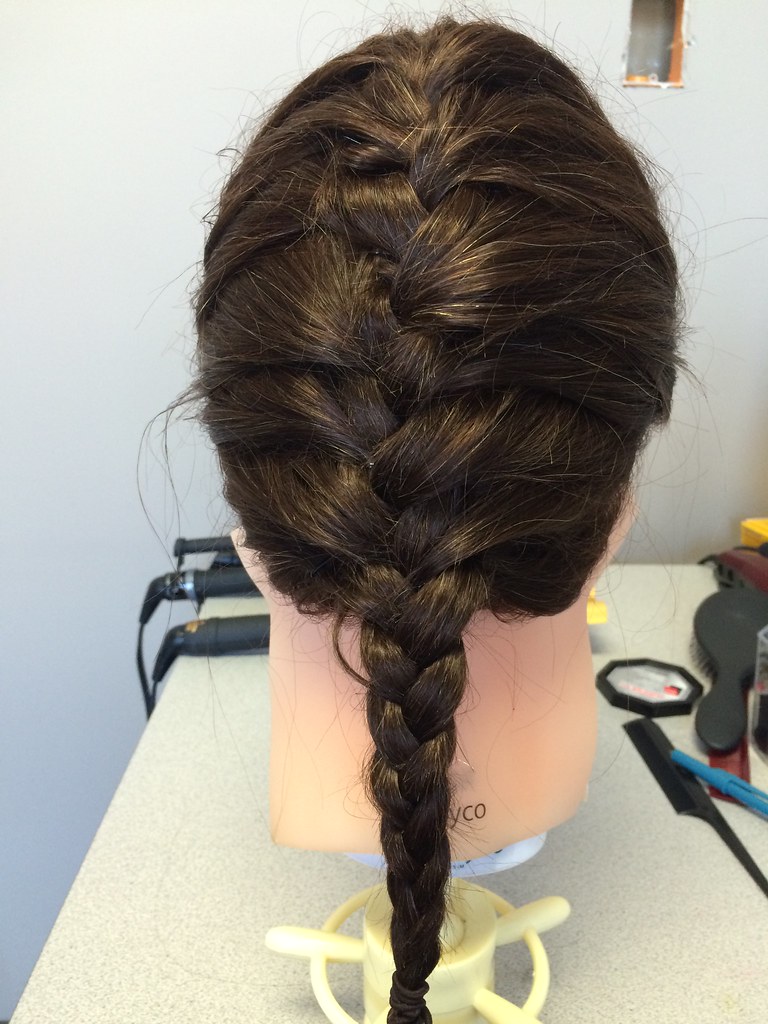
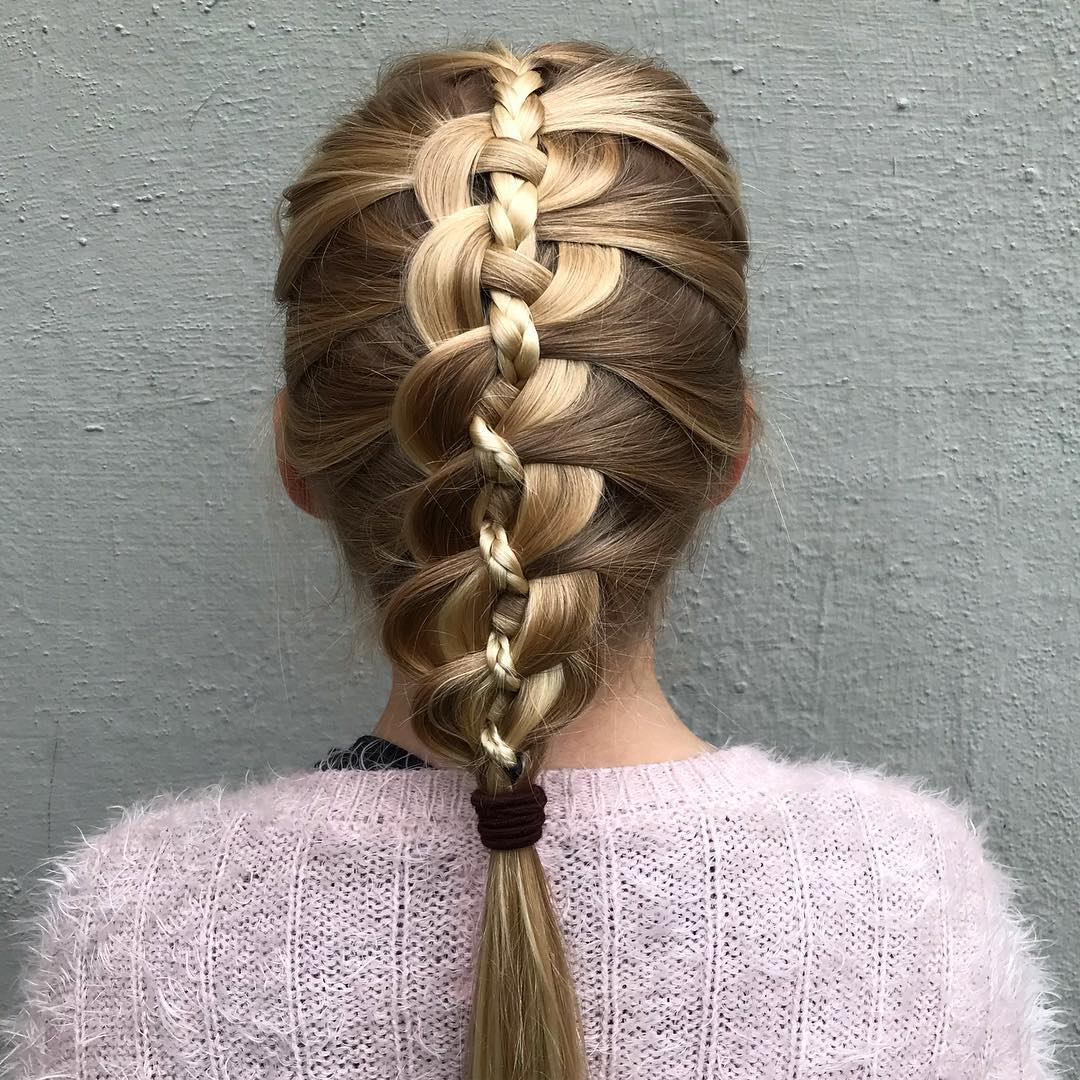
French Braid
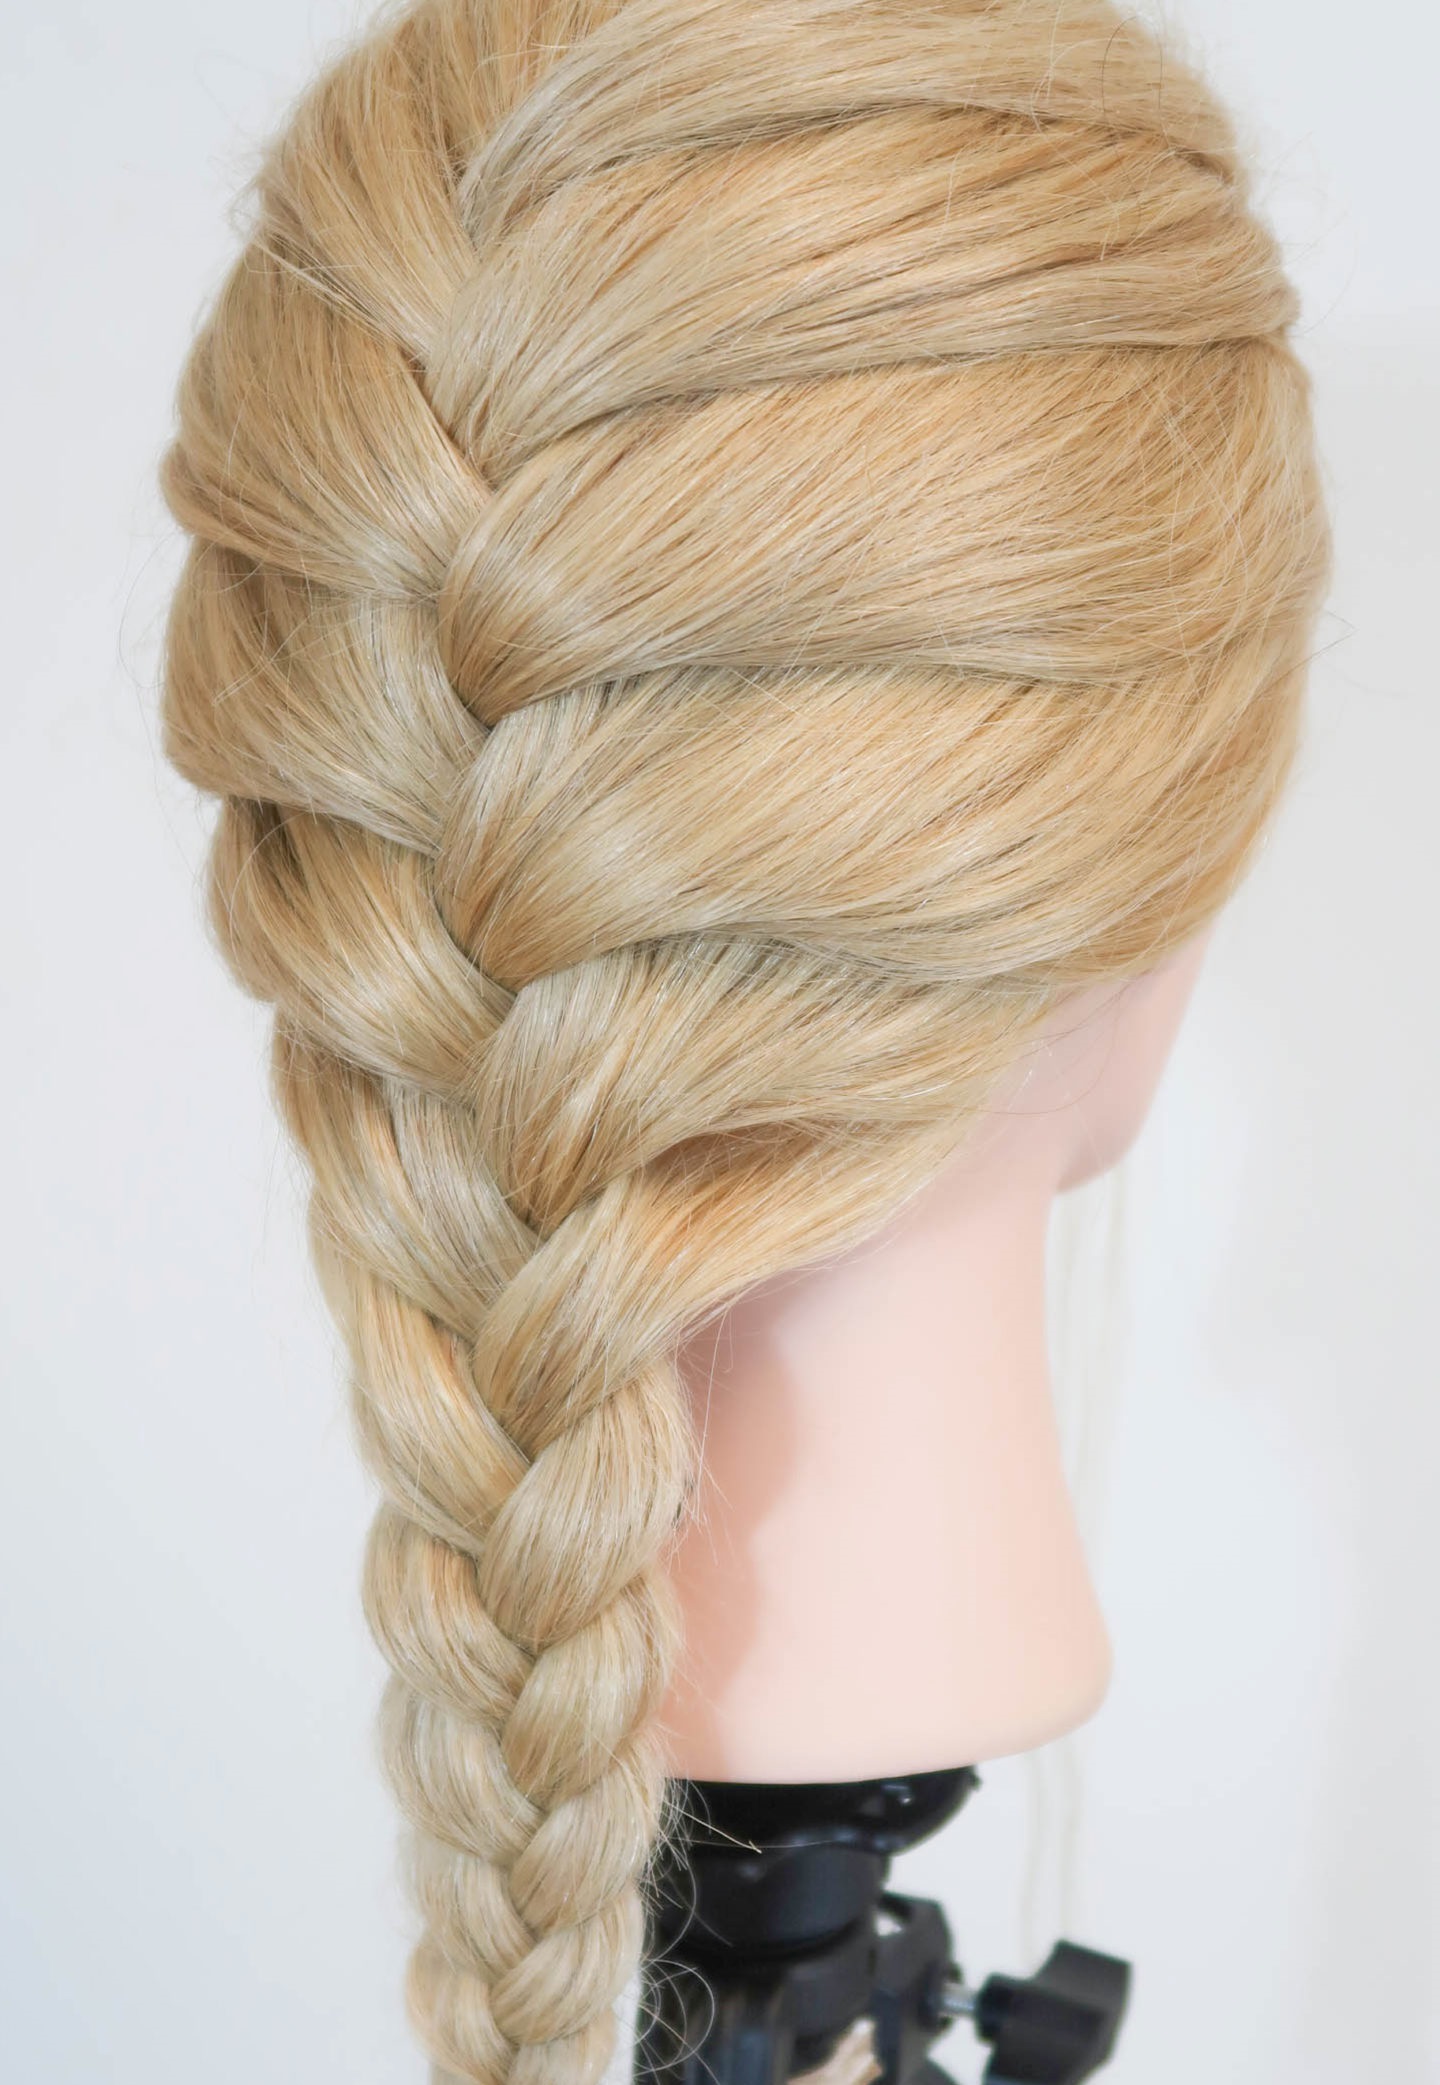
French braids look elegant but require practice.
Start the braid close to your scalp using three sections of hair. Add more hair each time you cross a section over the middle. This continuous integration creates that distinctive French look.
Any hair type can sport this versatile style. Wear it for a workout or dress it up for date night.
The French braid works well on both clean and second-day hair. Texturizing spray can help grip slippery strands.
This timeless braid remains an icon in the hair world for good reason.
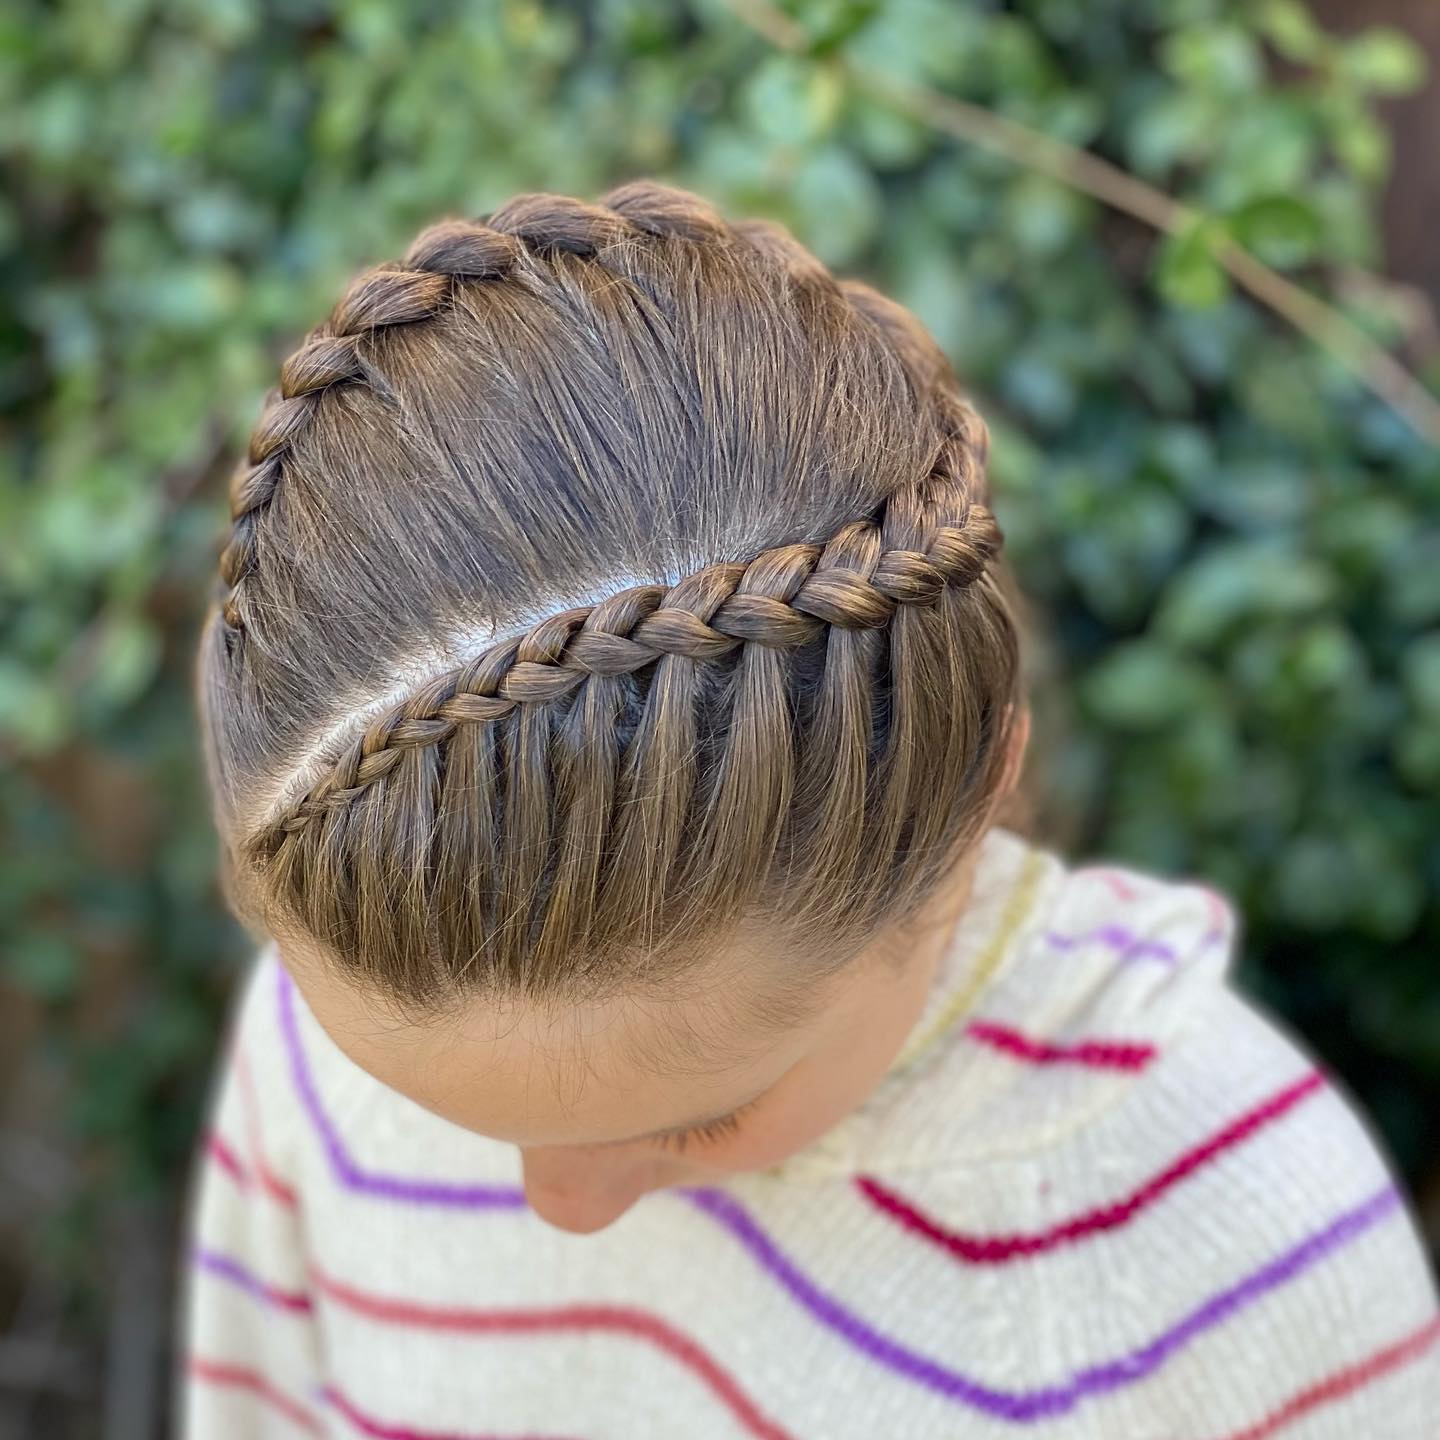
Dutch Braid
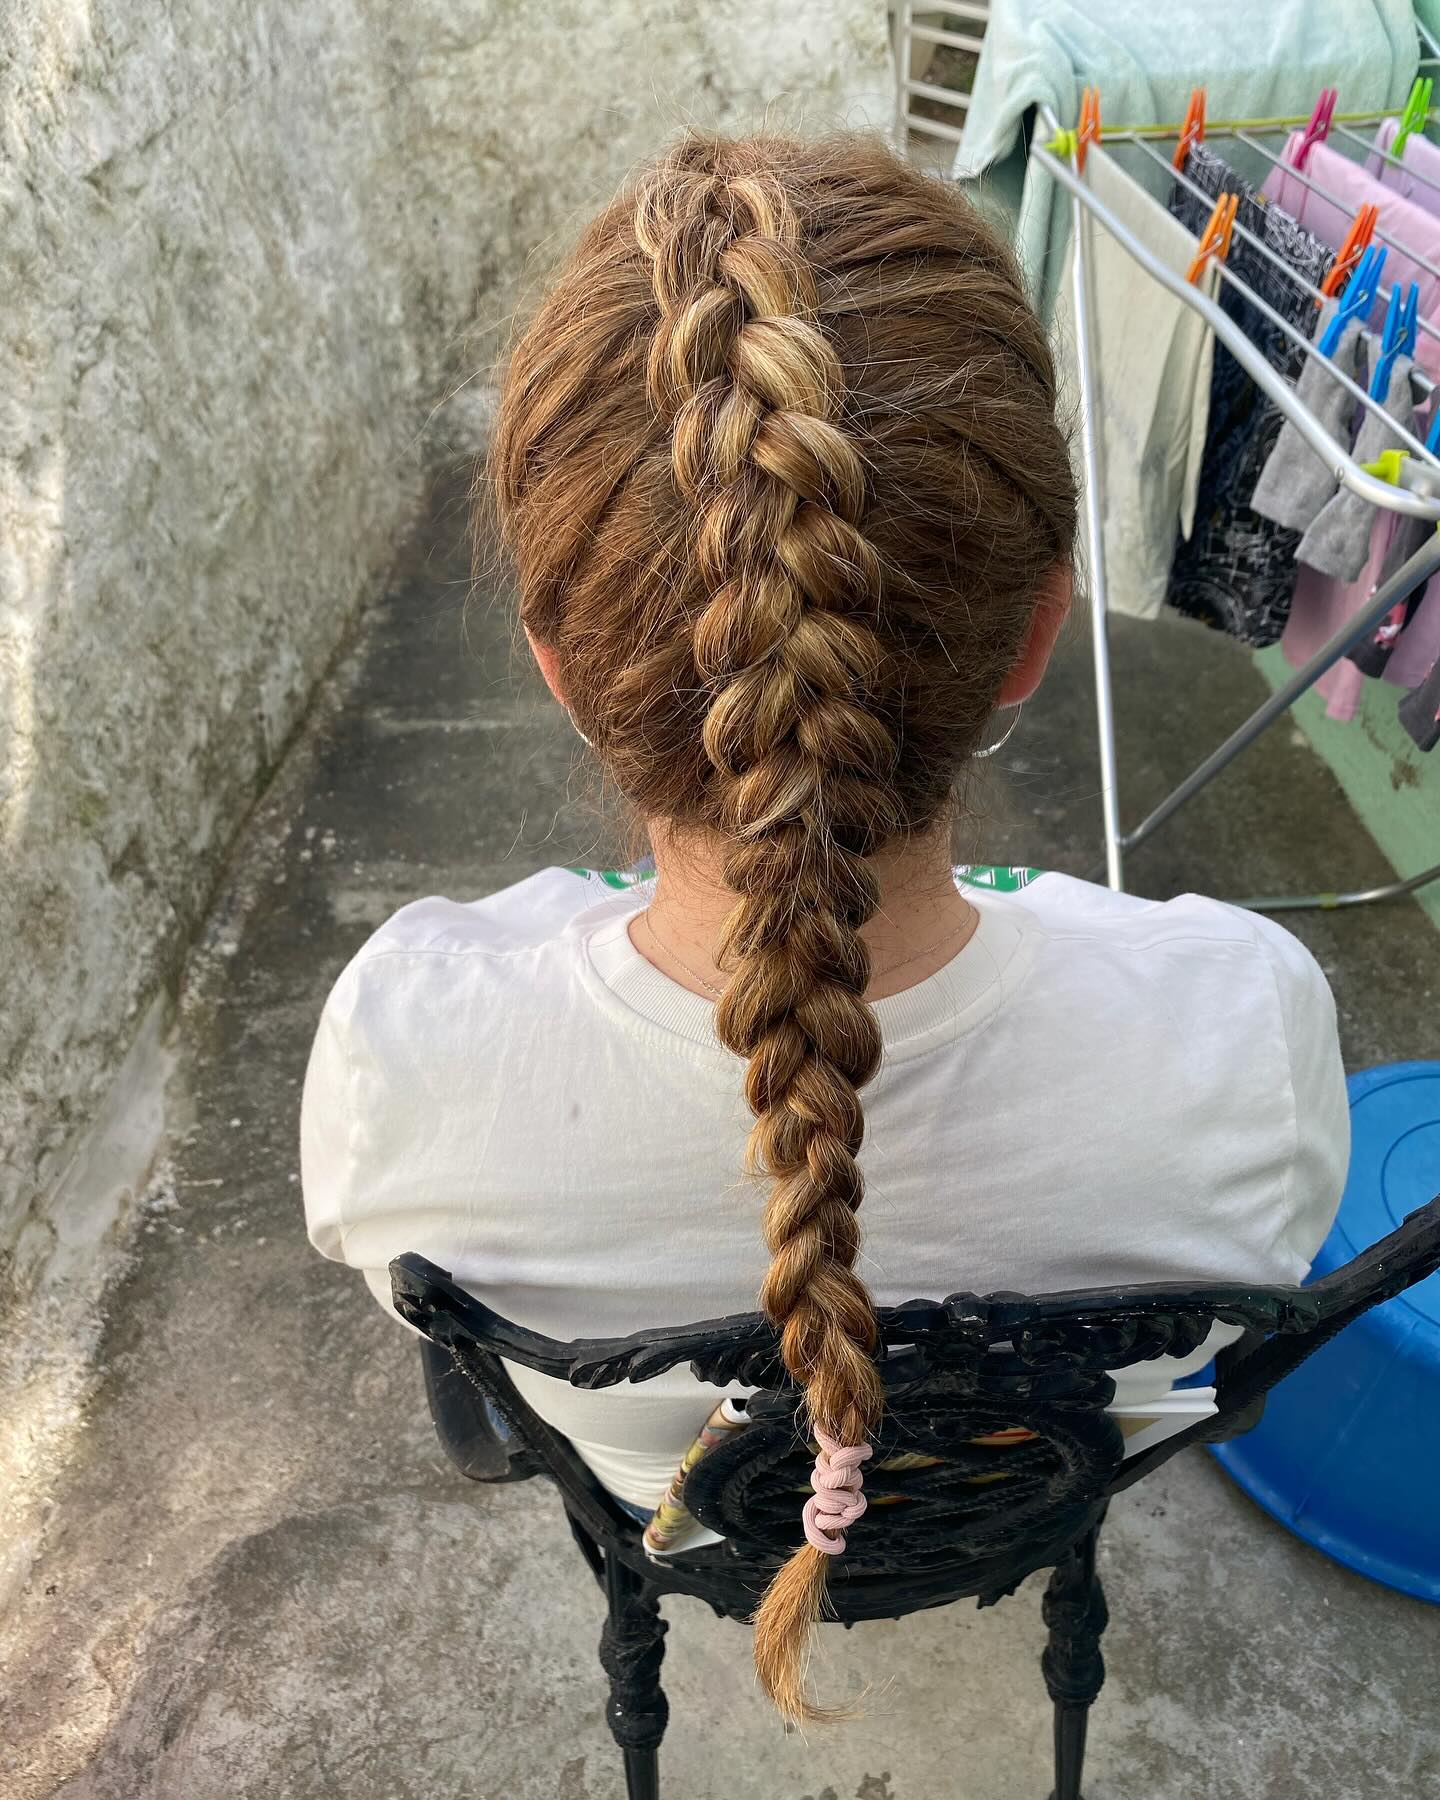
Dutch braids offer a dramatic raised effect.
The process mirrors the French braid technique closely. But you cross the sections under instead of over them. This creates a stunning braid that stands out from your hair.

Think of it as a reverse French braid. The raised appearance adds volume and dimension to any hairstyle. Dutch braids work great for festivals, weddings, or everyday wear.
You can create one central Dutch braid or two pigtail styles. Many people prefer this braid because it shows up beautifully in photographs.
Fishtail Braid
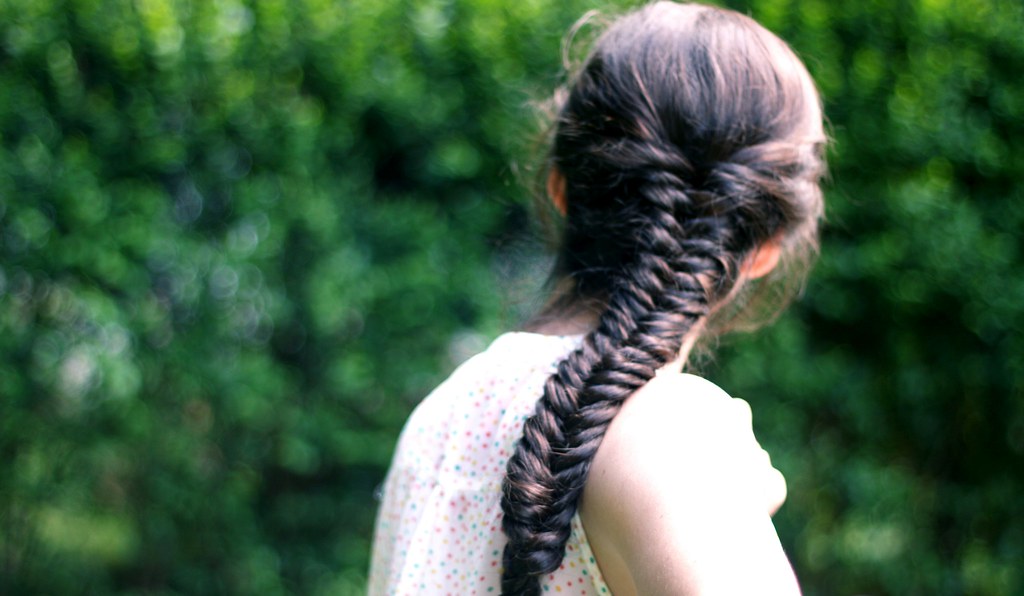
Fishtail braids look intricate but deceive you completely. They are surprisingly simple to create at home.
Split your hair into two large sections first. Take a small piece from one outer edge. Cross that piece over to the inner part of the other section. Repeat this process, alternating sides until you reach the end.
The finished braid resembles a fish skeleton, hence the name. Pull apart the pieces gently to add dimension and texture.
A spritz of texturizing spray gives it an extra bit of edge and hold.
Rope Braid
Rope braids work great for beginners seeking quick results.
Split your hair into two equal sections to start. Twist each section tightly in one direction on its own. Then twist both sections together in the opposite direction.
This creates a beautiful twisted “rope” effect instantly. Secure the end with a clear elastic band. The best part comes later when you unravel it. You get gorgeous, heatless waves without any styling tools.
You can create one rope braid, two, or as many as you like across your head.
Waterfall Braid
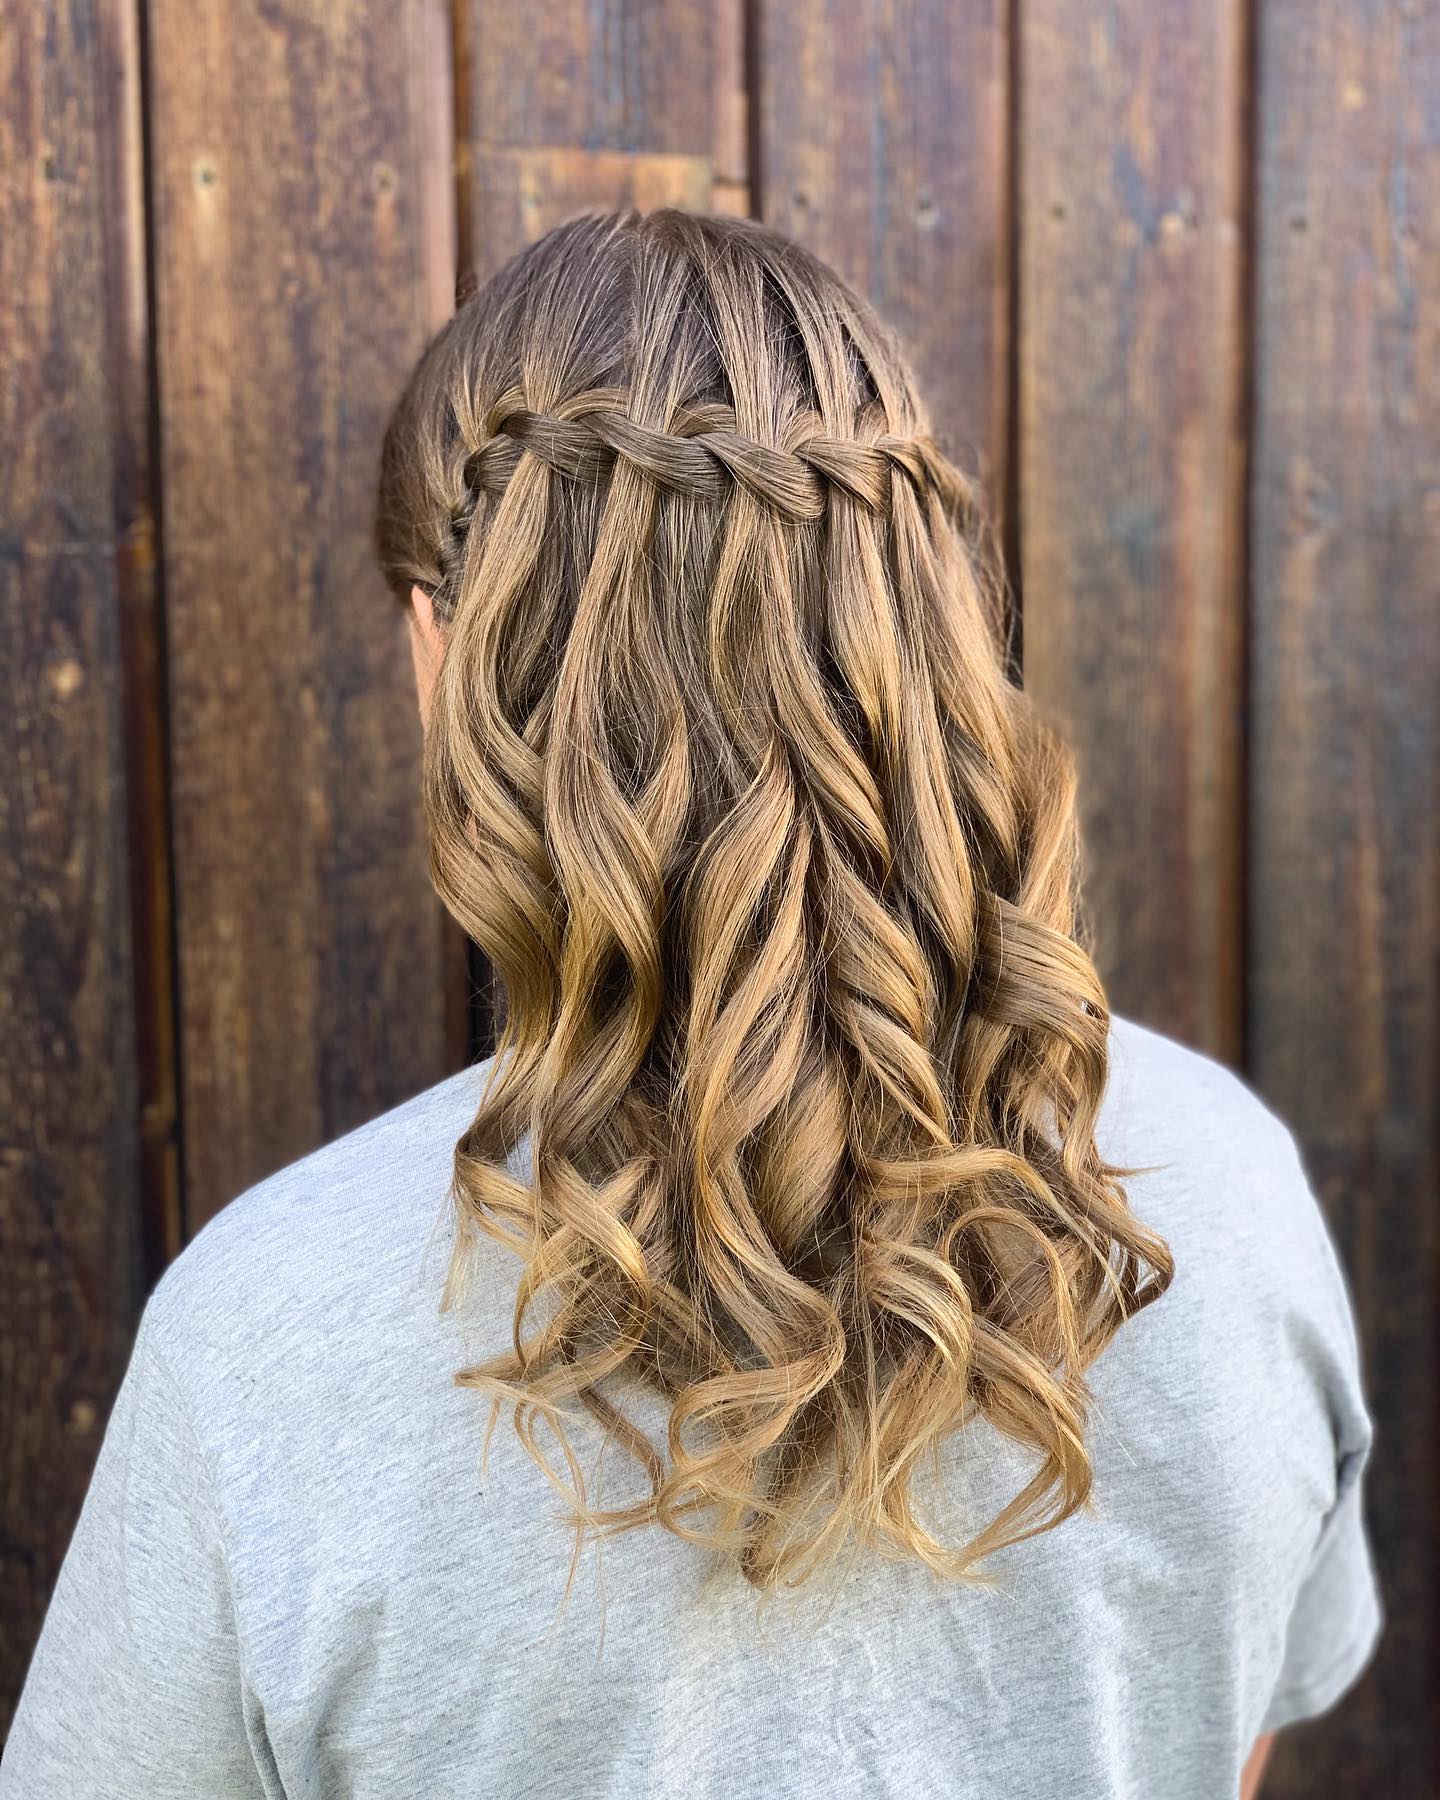
The waterfall braid creates a cascading hair illusion that turns heads.
Start with three sections on the side of your head. Drop the bottom section of hair each time you cross. Let that strand hang loose to create the “waterfall” effect.
Pick up new hair from behind the dropped piece each time. Continue this pattern around your head for a flowing look. The dropped strands cascade down like flowing water.
This braid works beautifully for weddings or date nights. It keeps some hair loose while still looking polished and romantic.
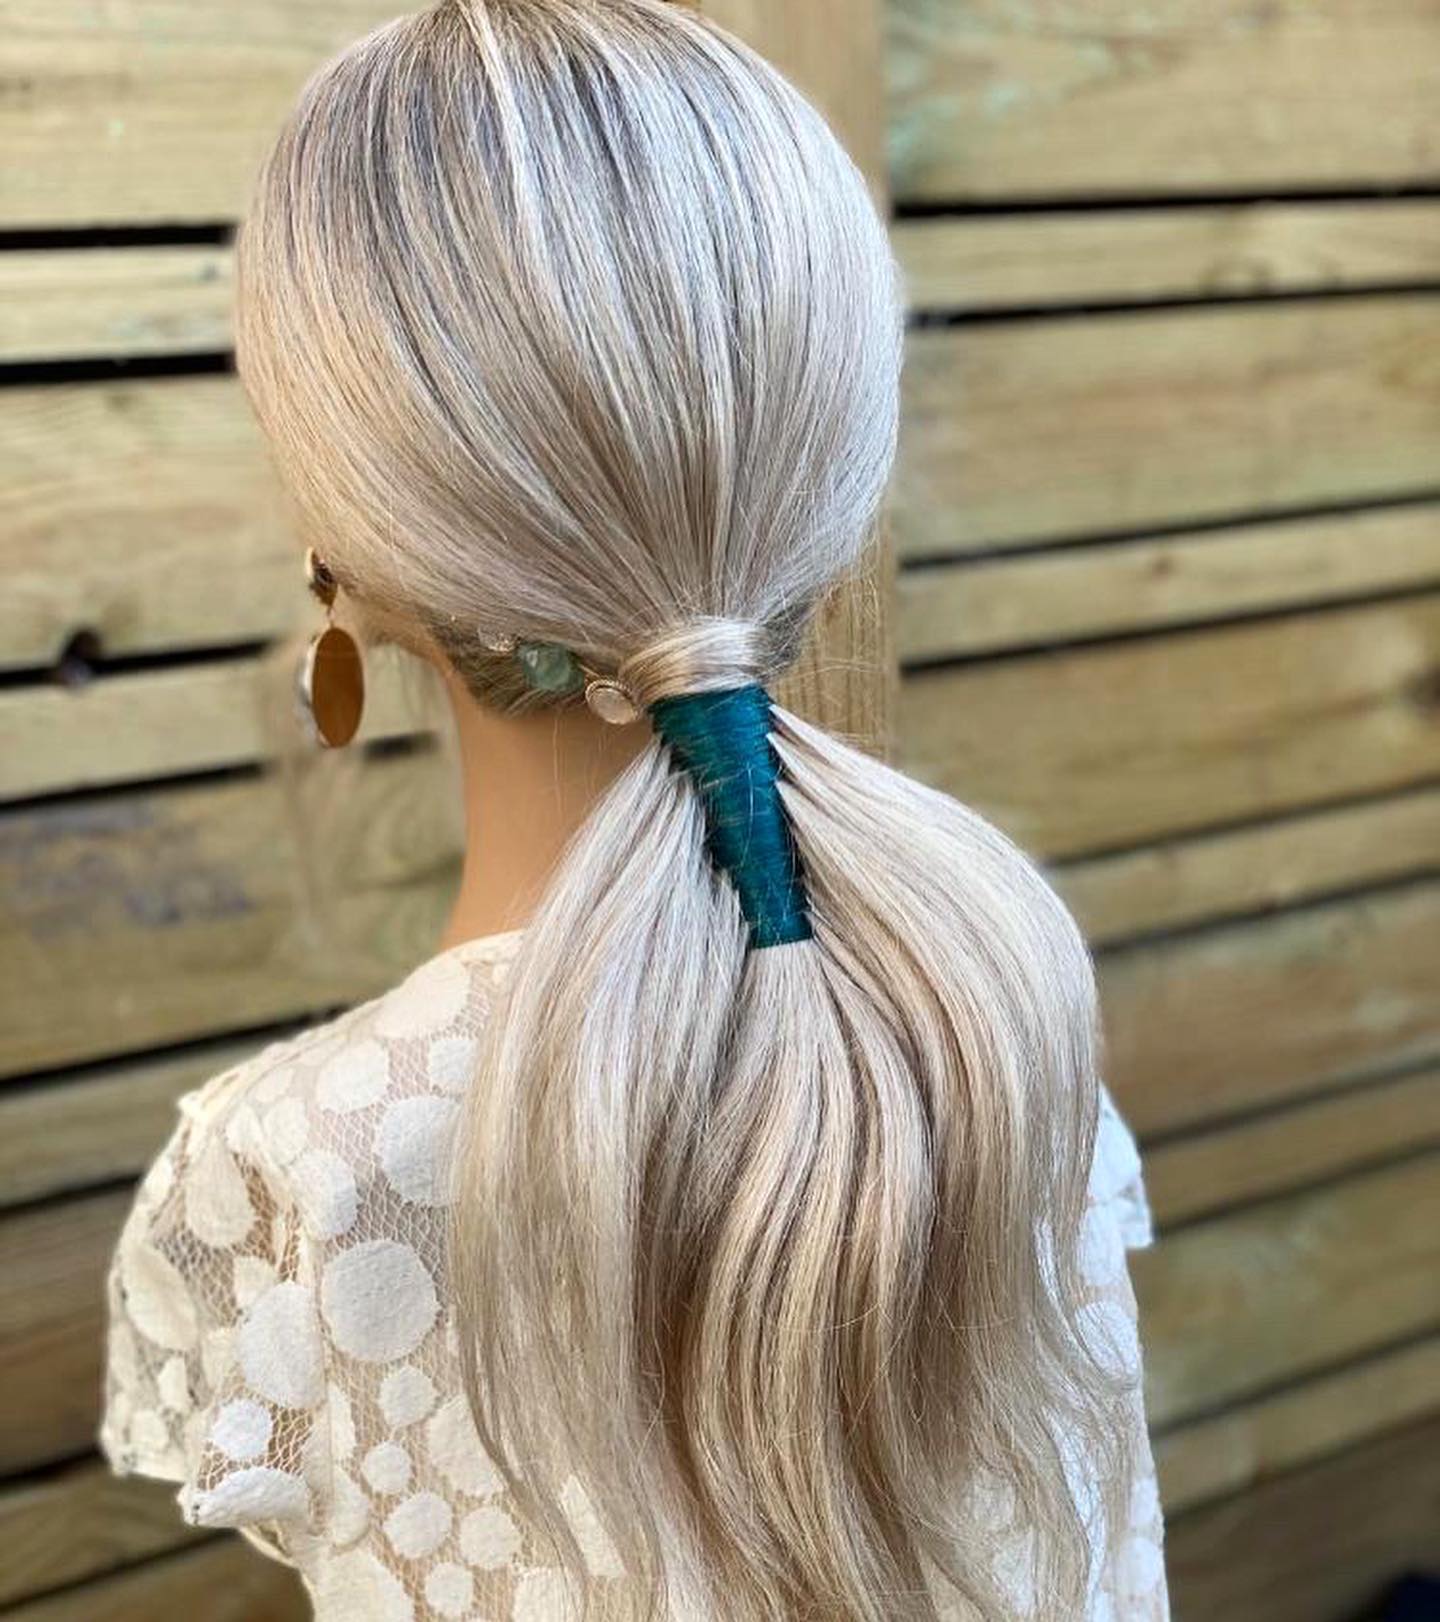
Pull-Through Braid
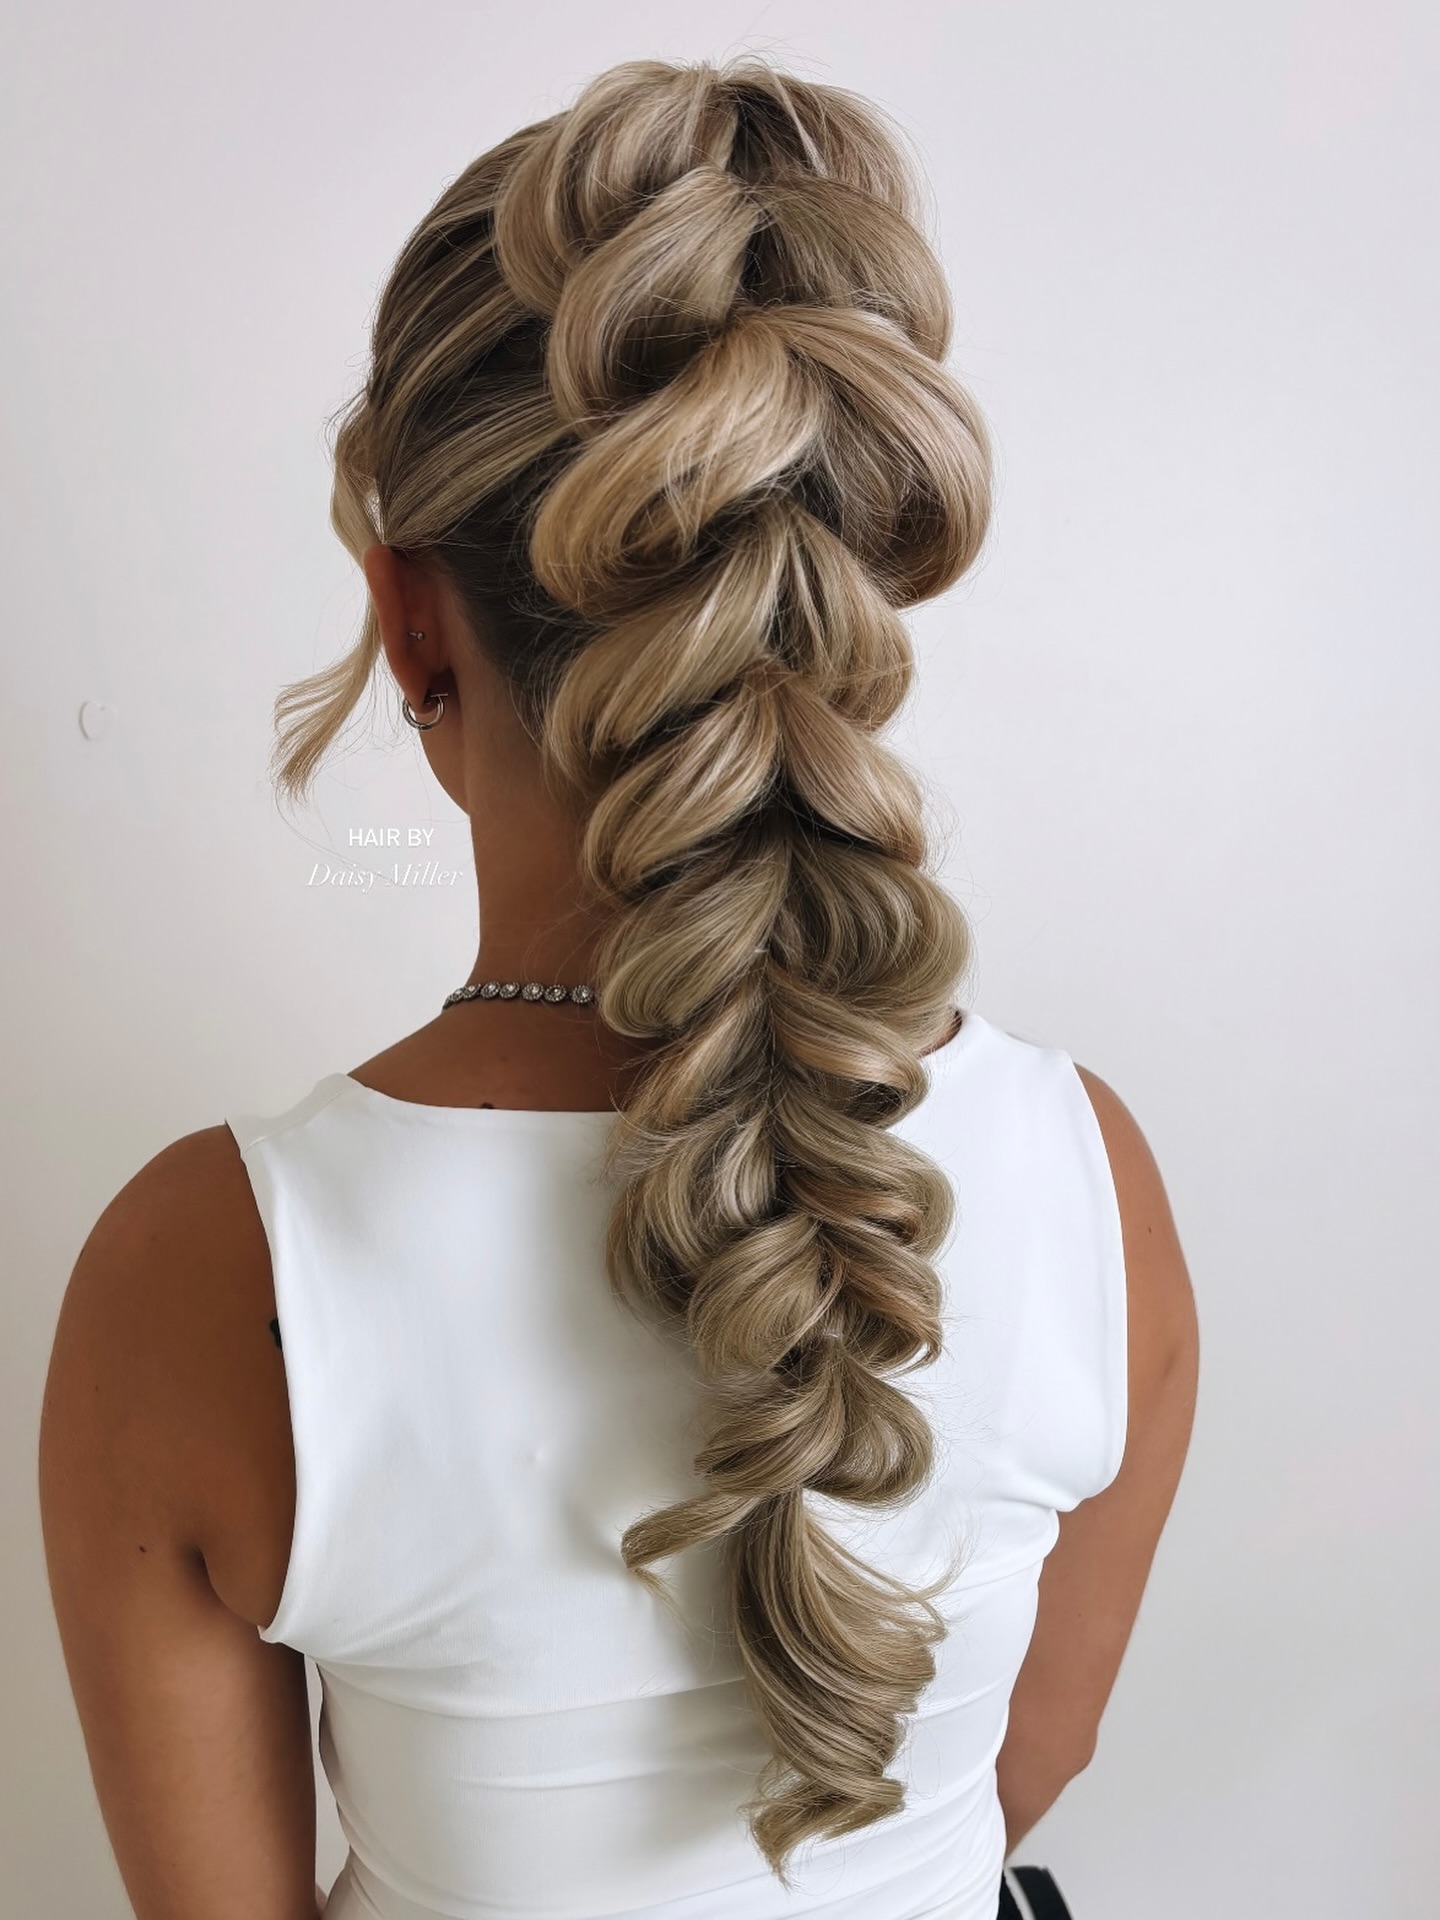
The pull-through braid requires no traditional braiding techniques at all.
Gather a section of hair at your crown into a ponytail first. Make another ponytail directly below that one. Split the first ponytail in half vertically. Pull the second ponytail through the split opening.
Secure with a hair tie and repeat all the way down. This creates a voluminous, chunky braid that looks complex. It works perfectly for those with thin hair.
The pull-through braid adds texture and depth to any look in minutes.
Protective Styles for Natural Hair
Box Braids
Box braids offer endless styling possibilities for natural hair.
Section your hair into small squares or rectangles first. Braid each section down while adding extension hair as you go. This classic protective style can last for many weeks with care.
You can wear them loose down your back or in elegant updos. The squared-off parts create a neat, grid-like pattern on your scalp.
Box braids protect your natural hair from daily stress and breakage. They give you a break from heat styling and harsh weather exposure.
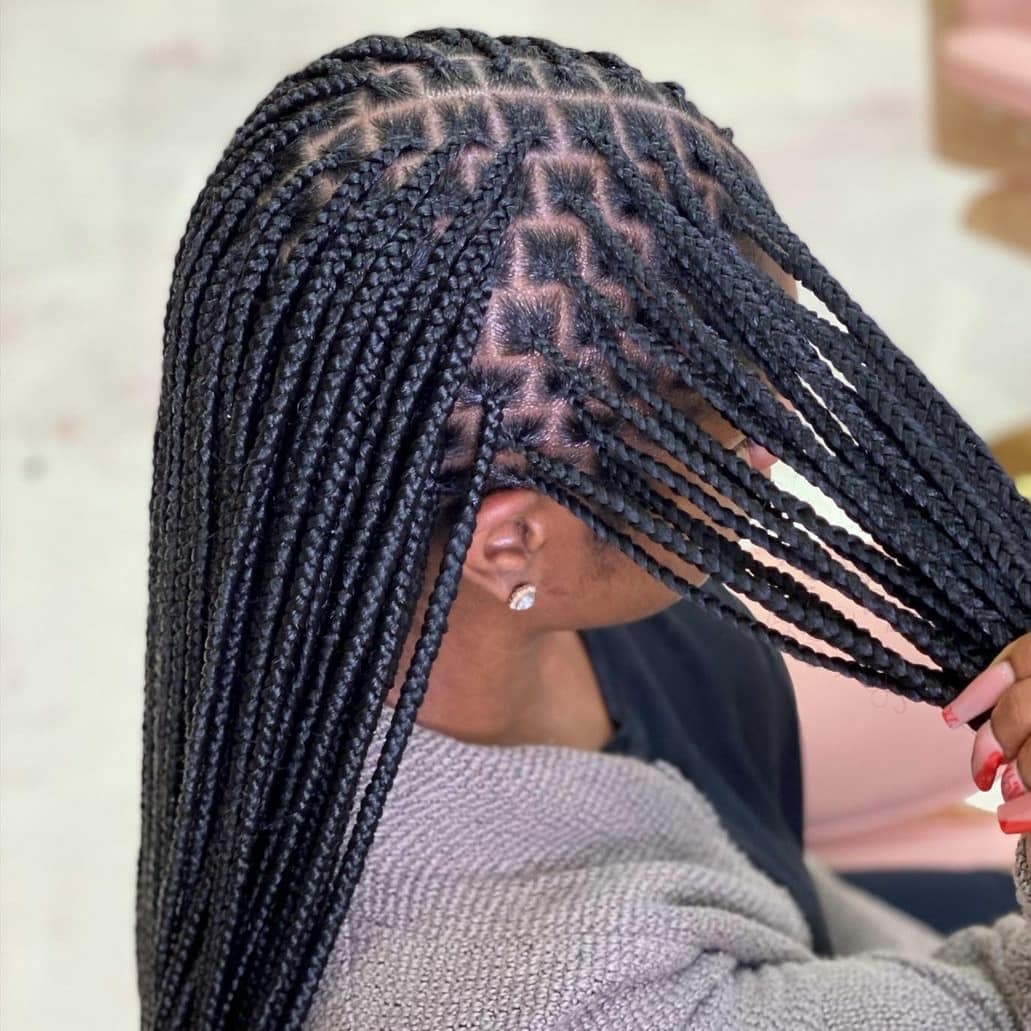
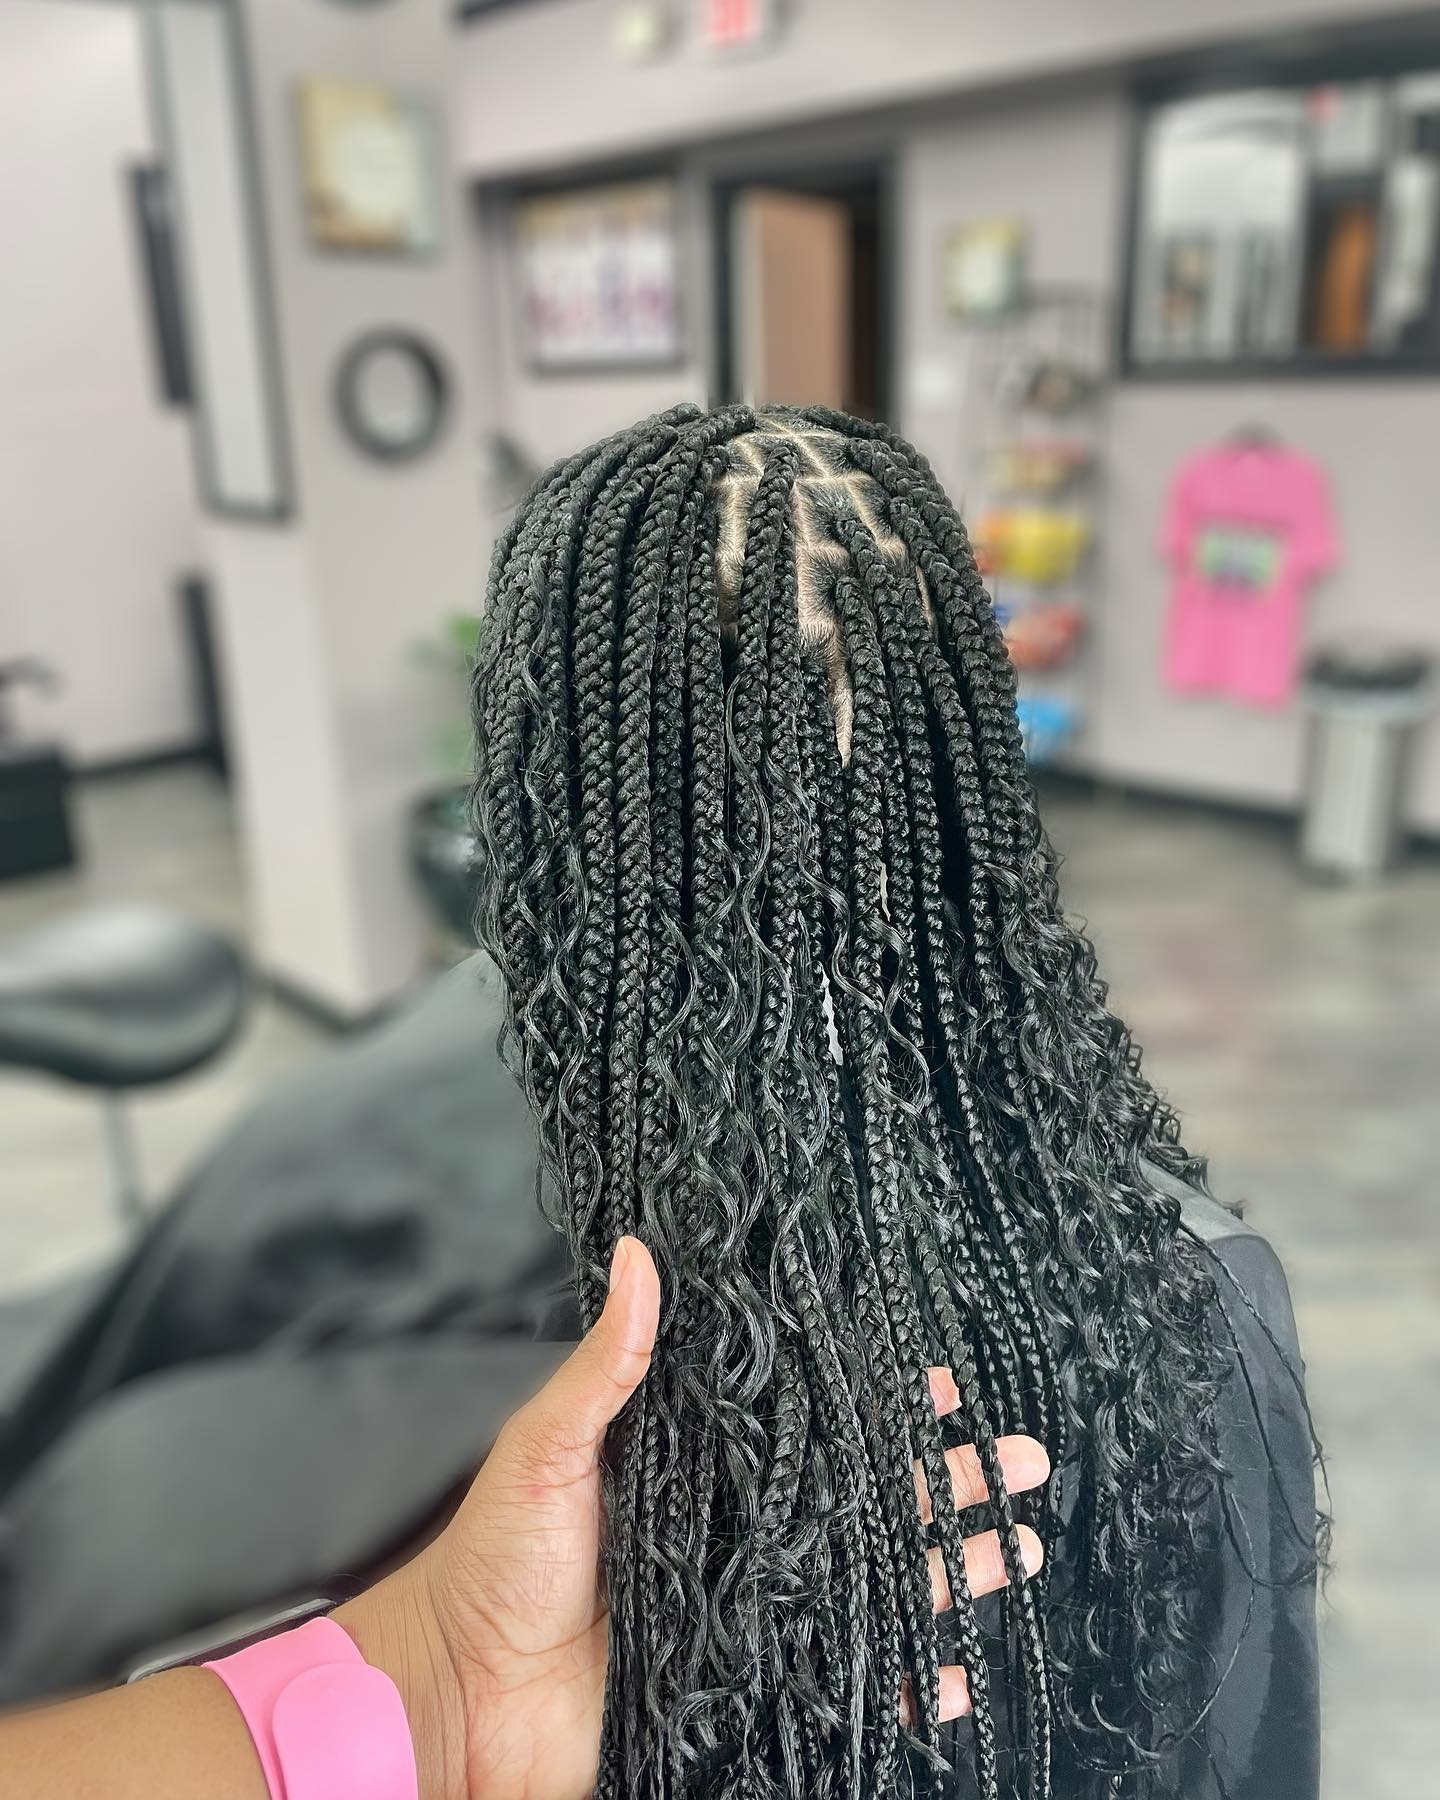
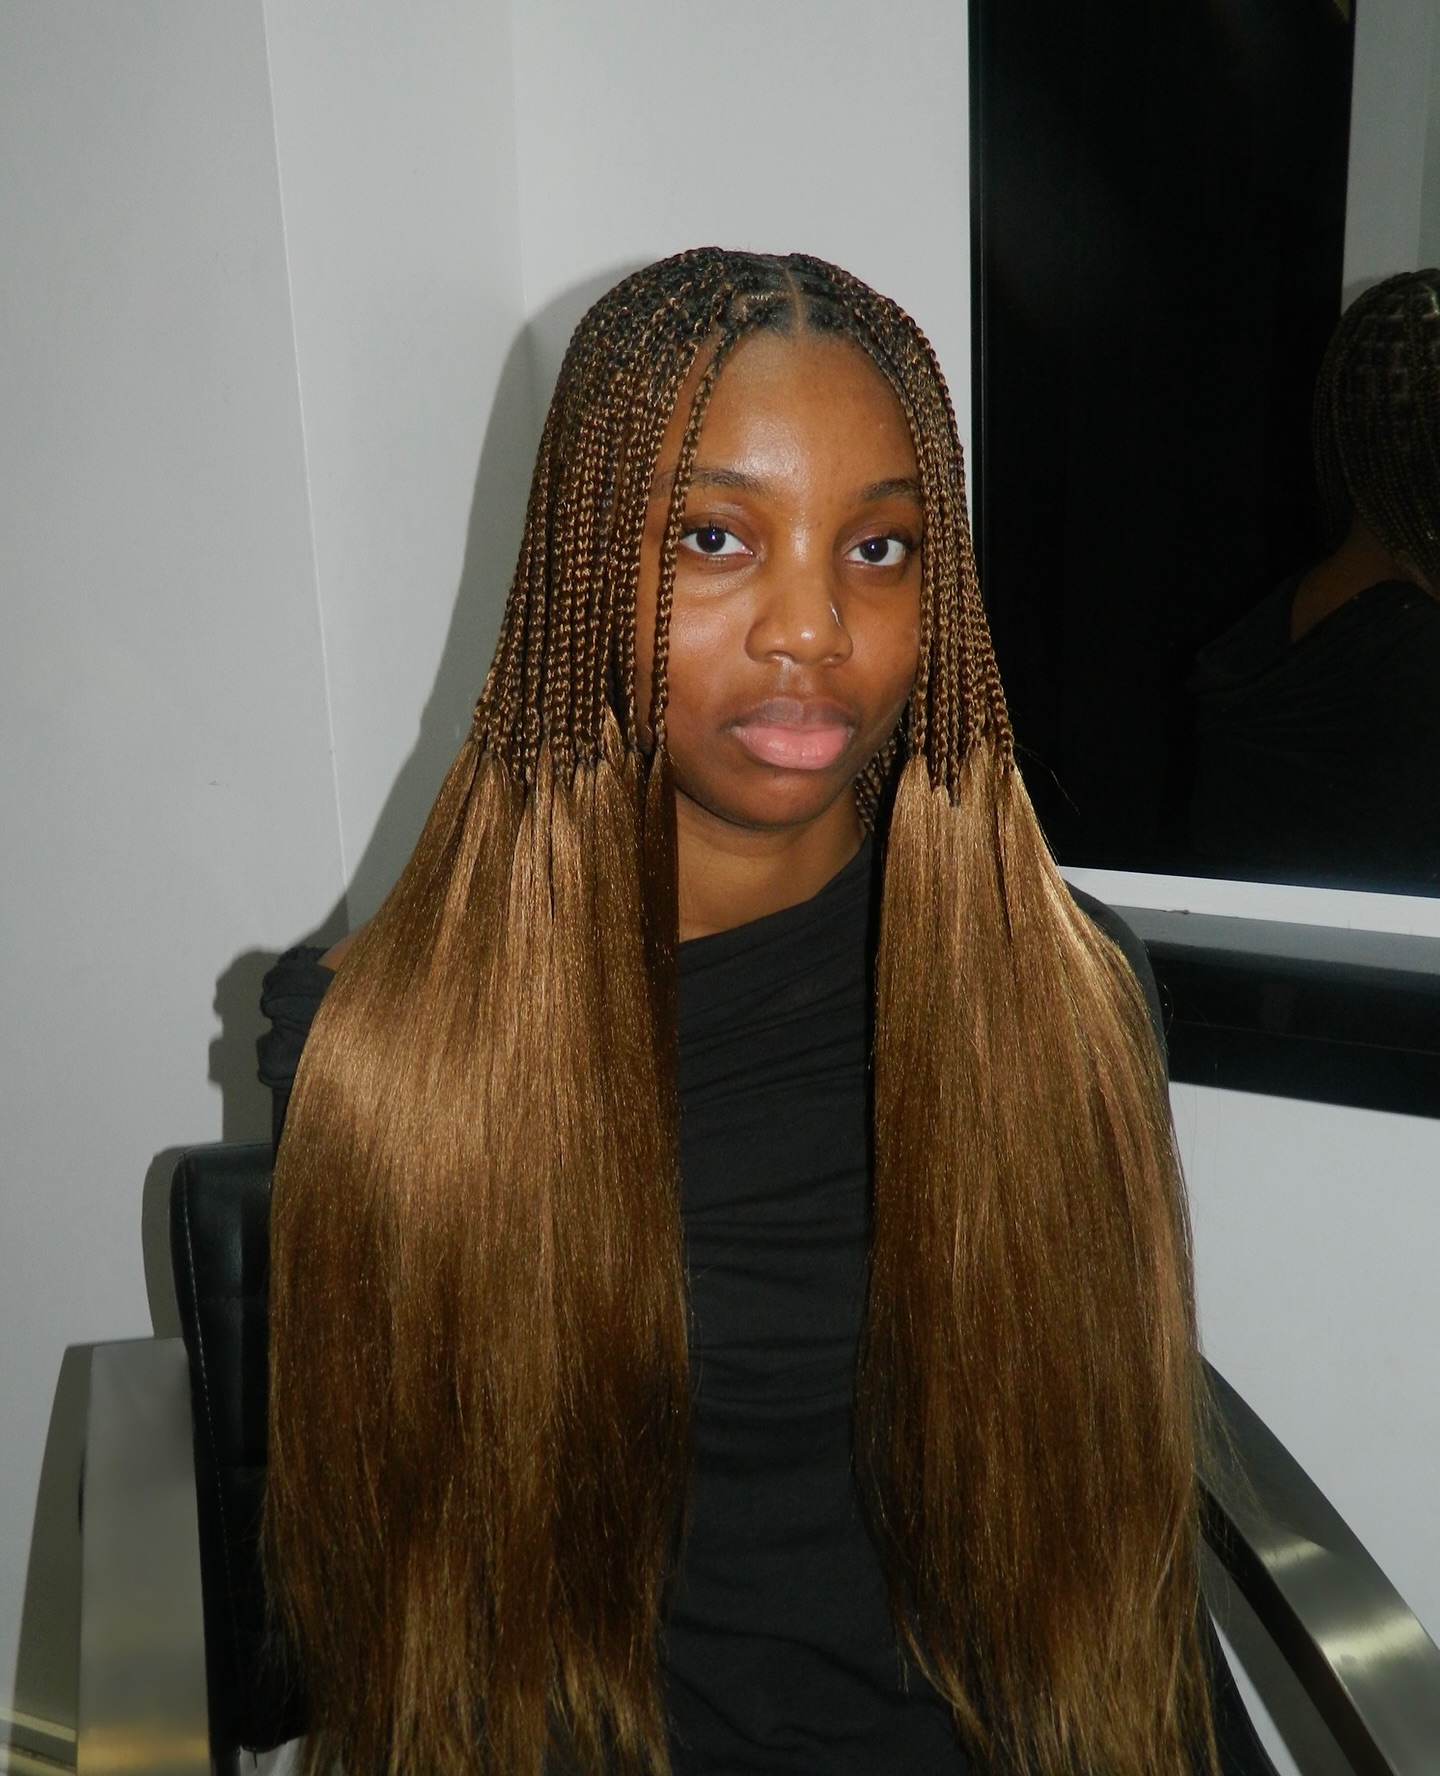
Knotless Box Braids
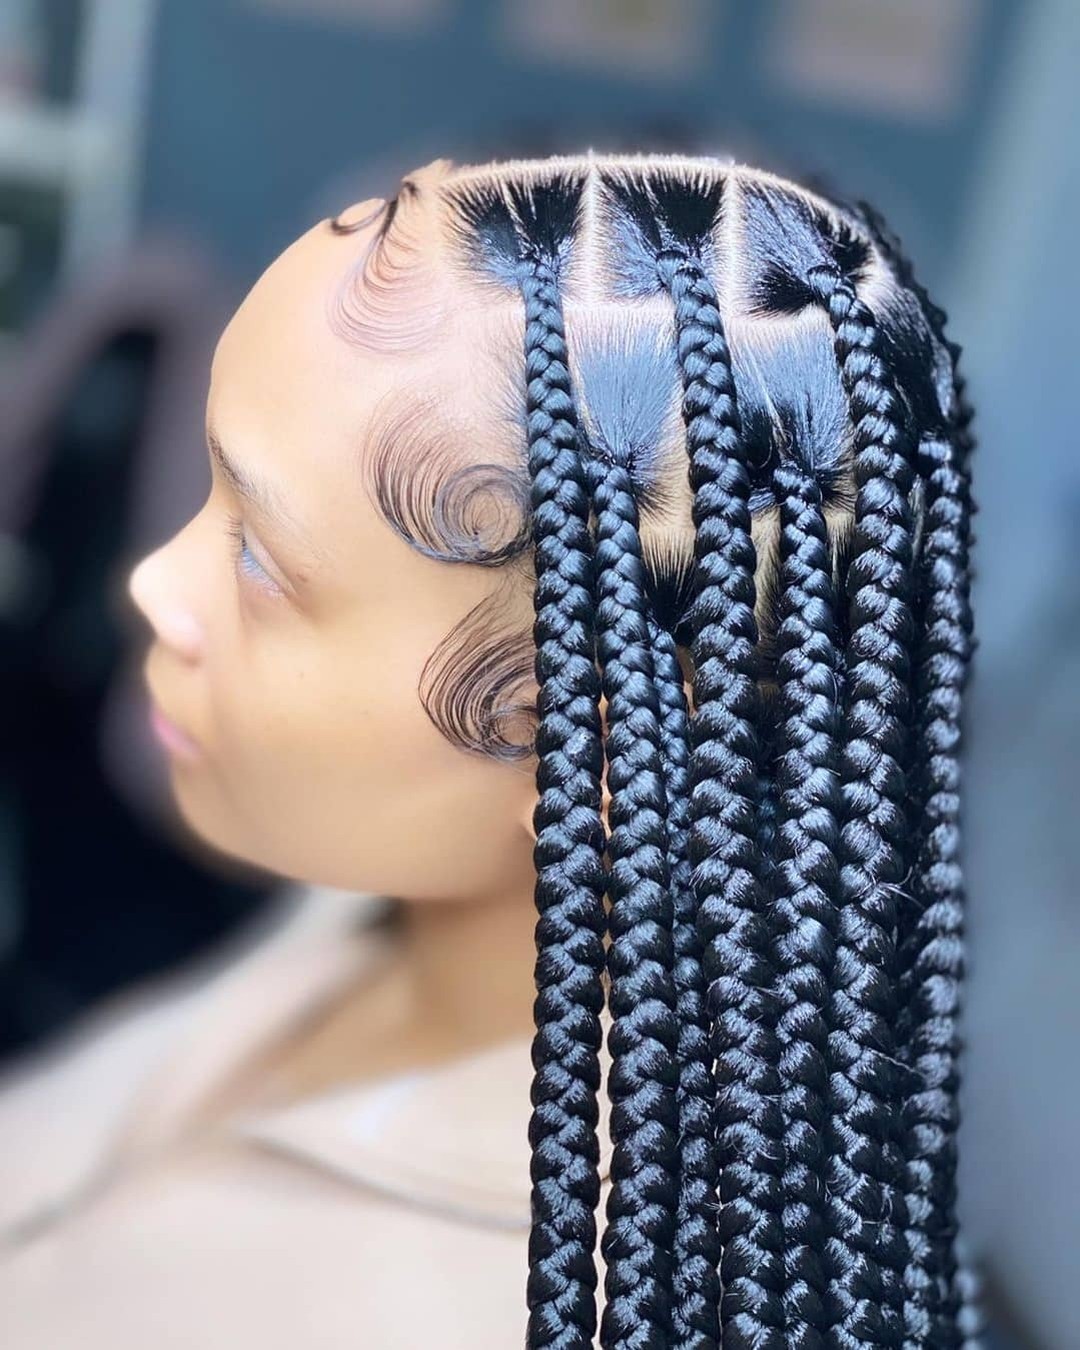
Knotless box braids reduce tension on your sensitive scalp significantly.
Traditional box braids start with a knot at the root. Knotless braids use a gradual feed-in technique instead.
Synthetic hair gets added as the braid continues down the strand. This creates a natural, flat-looking root with less discomfort.
Celebrities like Zendaya and Zoe Kravitz swear by this style. The lightweight feel makes them comfortable for long-term wear.
Your scalp will thank you for choosing this gentler option. Knotless braids look seamless and lie flat against your head.
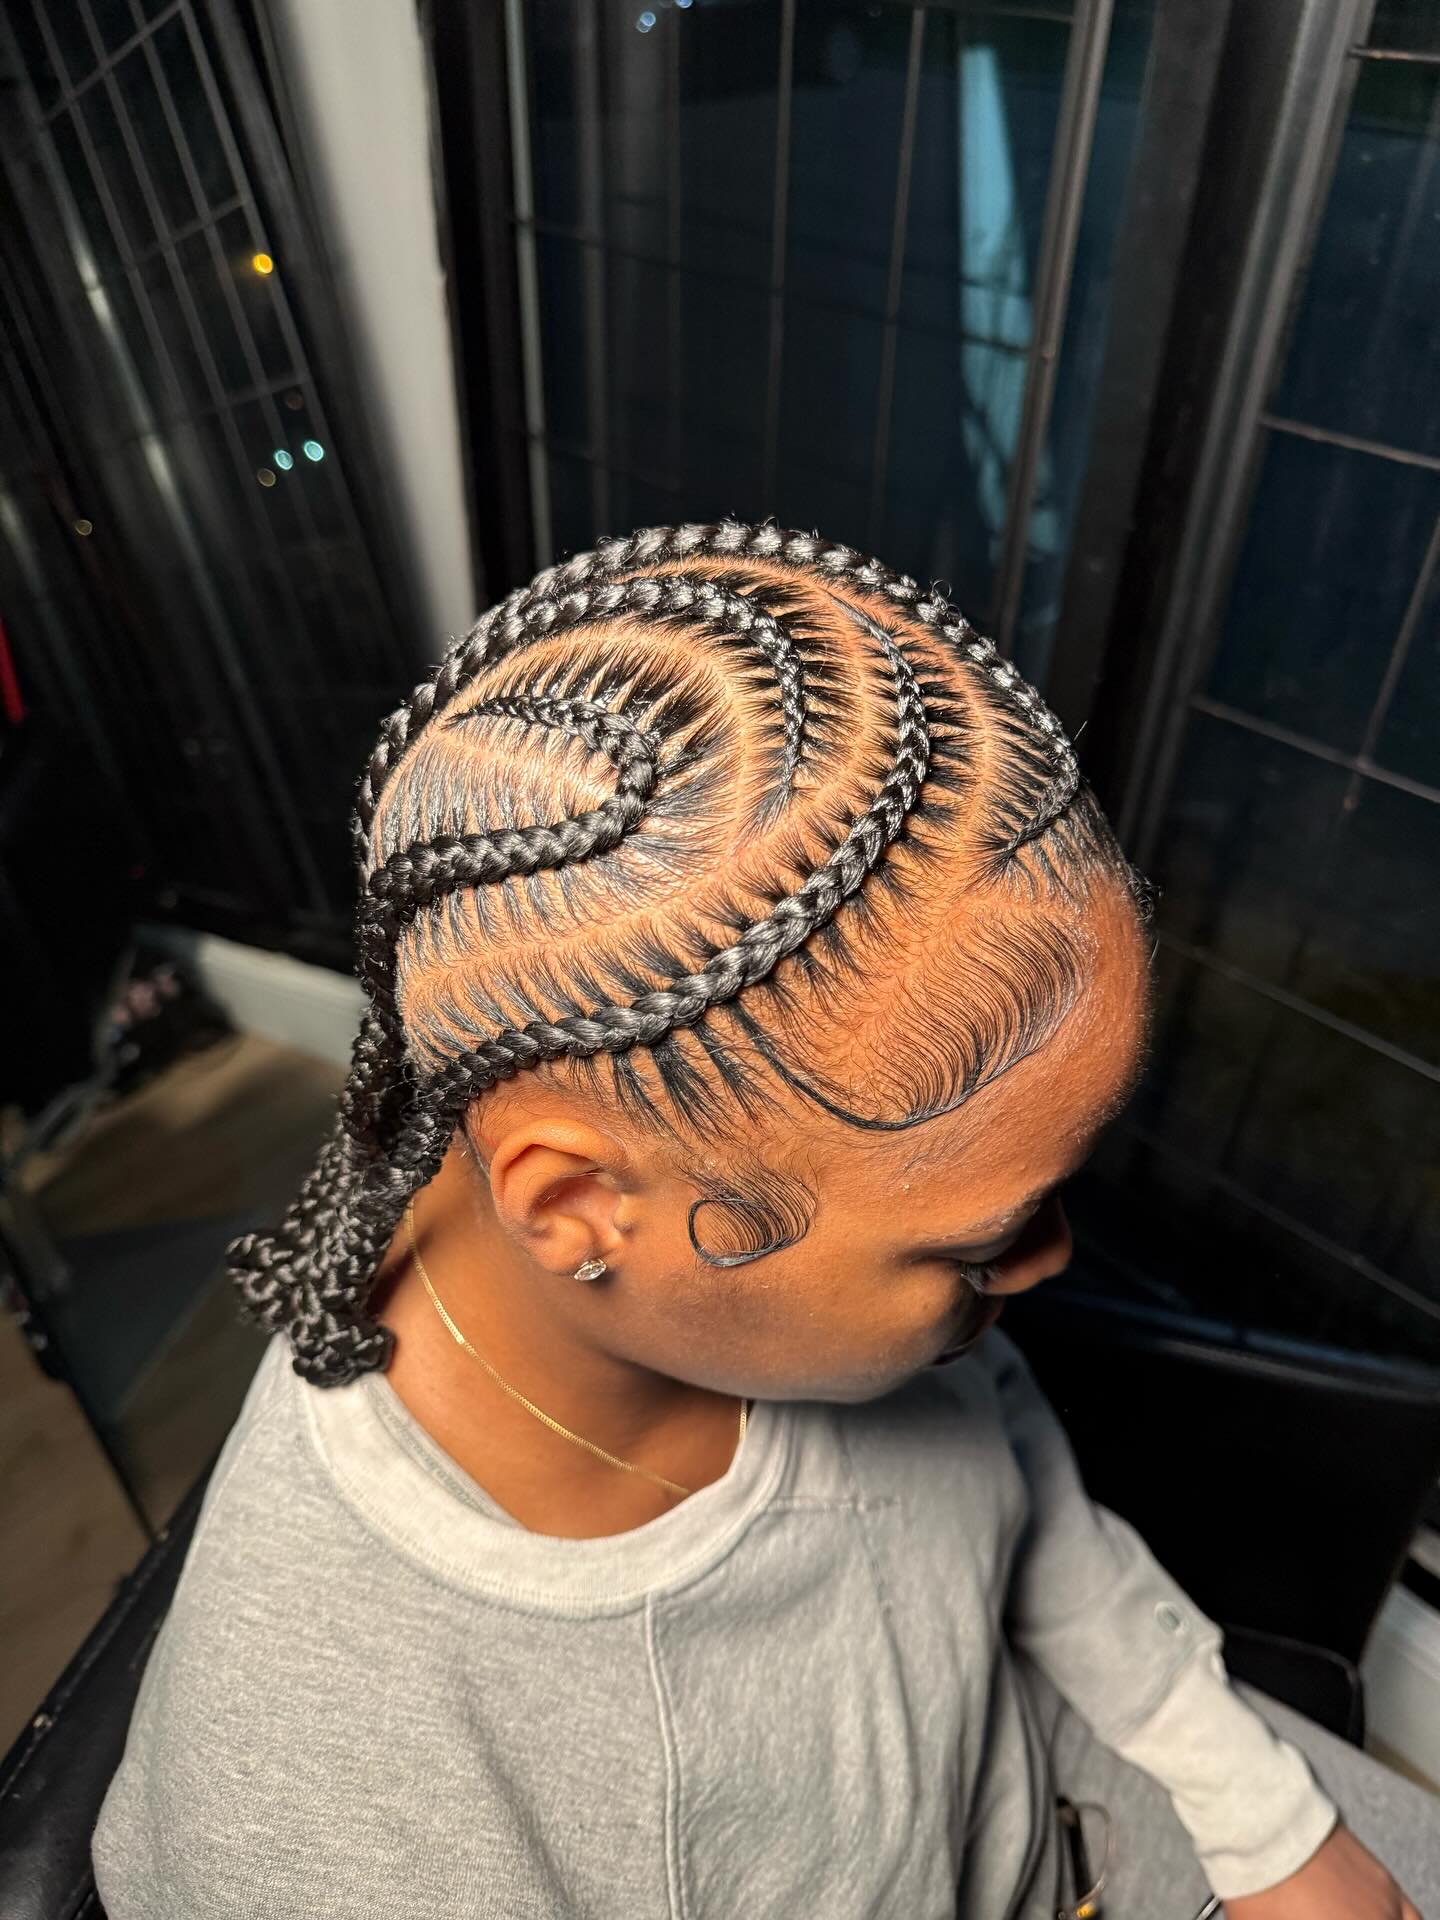
Cornrows
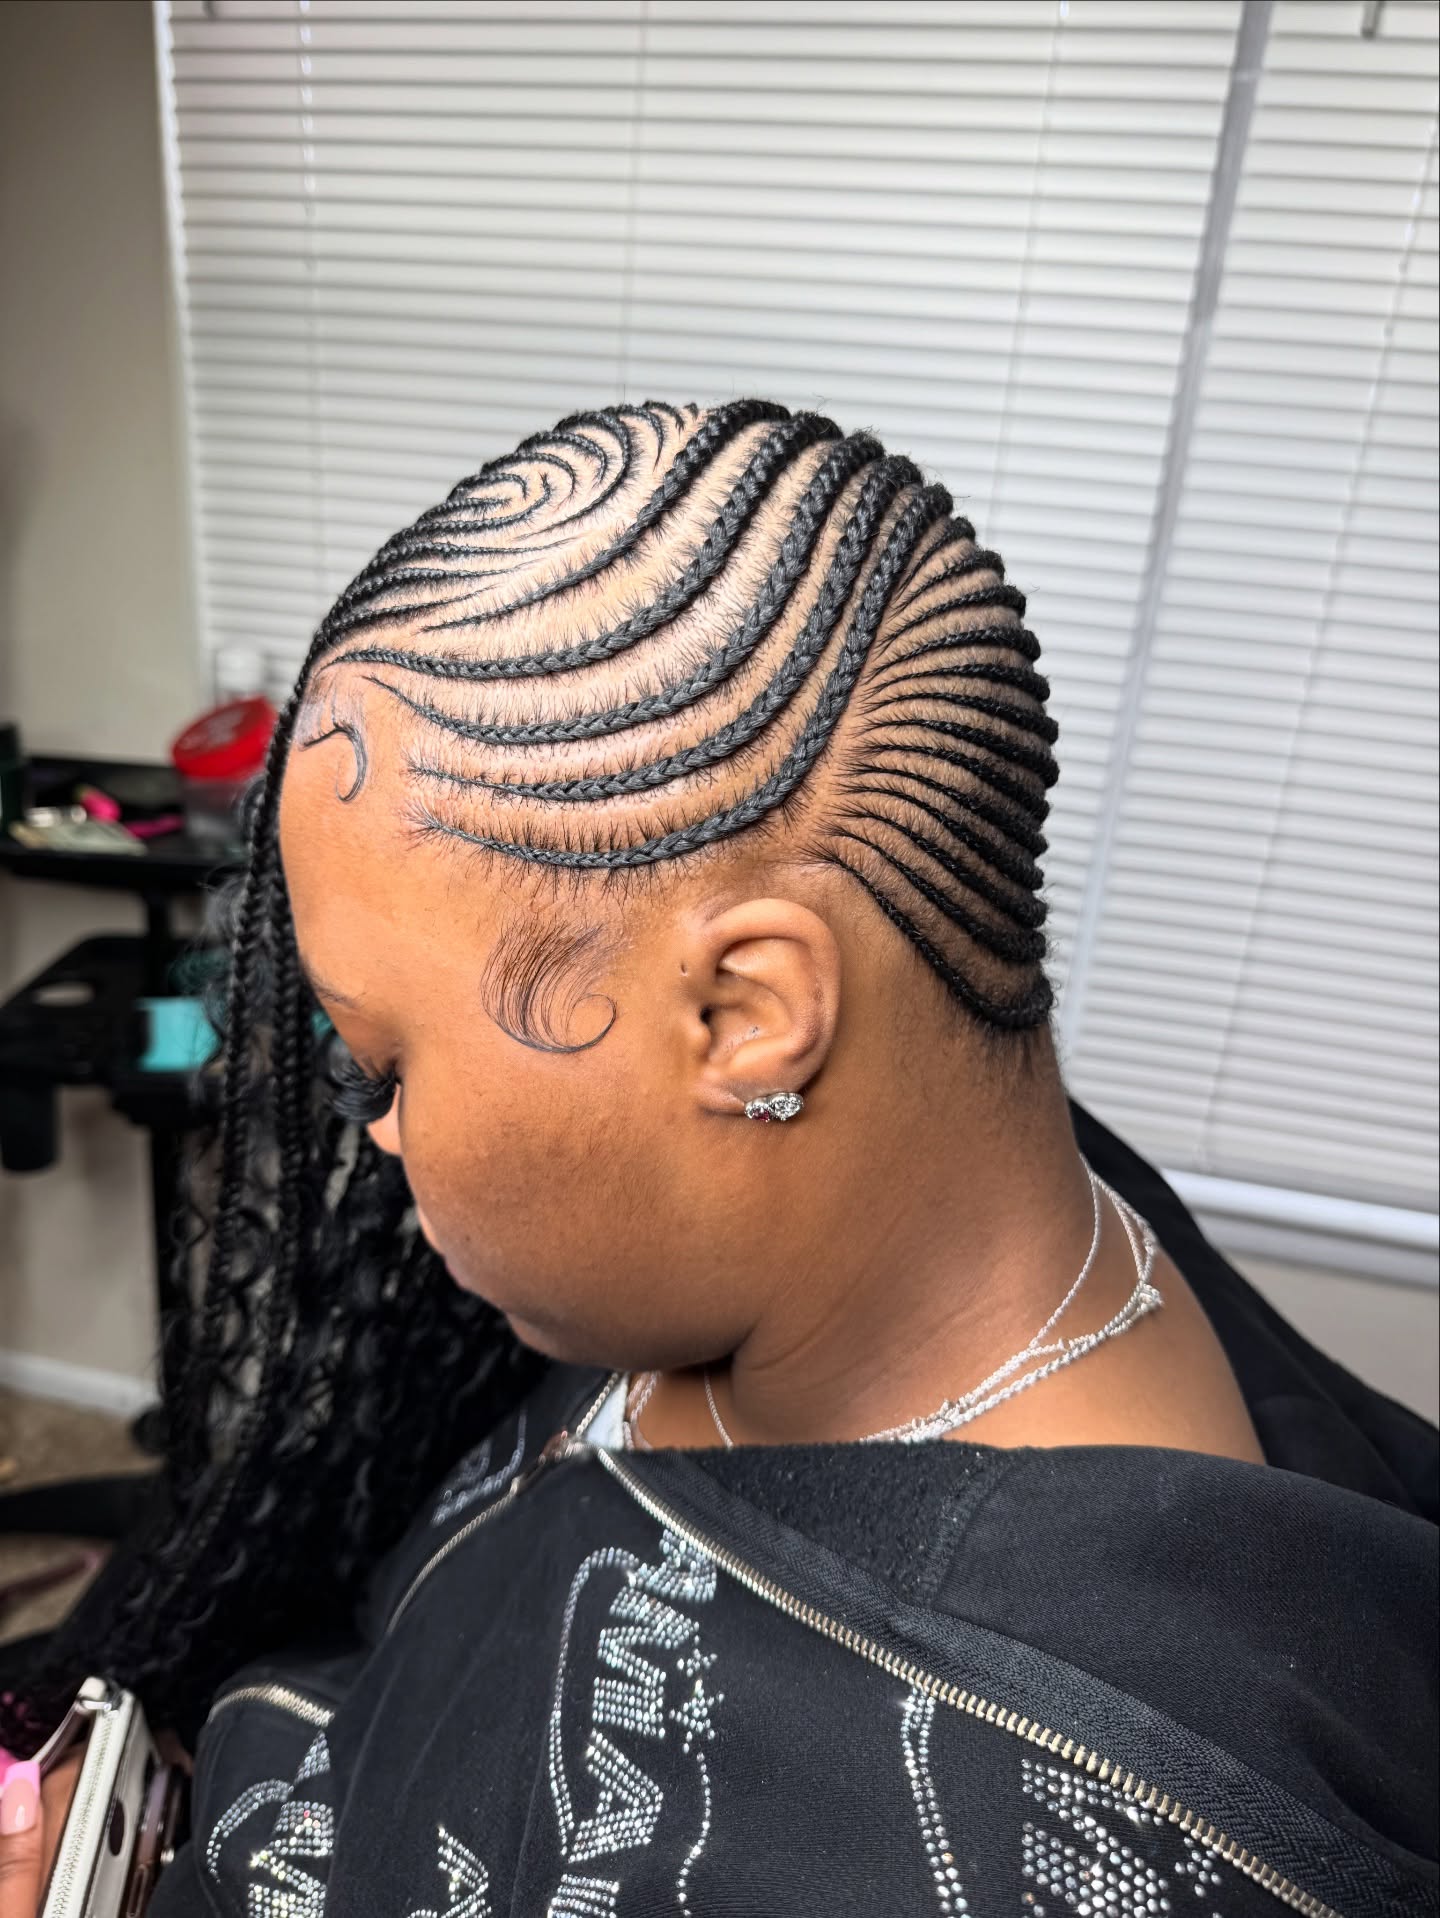
Cornrows remain timeless and highly customizable for all ages.
Braid the hair flat to the scalp in straight or curved lines. This technique uses an underhand, upward motion throughout.
Cornrows work great for curly and natural hair textures. They look good on medium to long hair lengths especially.
You can create simple straight rows or intricate geometric designs. Cornrows hold cultural significance dating back to ancient Africa.
They are neat, clean, and long-lasting with proper care. You can dress them up or down for any occasion easily.
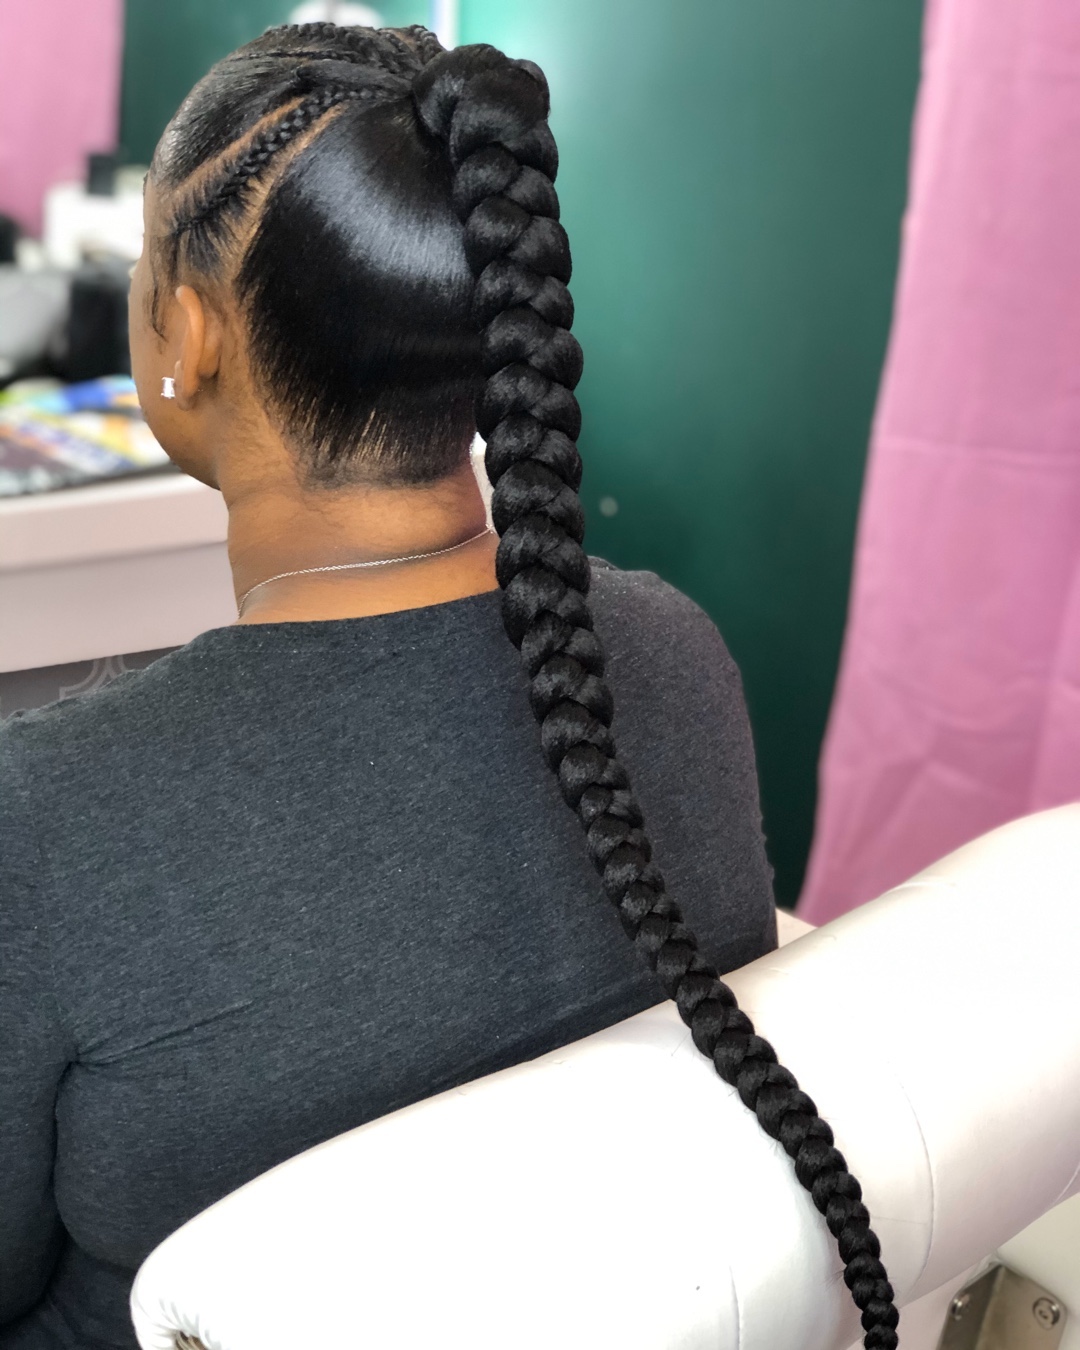
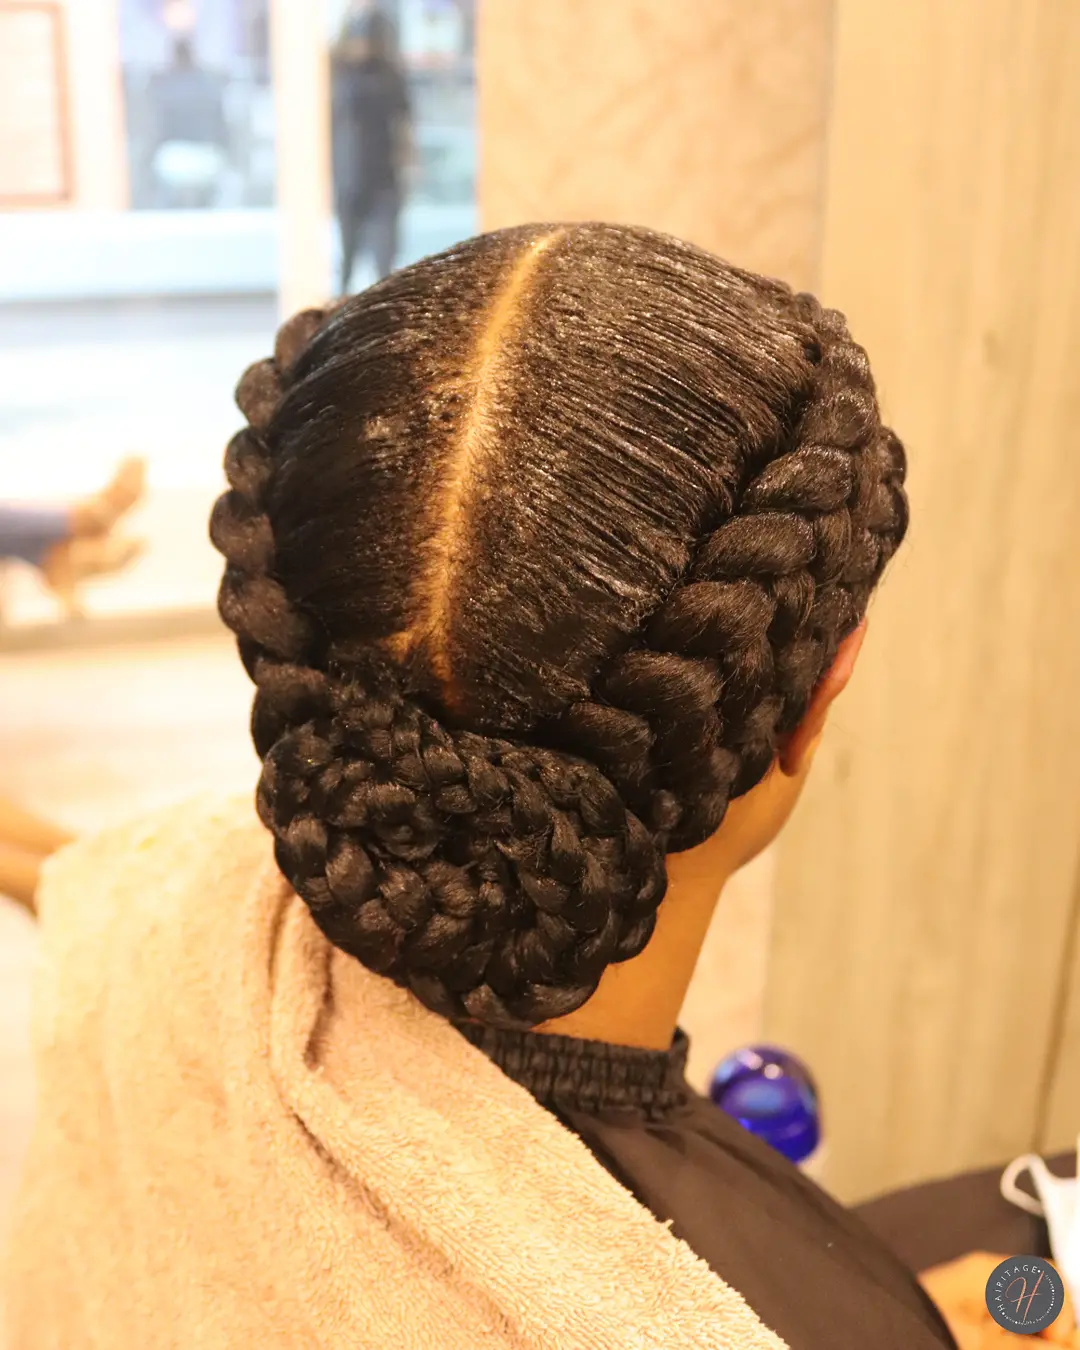
Goddess Braids
Goddess braids make a bold and regal statement wherever you go.
They resemble cornrows but use larger sections of hair. The braids themselves are thicker than traditional plaits.
Many styles leave curly human hair loose at the ends. This creates a regal and feminine appearance overall. You can add beads or gold cuffs for extra decoration. Goddess braids work well for special events or vacations.
They protect your natural hair while looking glamorous. The loose curly ends add movement and softness to the style.
Fulani Braids
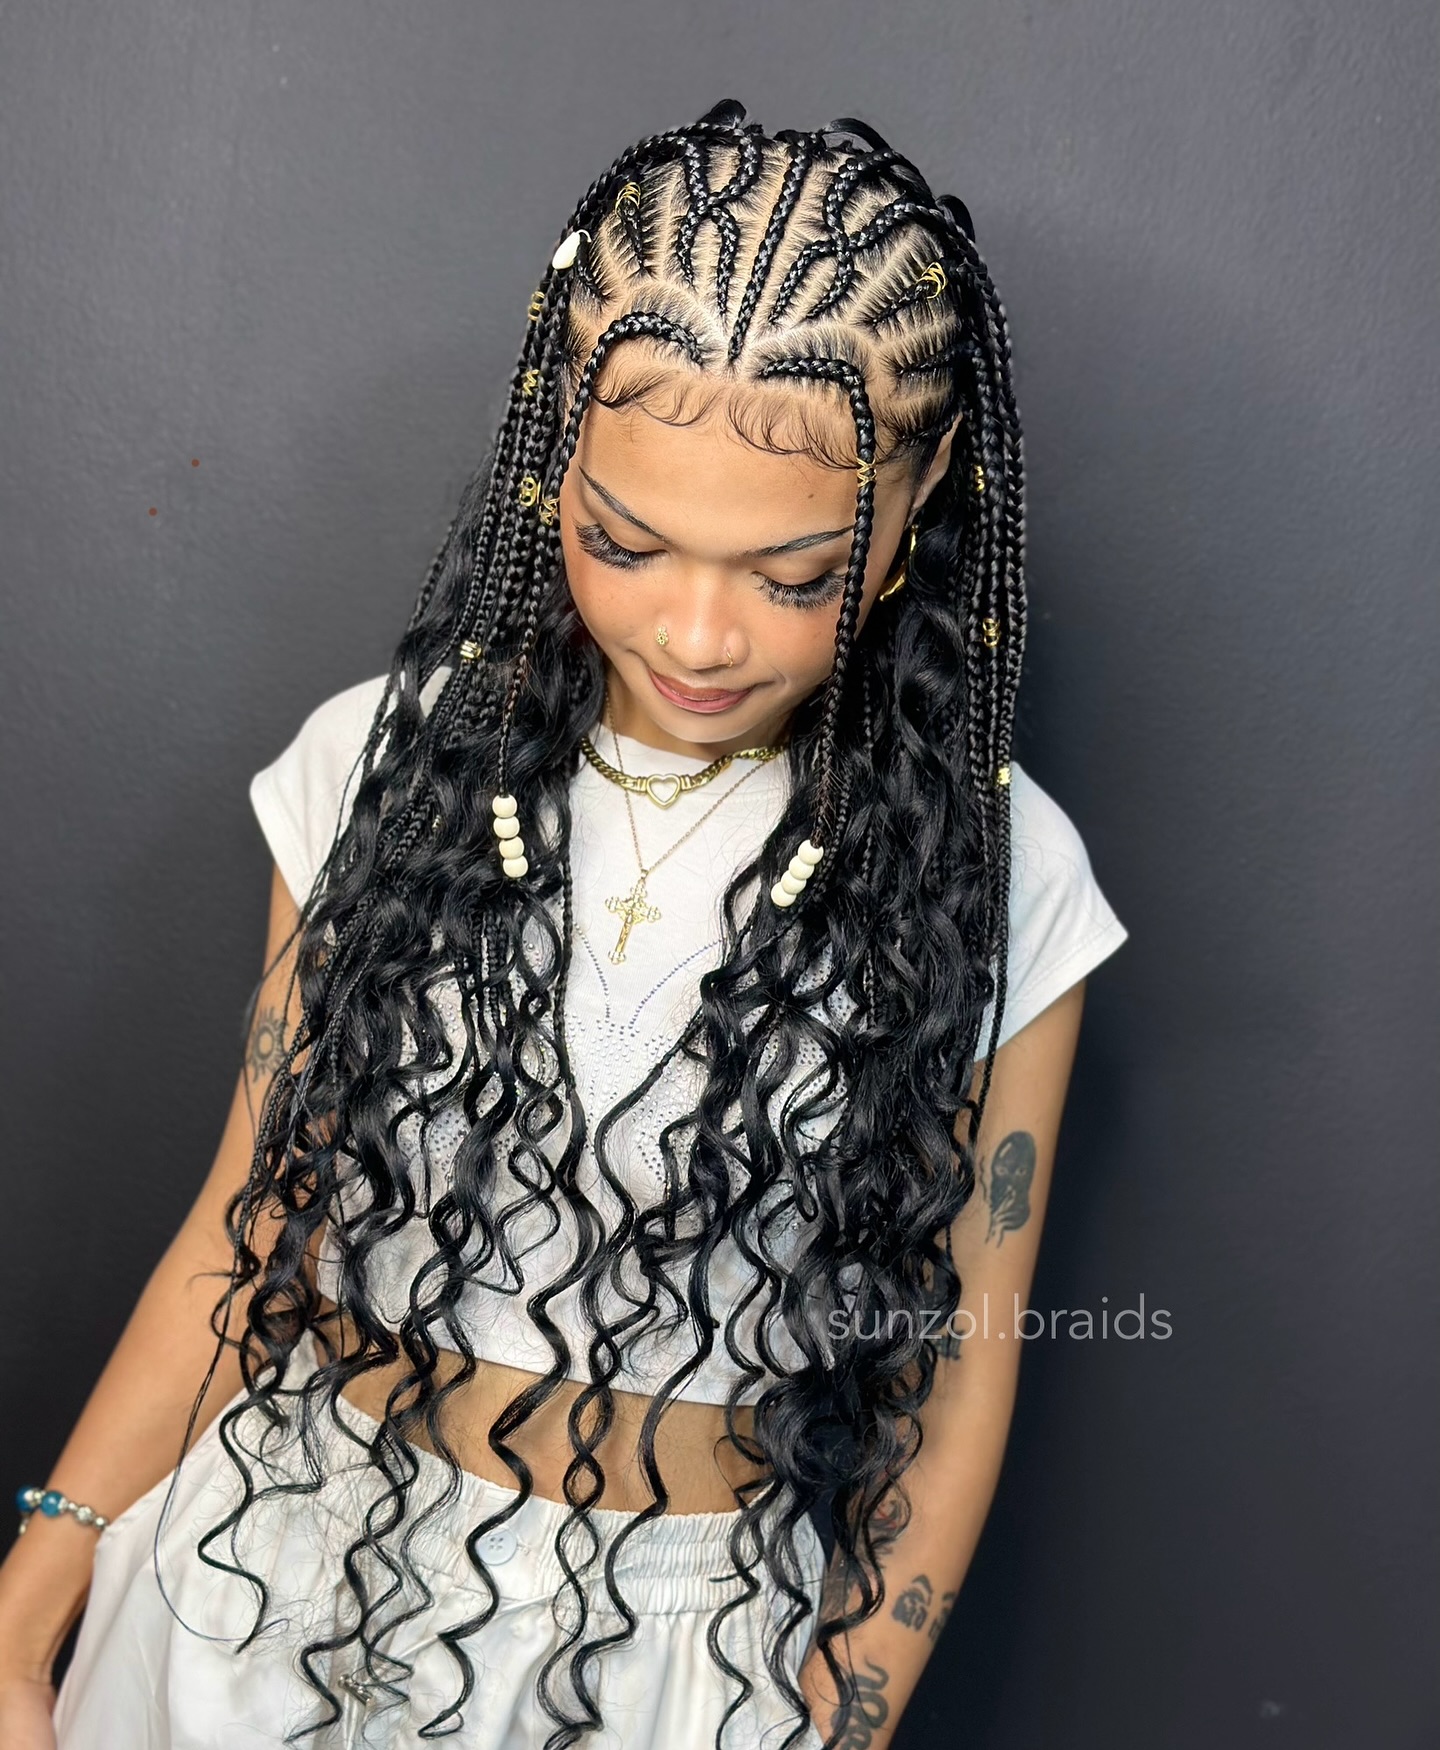
Fulani braids blend different braiding techniques together beautifully.
You get cornrows in the front of your head first. The back features box braids instead of more cornrows. A signature middle braid runs down the center of your scalp.
Decorative beads and accessories complete this traditional West African look. Don’t be afraid to add many beads and charms. There is no such thing as too many decorations with Fulani braids.
This style honors rich cultural traditions from the Fulani people. It looks striking and unique compared to other braid types.
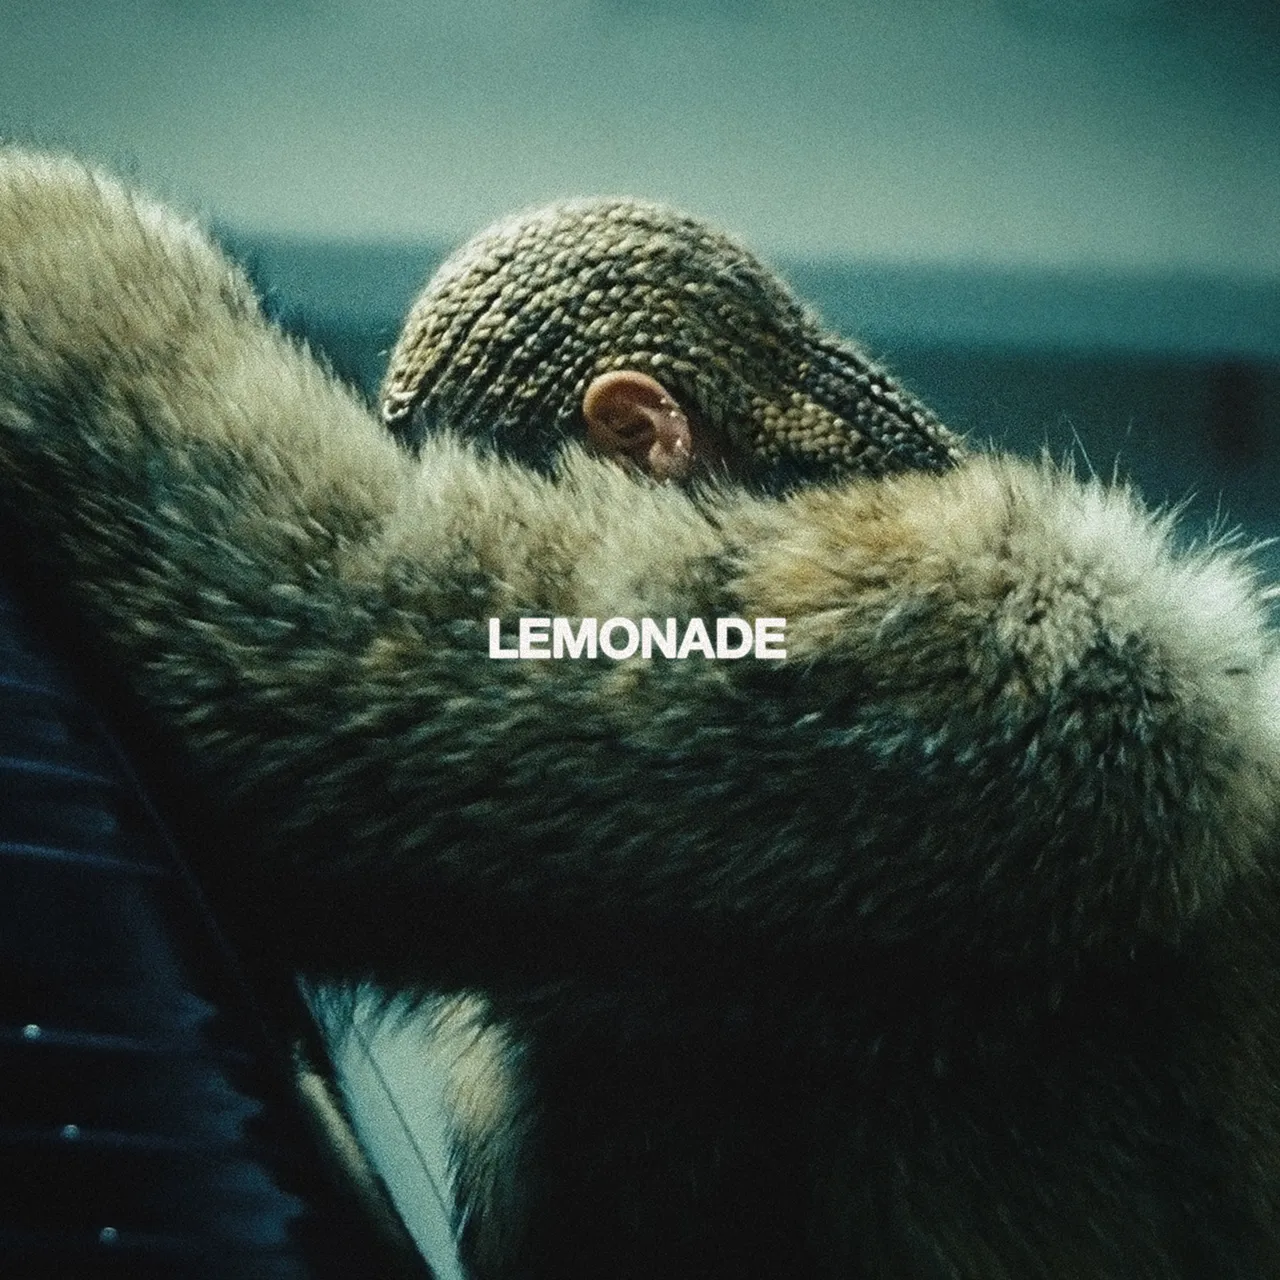
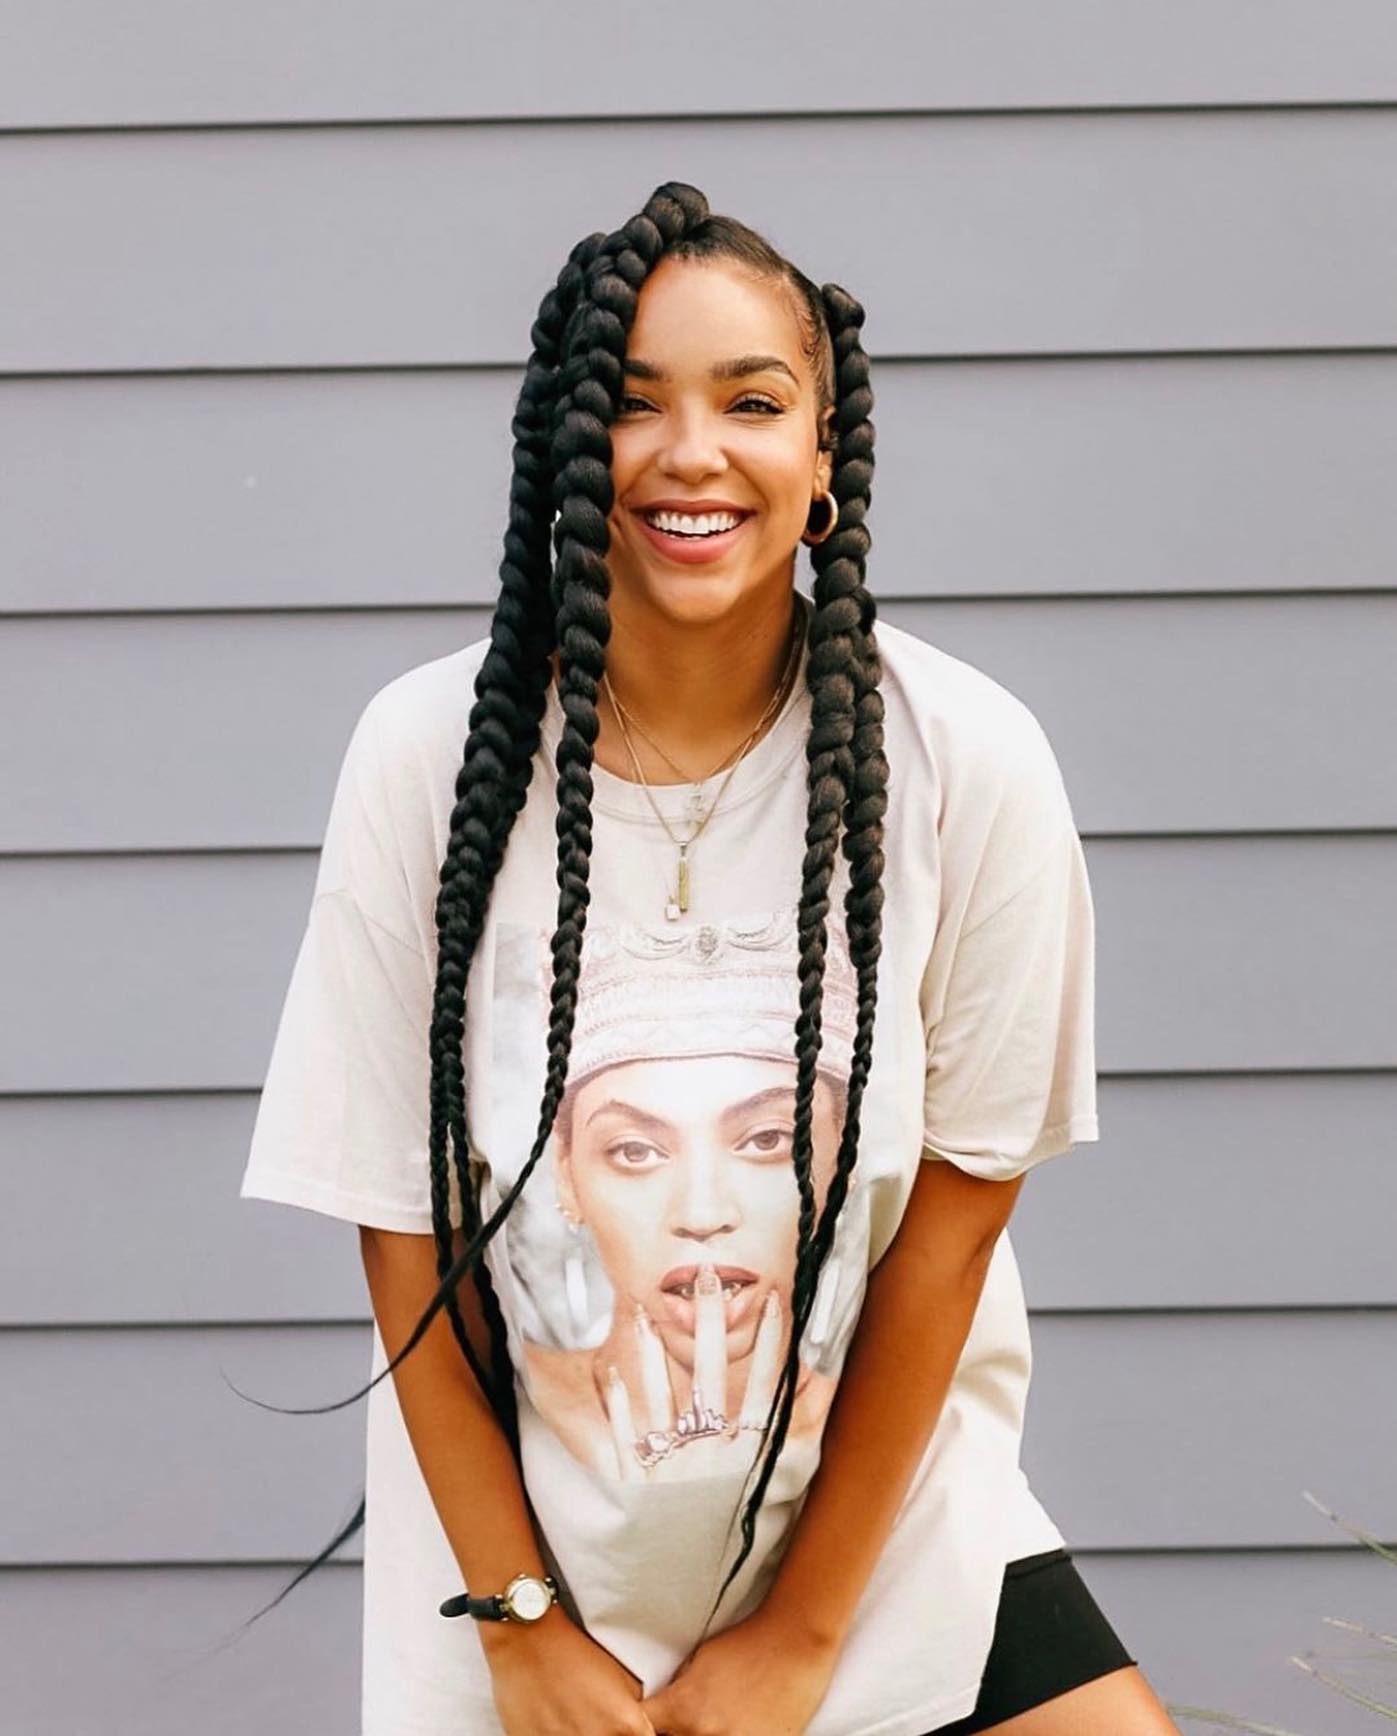
Lemonade Braids
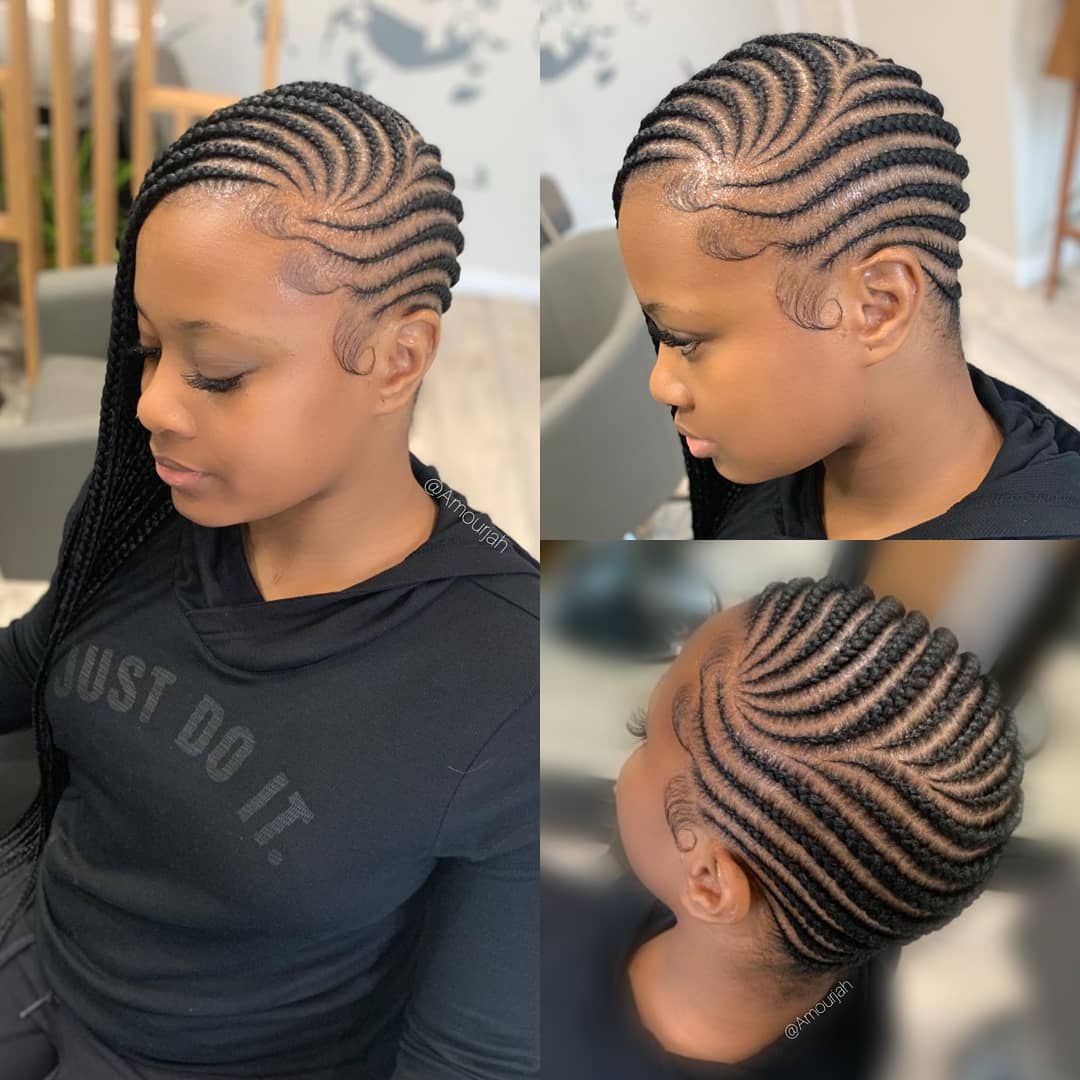
Lemonade braids owe their modern fame to Beyoncé’s iconic album.
These are cornrows with a deep dramatic side part. The braids sweep to one side of your head entirely.
This trendy style takes confidence and attitude to pull off. It works best for those wanting a bold, fashionable statement.
The deep side part sets these braids apart from regular cornrows. You can wear them long or short depending on your preference.
Lemonade braids frame your face beautifully on one side. They remain popular years after Beyoncé made them famous.
Stitch Braids
Stitch braids offer a distinctive, patterned variation of cornrows.
A specialized braiding technique creates a “stitched” appearance throughout. The braids look like small, even stitches sewn into your scalp.
This style requires a skilled braider for best results. The pattern stands out more than regular cornrows do. Stitch braids look especially striking when done with clean parts. You can wear them in straight rows or creative designs.
This style holds up well for several weeks. It offers a fresh take on traditional cornrow patterns.
Ghana Braids
Ghana braids add thickness and volume to traditional cornrow styles.
Start by forming cornrows close to your scalp first. Then gradually add extension hair as you continue braiding. This technique creates braids that get thicker toward the ends. The result looks fuller and more dramatic than regular cornrows.
Ghana braids can be straight or curved into intricate patterns. They protect your natural hair while adding significant length.
You can accessorize them with cuffs or beads. This style turns heads and starts conversations wherever you go.
Micro Braids
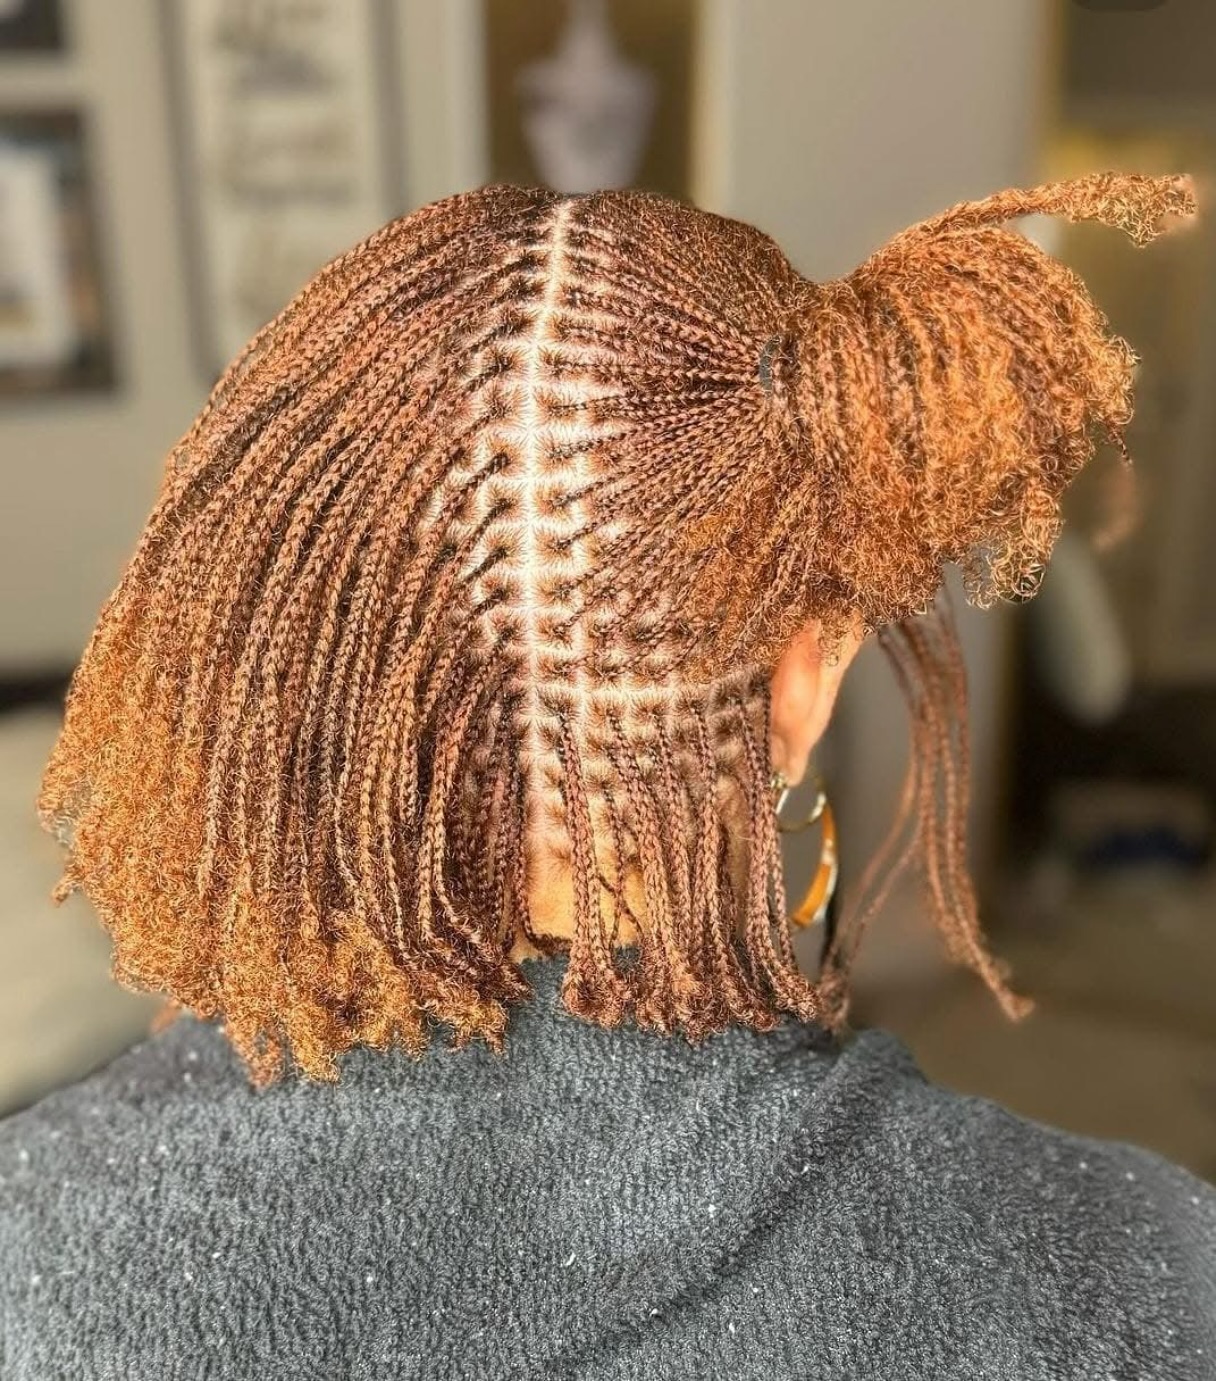
Micro braids offer a delicate, intricate finish for patient people.
Each braid is about the width of a pencil lead. They can take many hours or even days to install fully. The results look like fine strands of textured natural hair.
You can wear them straight, curled, or woven into larger styles.
Micro braids are easier to manage than other small braids. They tangle less and stay neat for longer periods. But they do put more tension on your hair than larger braids.
Always give your hair a break between micro braid installations.
Crochet Braids
Crochet braids use a latch hook for fast installation.
First, braid your natural hair into cornrows as a base. Then attach pre-braided hair extensions using the latch hook.
This versatile method allows for many different finished looks. You can achieve braids, twists, locs, or curly styles easily.
Crochet braids take much less time than individual braiding. You can finish a full head in just a few hours.
The style is lightweight and puts less stress on your scalp. Switching up your look becomes quick and affordable with crochet braids.
Stylish Variations for Special Occasions
Halo Braid

Halo braids wrap around your crown like a beautiful circle of hair.
Use the Dutch braiding technique to create this ethereal style. Wrap the finished braid around the top of your head carefully. Secure it in place with bobby pins along the way.
The result looks romantic, angelic, and perfect for weddings. You can create a full halo using all your hair. Or make a half-halo that leaves some length flowing down.
This style stays secure all day and night. It looks complicated but becomes easy with practice.
Crown Braid
Crown braids differ from halo braids in one key way. They use the French braiding technique instead of Dutch.
Start at the nape of your neck and braid upward around your head. Work your way completely around until you reach the start.
Long hair allows you to cheat this style easily. Part your hair into two even sections first. Create two traditional three-strand braids with those sections.
Wrap each braid around your head from opposite sides. Tuck the ends under and secure with bobby pins throughout.
Milkmaid Braids
Milkmaid braids give you a vintage-inspired style with European roots.
Split your hair down the middle into two equal sections first. Braid each section into a basic three-strand braid securely. Lift each braid up and over the top of your head gently.
Tuck the ends under the opposite braid to hide them. Secure everything in place with sturdy bobby pins. This creates a charming braided crown across your forehead. The style stays secure without pulling or tugging.
Milkmaid braids look fresh and romantic for garden parties or festivals.
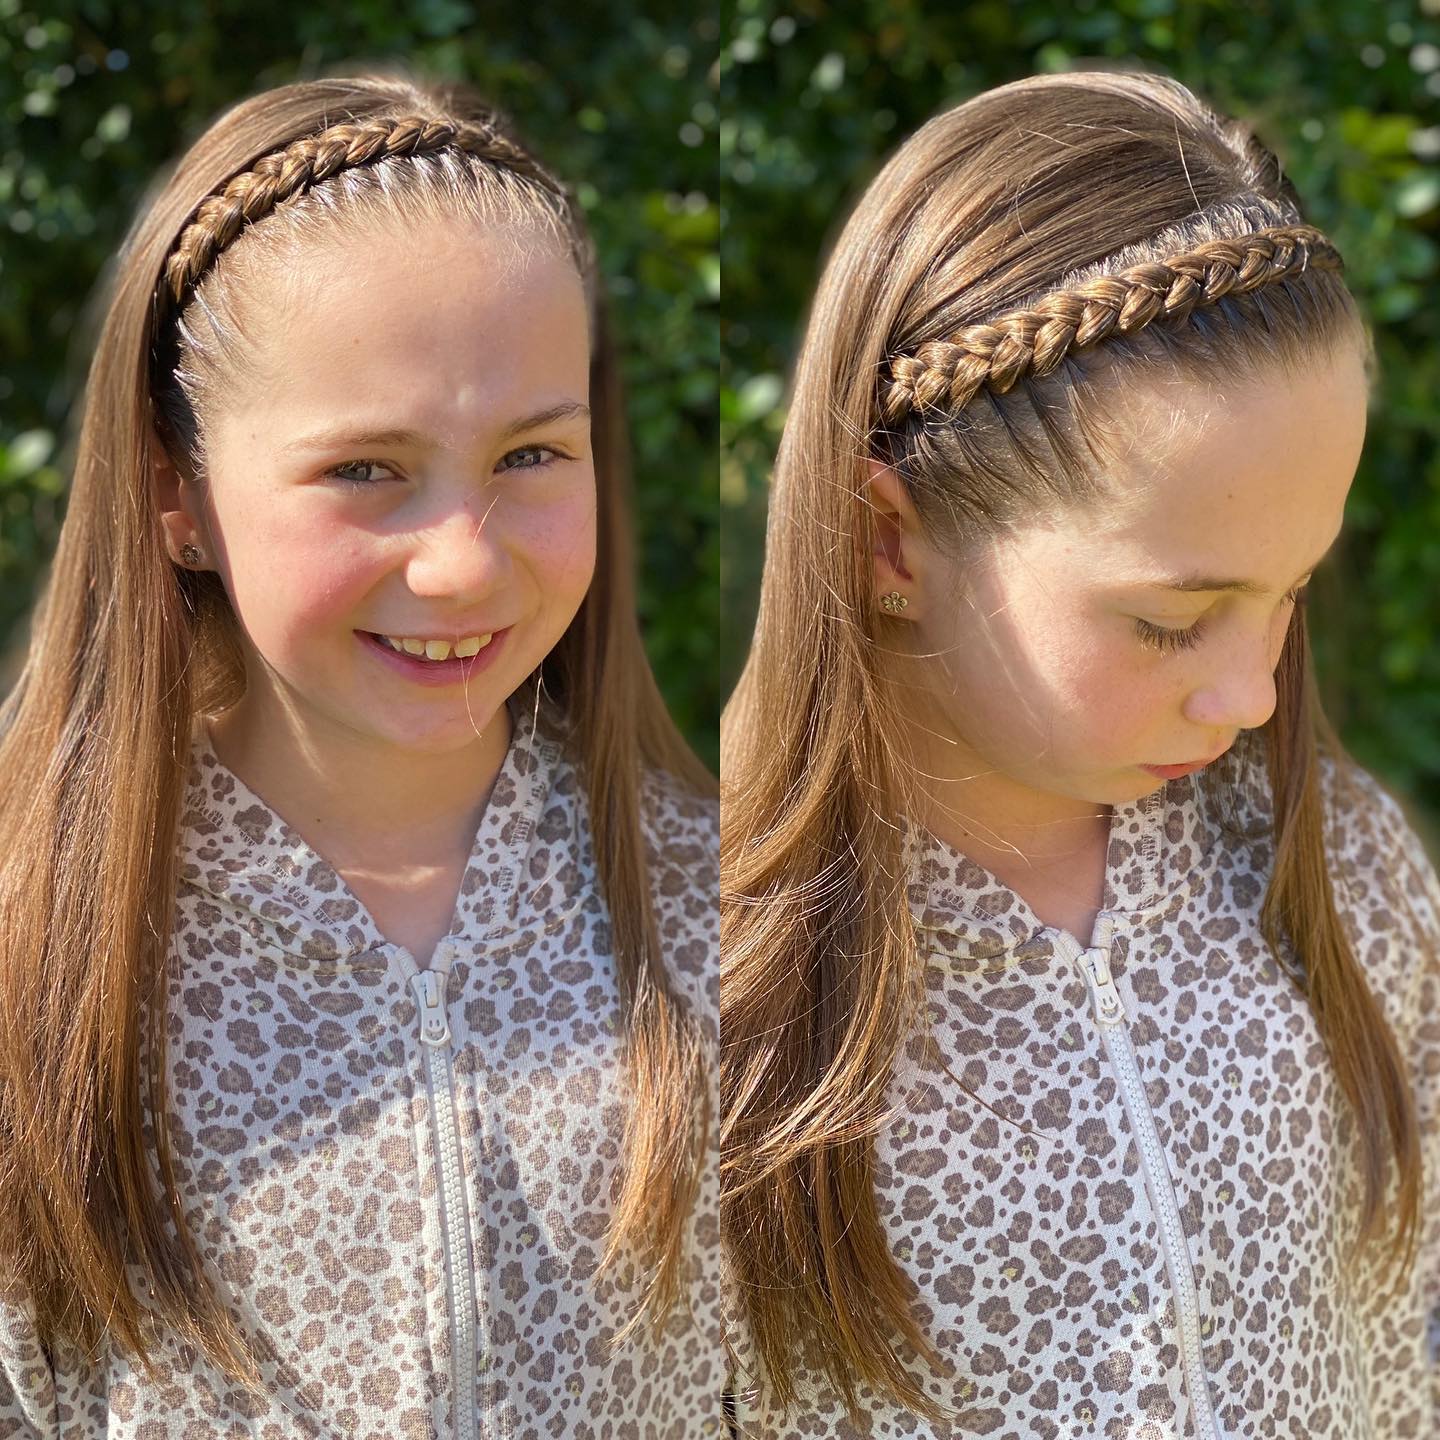
Lace Braid
The lace braid creates a delicate, cascading effect along your hairline.
This technique involves adding hair from only one side. Start by sectioning off hair where you want the braid. Do a French braid but add hair from just one side.
Only add the hair closest to your face as you braid. This makes the braid appear to cascade down your hair. The other side remains loose and flowing freely. Lace braids work great for half-up, half-down styles.
They frame your face beautifully without pulling all your hair back.
Ladder Braid
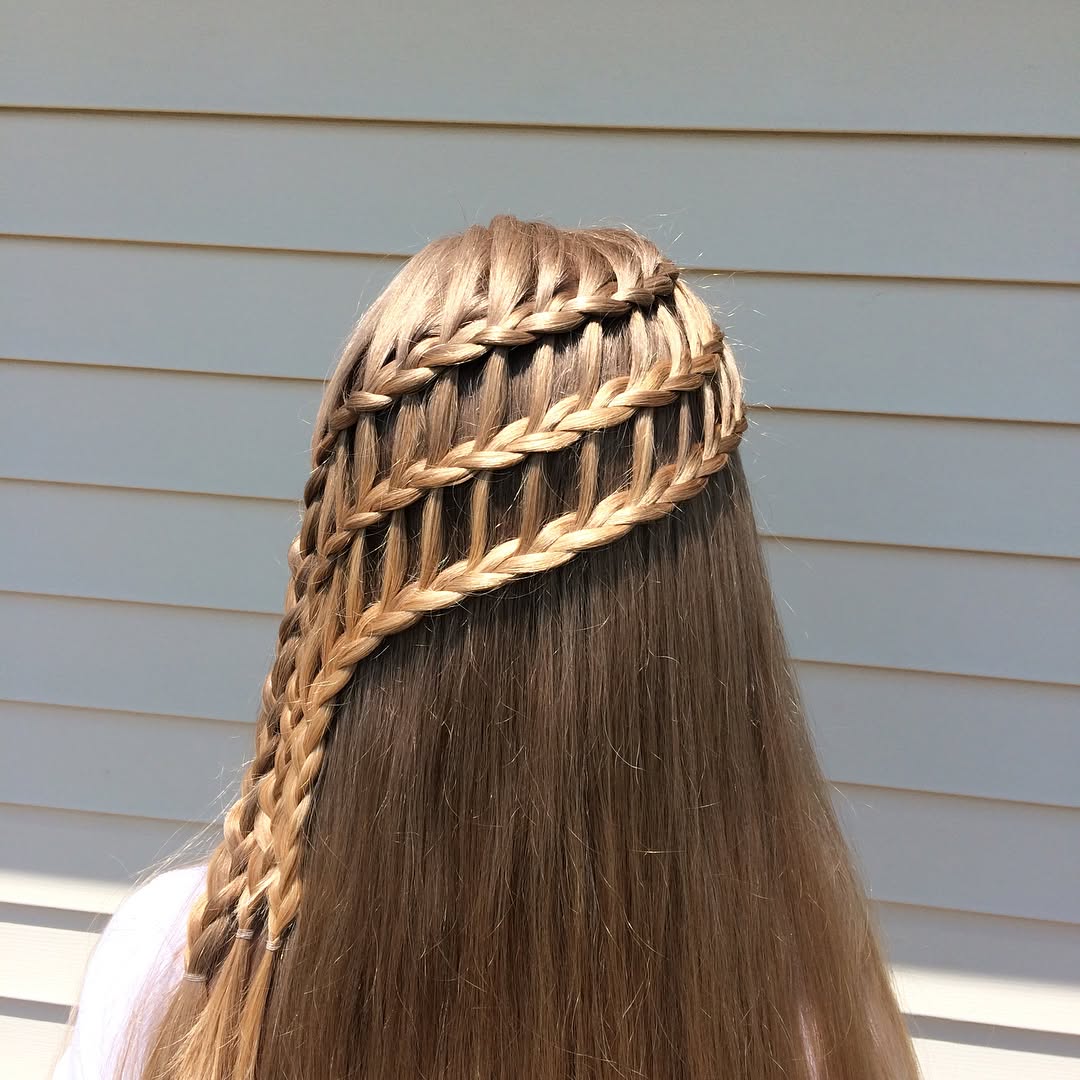
The ladder braid combines a waterfall braid with a second parallel braid.
Start with a waterfall braid along the side of your head first. Leave some hair strands out while braiding as usual. These dropped pieces become the “rungs” of your ladder.
After finishing the waterfall braid, start a second braid parallel to it. Incorporate the dropped pieces from the first braid into the second. This creates a connected, ladder-like appearance between both braids.
The result looks intricate and impressive to everyone who sees it. This style works best on medium to long hair lengths.
Infinity Braid
The infinity braid results in a pattern resembling the infinity symbol.
This braiding style is more complex than basic techniques. Start by dividing your hair into three equal sections first. Take the middle section and divide it in half again.
These two strands will serve as the center of your infinity symbol. Weave the outer strands around the center in a figure-eight pattern.
Take additional hair from each side as you go along. Once you reach the end, secure with a hair tie. The captivating result is well worth the extra effort required.
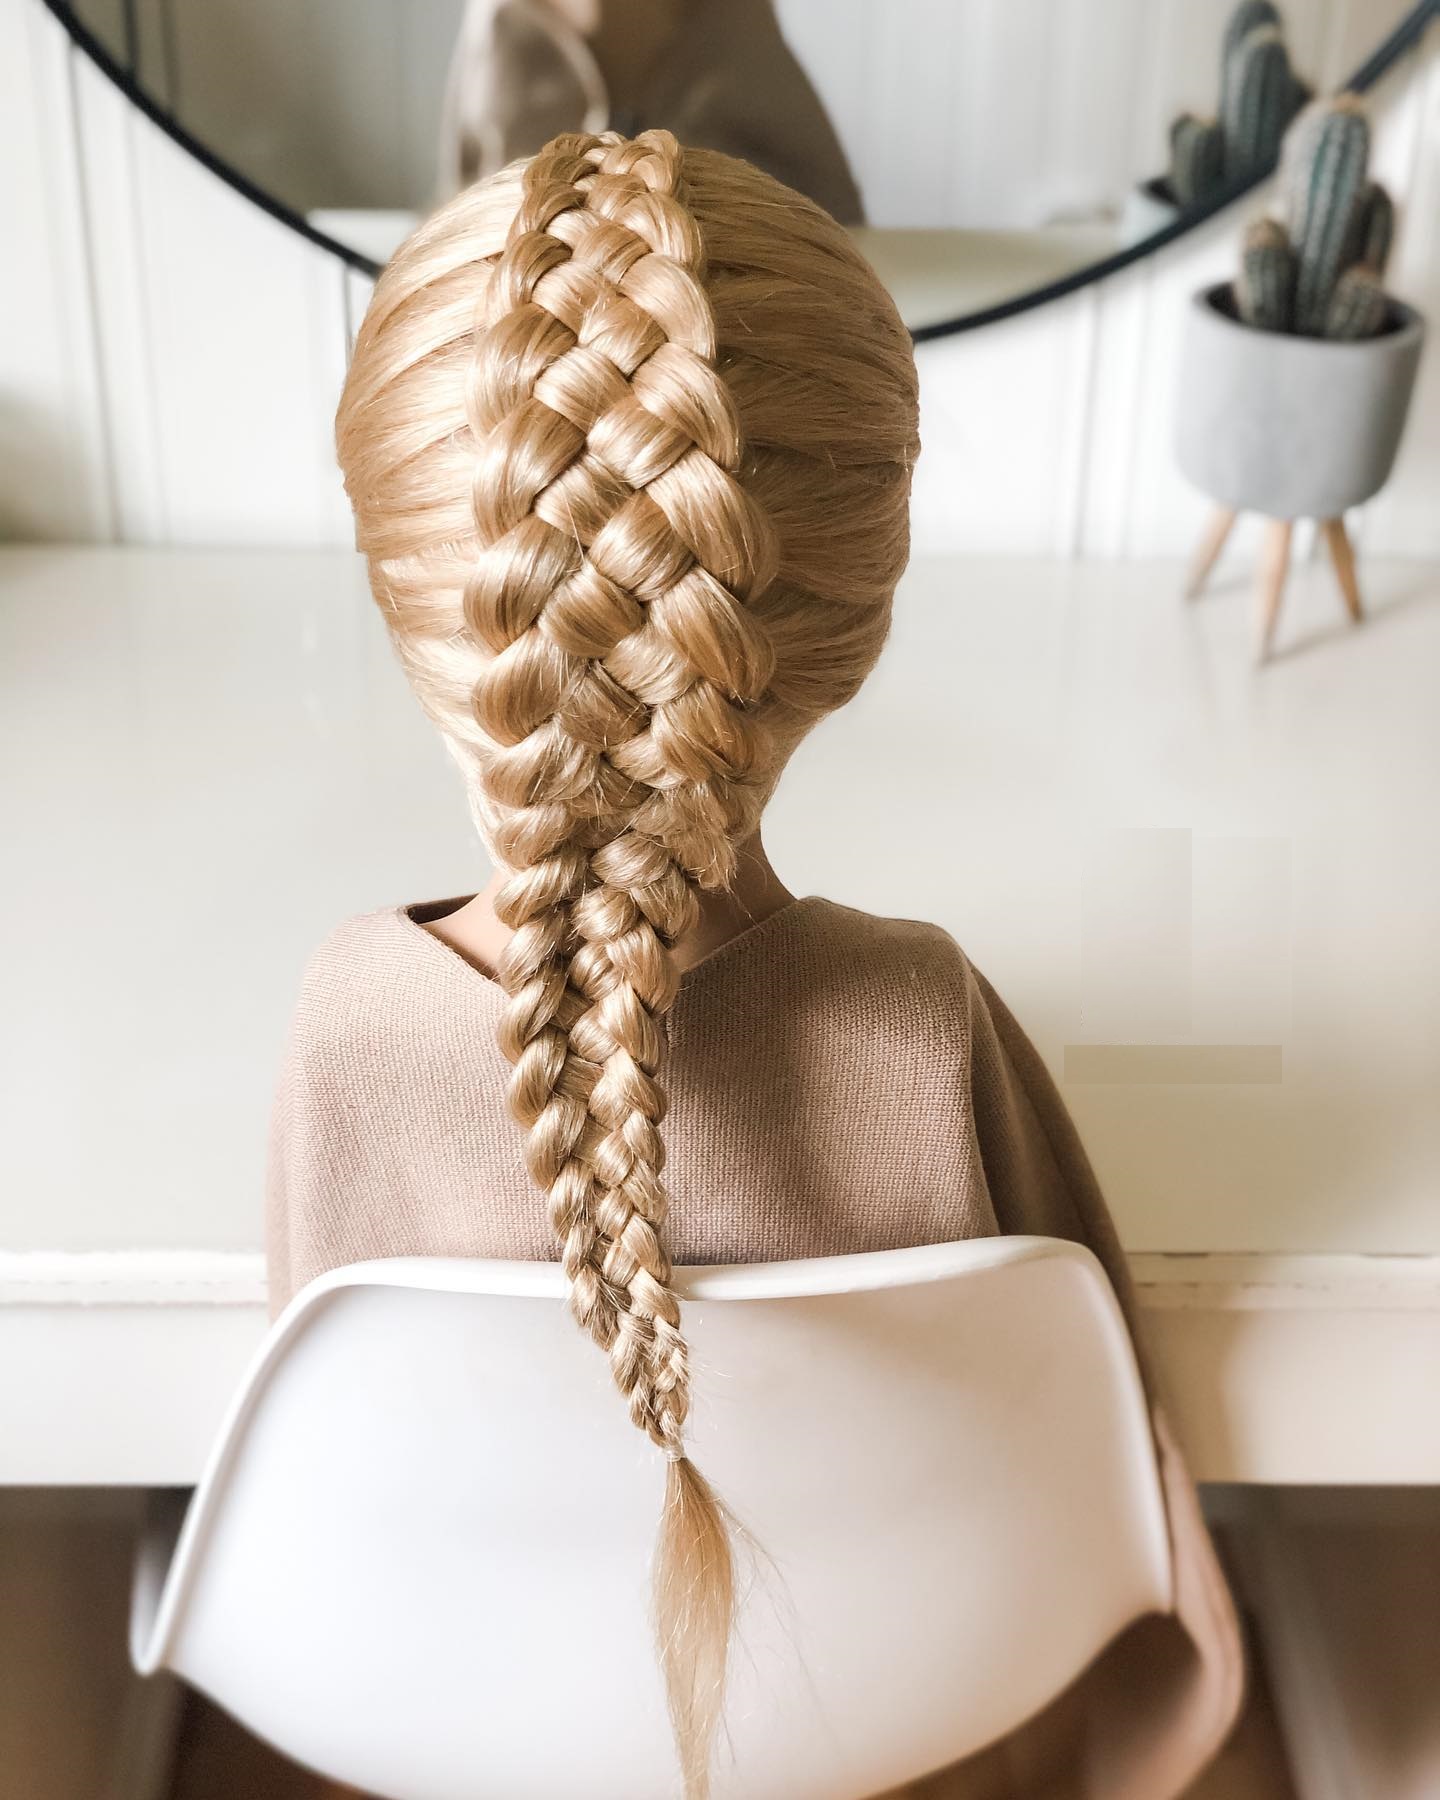
Four-Strand Braid
The four-strand braid offers a thicker, more intricate look than three strands.
Separate your hair into four equal sections to begin. Starting from the left, take the first strand. Weave it under the second strand, then over the third.
Finally, weave it under the fourth strand to complete one cycle. Repeat this weaving pattern, pulling each strand tightly. The result is a well-defined, flattened braid.
This style works great for those ready to advance beyond basics. Four-strand braids look impressive but become natural with practice.
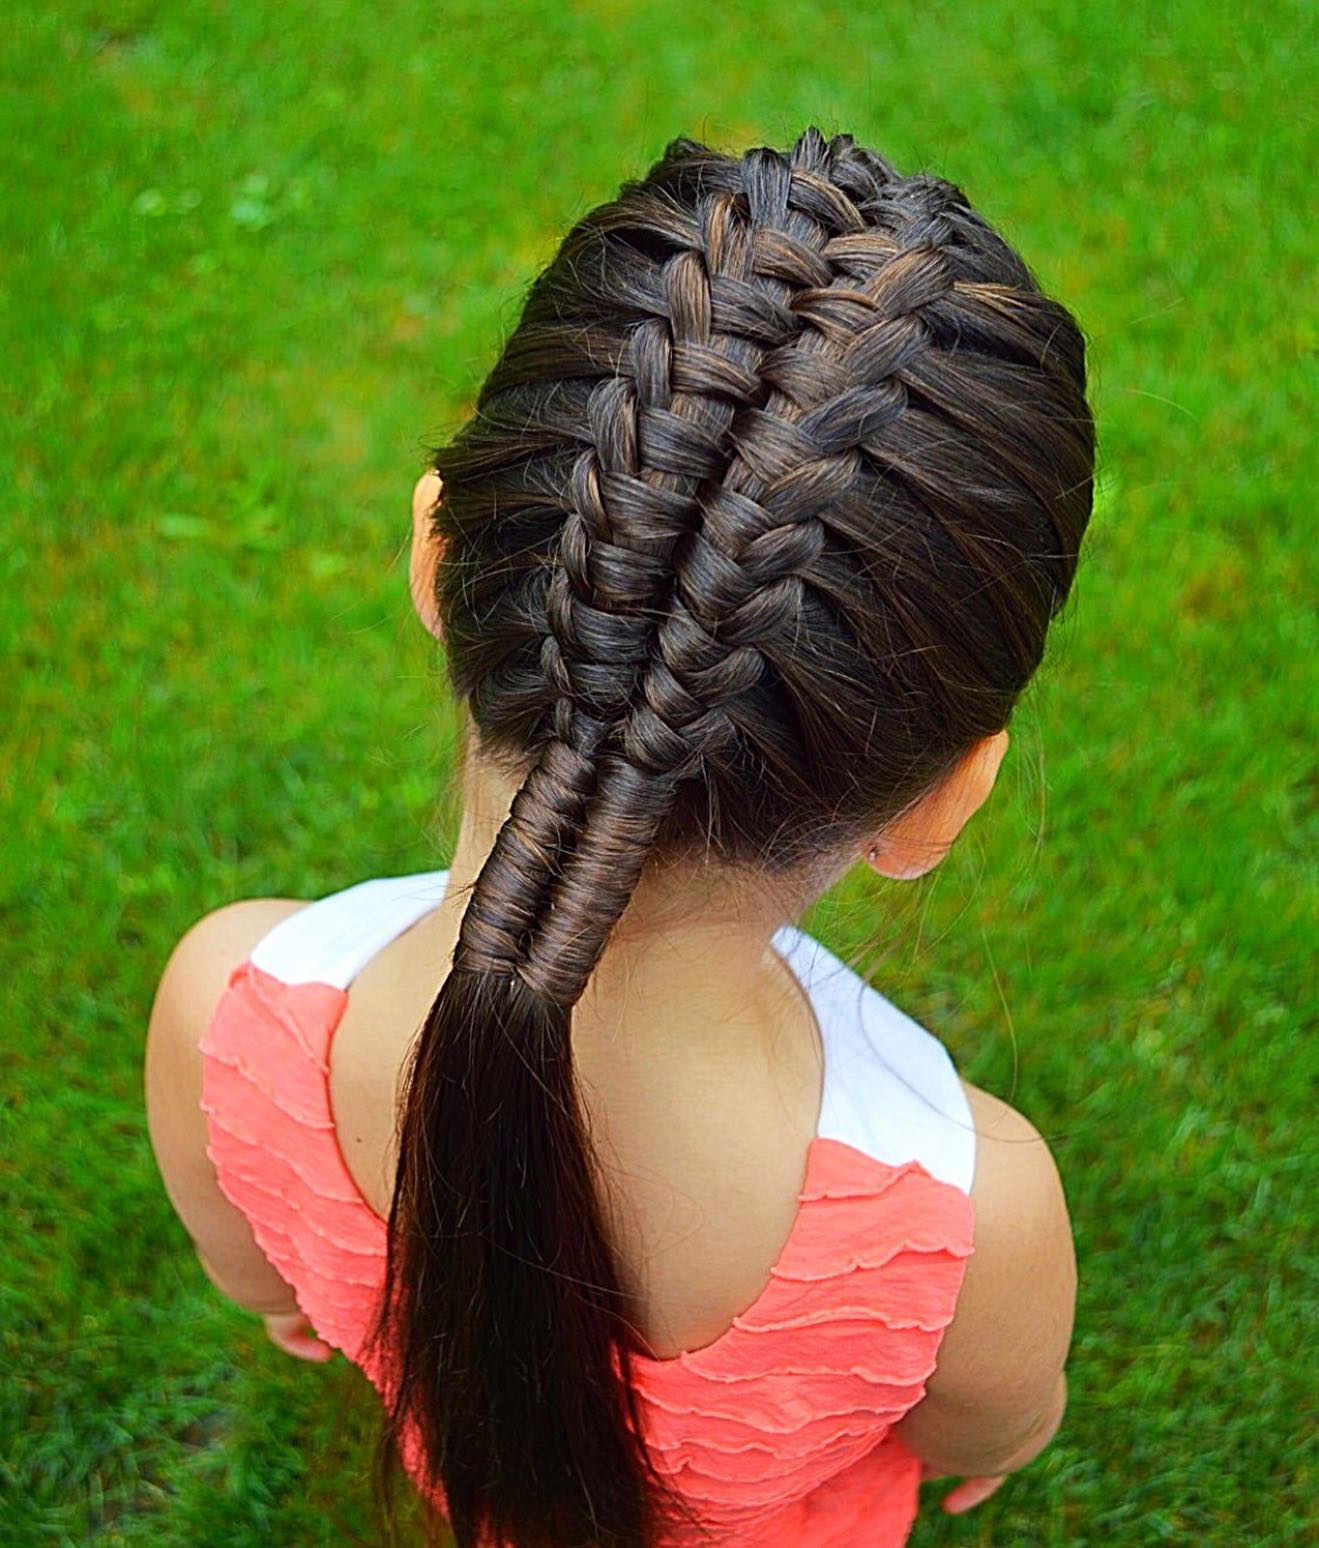
Five-Strand Braid
The five-strand braid takes complexity to an even higher level.
You must separate your hair into five equal sections first. Starting from the right, cross the first strand over the second. Then cross it under the third strand next.
Take the fifth strand from the far left side. Cross it over the fourth, then under the strand you just moved. Continue this pattern of over, under, over, under until the end.
This braid works best with longer hair lengths only. The finished result looks like an intricate woven masterpiece.
Feather Braid
The feather braid adds a whimsical, enchanting touch to any hairstyle.
This braid leaves pieces of hair out during each turn. Start like a French braid at your crown. Divide a section of hair into three parts as usual.
As you braid, leave out small sections each time you cross. Do not pull all the hair into the braid itself. These left-out strands form the “feathers” of the braid. They stick out softly along the sides.
The effect looks soft, romantic, and slightly bohemian. Feather braids work beautifully for outdoor weddings or festivals.
Braids for Adding Length and Volume
Feed-In Braids
Feed-in braids gradually add extension hair as you plait each row.
This technique creates thicker, more voluminous braids throughout. The result looks natural and seamless from root to tip. Many professional braiders prefer this method for their clients.
You cannot see where your real hair ends and extensions begin. Feed-in braids work for cornrows, individual braids, or ponytails. The gradual addition prevents bulky, obvious knots at your scalp.
Your braids will look fuller and more luxurious overall. This technique requires skill but delivers beautiful, natural-looking results.
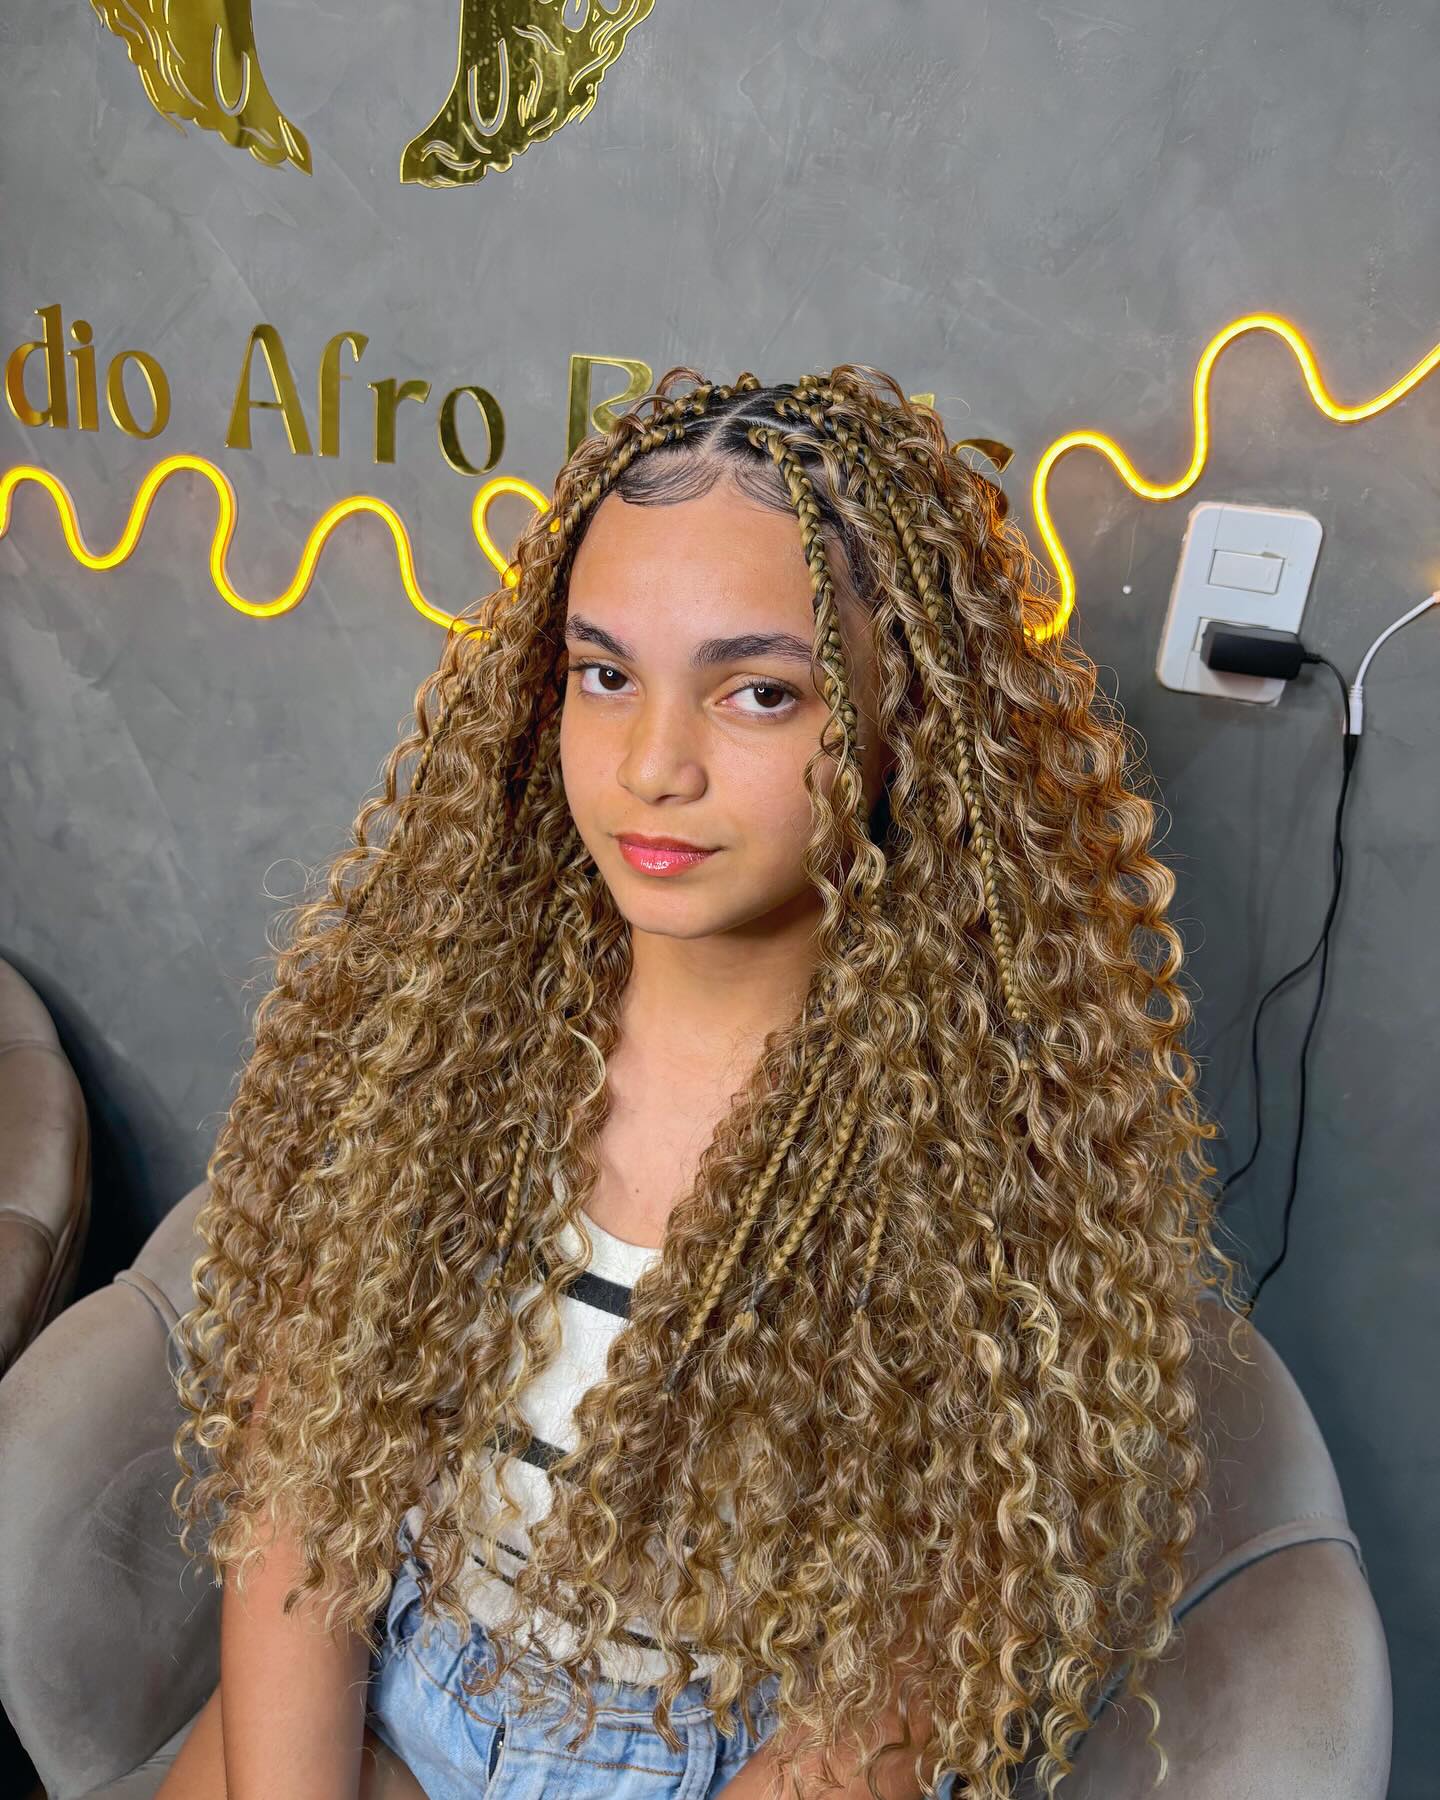
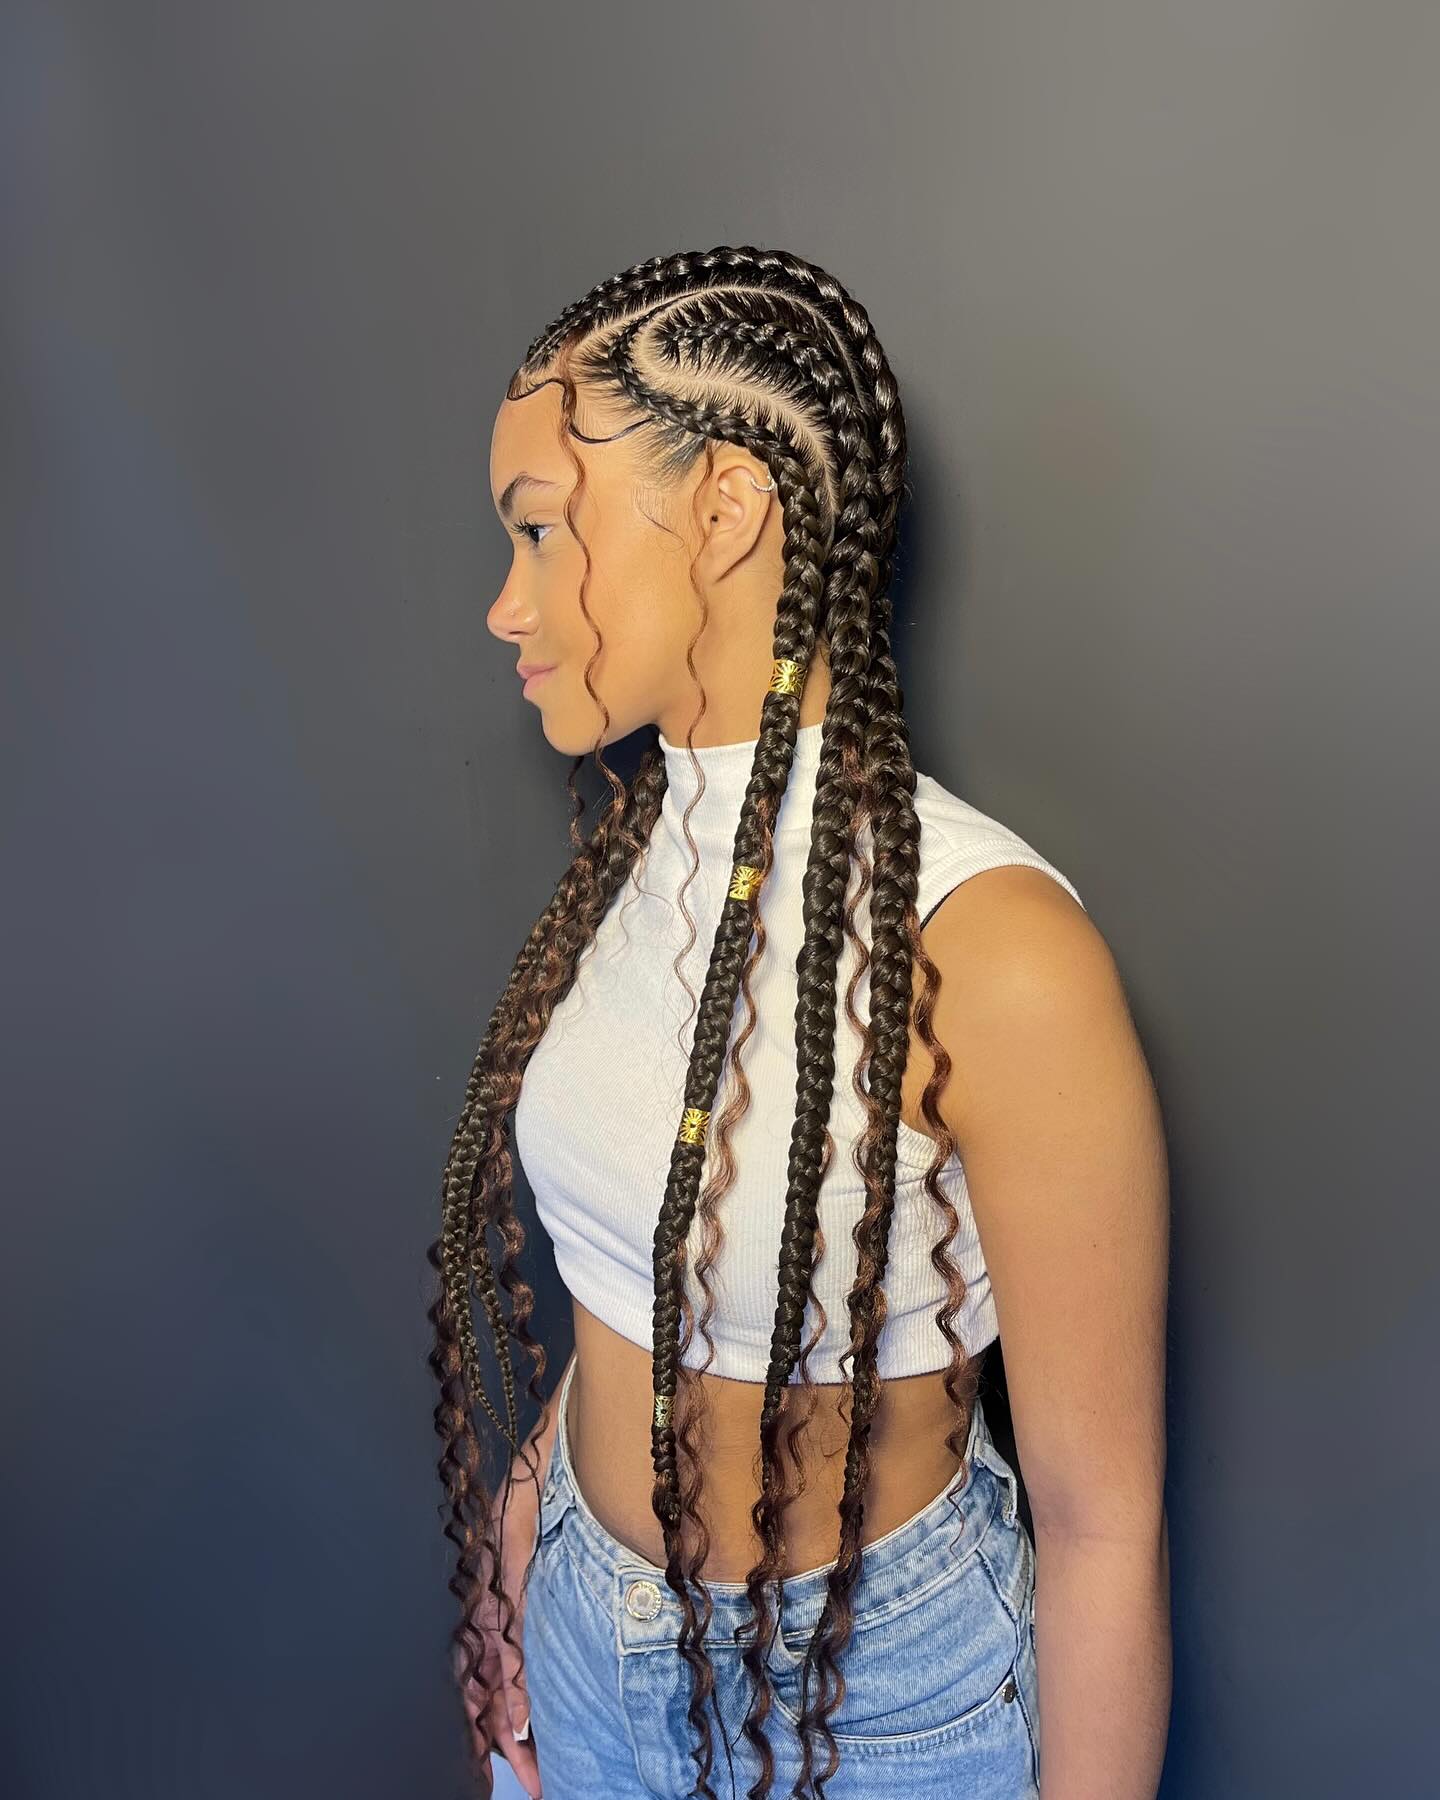
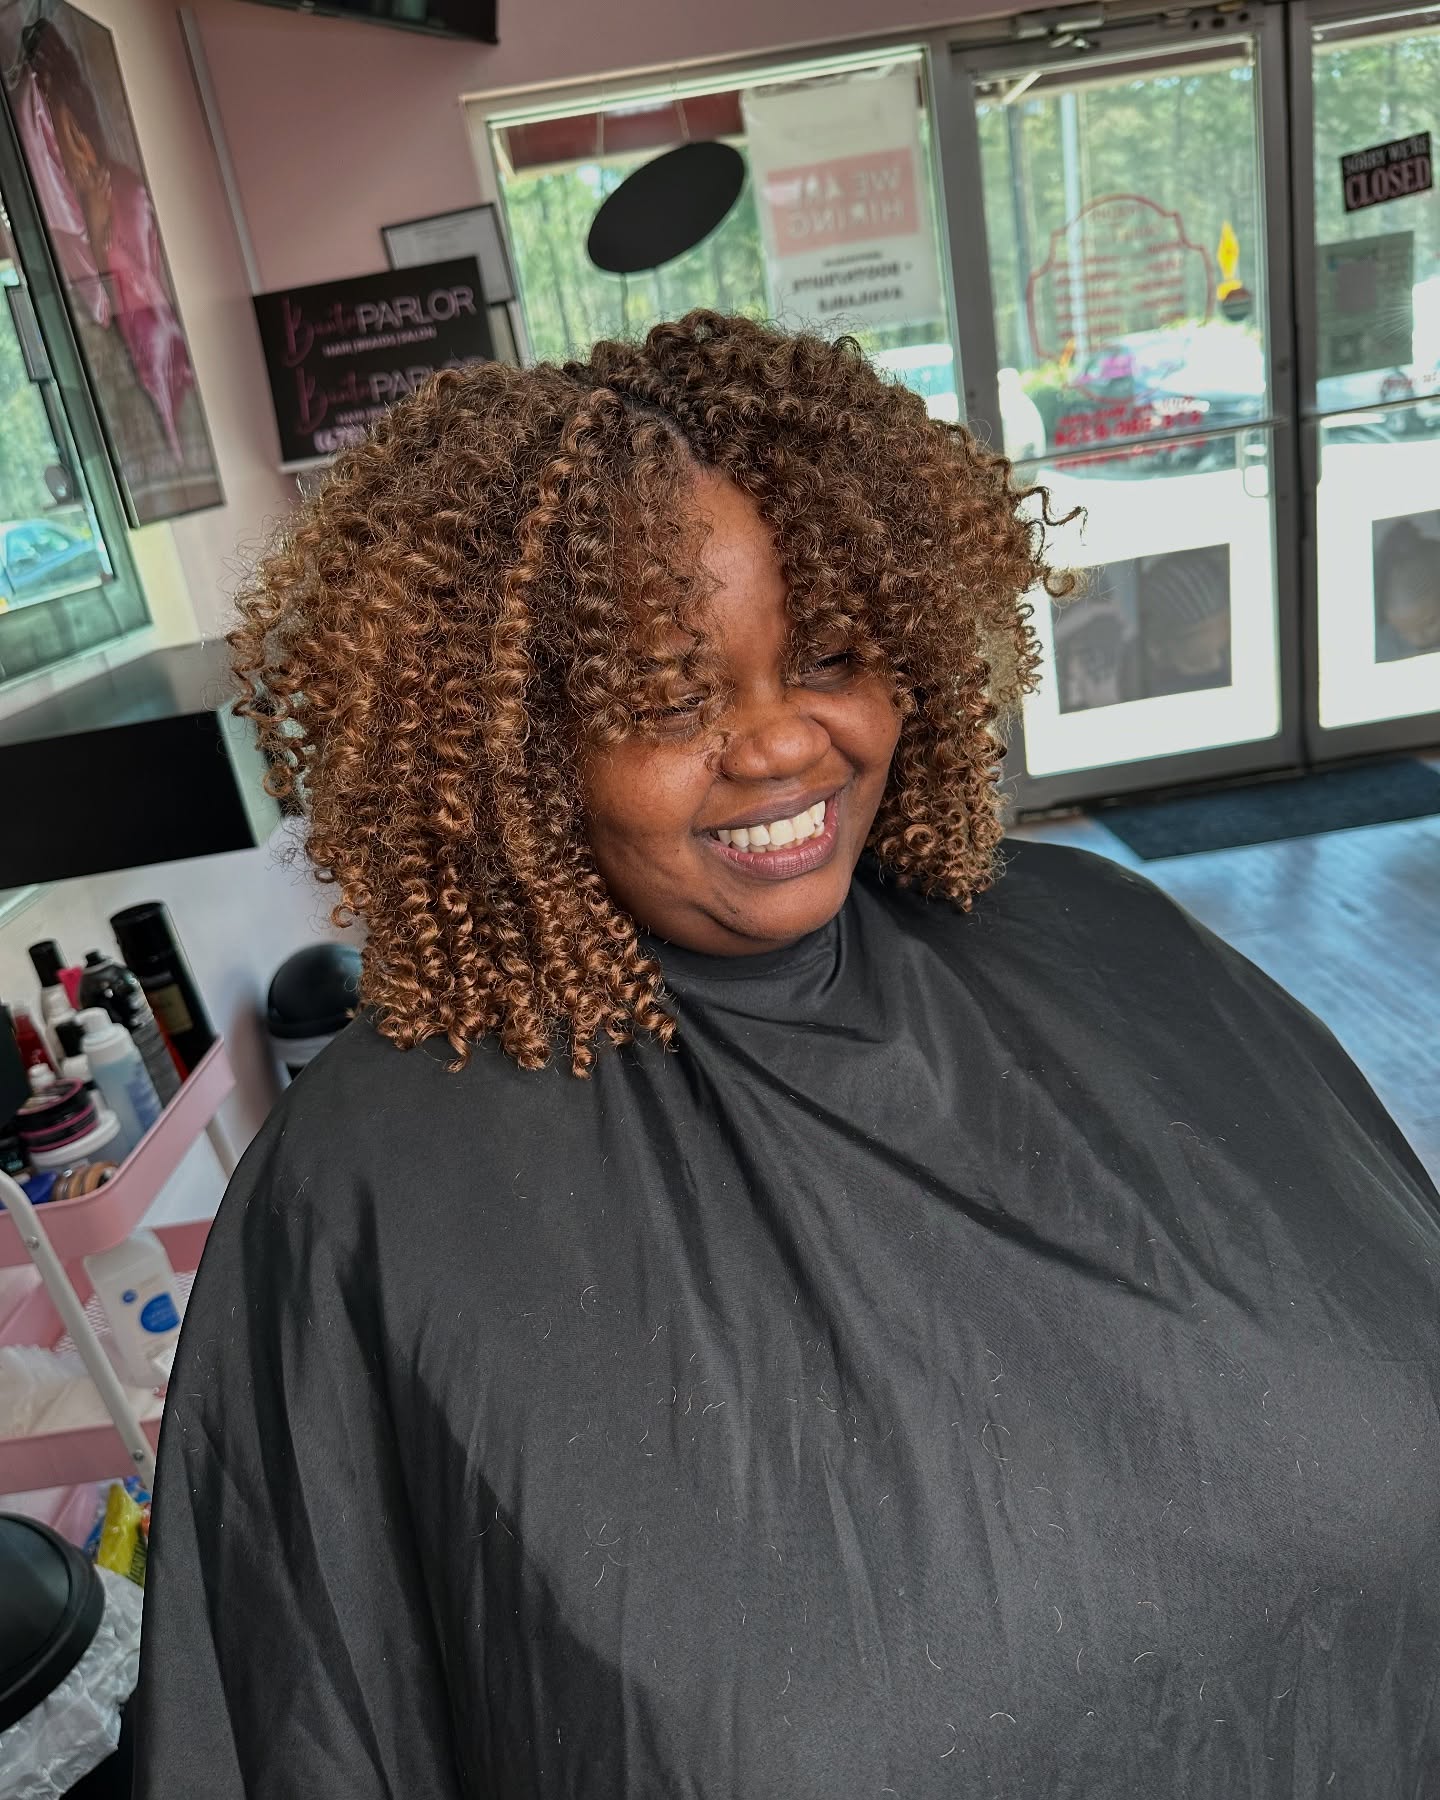
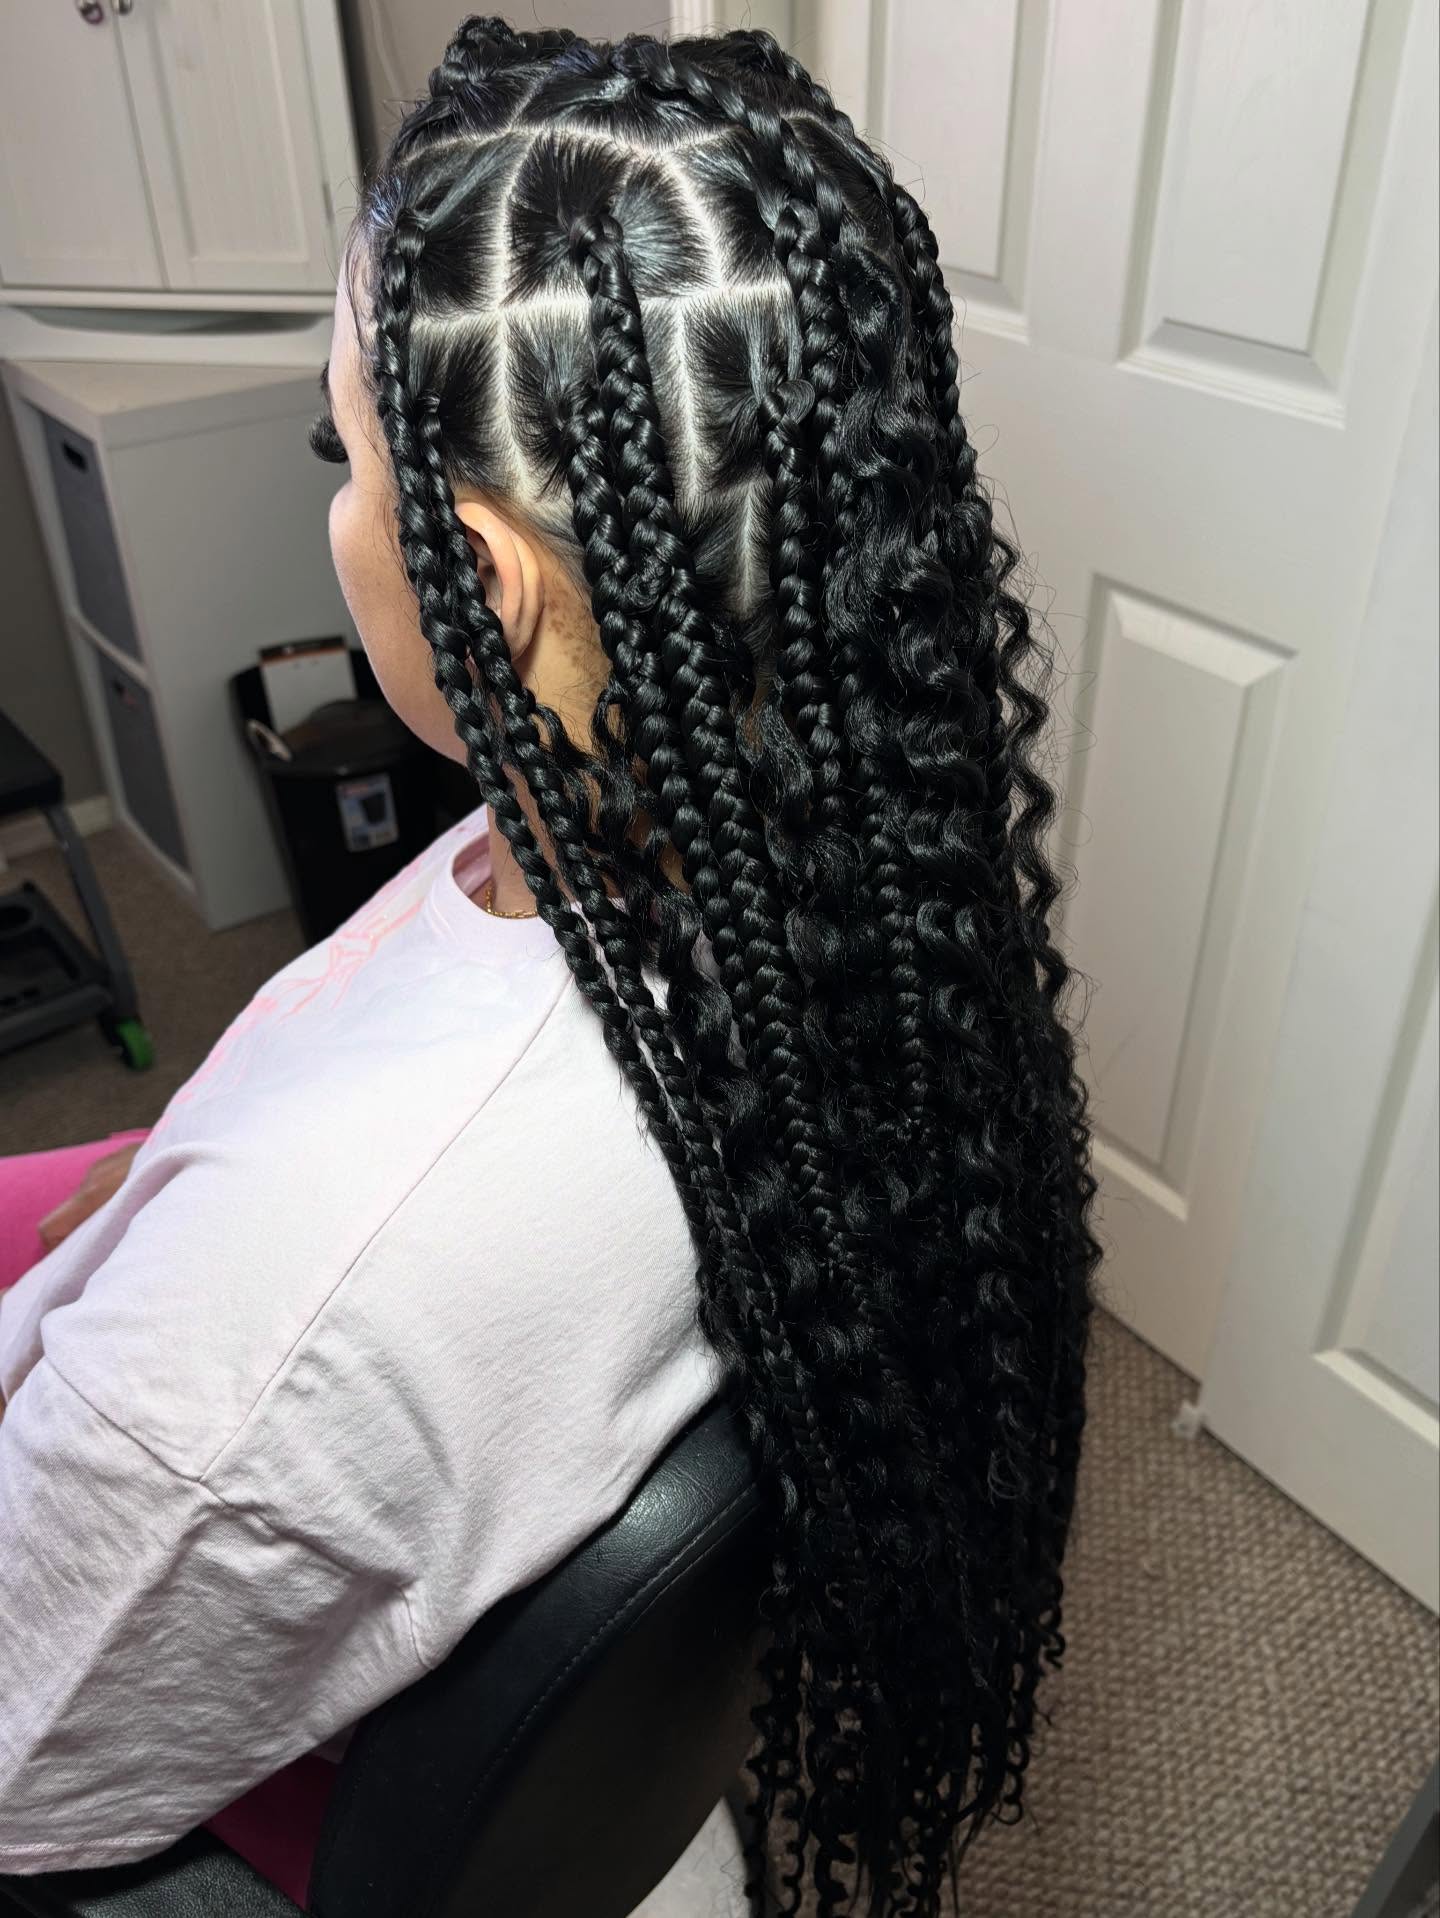
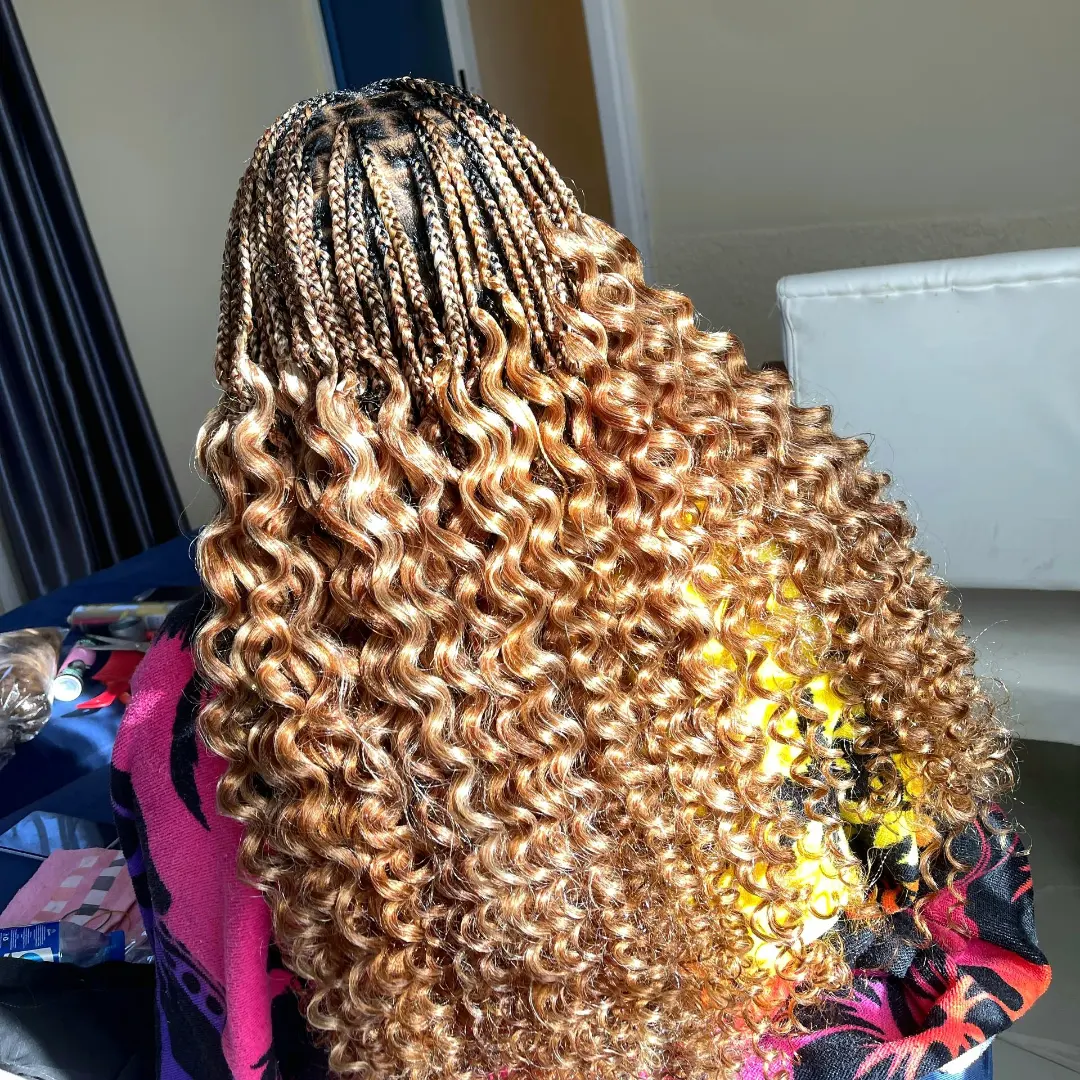
Boho Box Braids
Boho box braids leave human hair out throughout the entire style. Your natural curls or added extensions remain loose and free.
This creates a carefree, relaxed bohemian vibe instantly. The loose strands give the style movement and softness. These braids require extra hair care maintenance than regular box braids.
Use sulfate-free shampoo and frizz-fighting products regularly. The human hair left out can be your natural curls. Or you can add extensions for more volume and dimension.
Boho braids look effortlessly chic and slightly messy on purpose.
Mermaid Braids
Mermaid braids blend braided top sections with flowing loose hair below.
Braid the top lengths of your hair close to your scalp. Let the rest of your hair flow down completely free. This can be straight hair or curly hair depending on preference. The contrast between braided and loose hair creates visual interest.
Mermaid braids work well for those who want some braided detail. But you still get to show off your length and texture.
This style suits beach weddings, vacations, or summer days. The name comes from the flowing, mermaid-like appearance of loose ends.
Pick and Drop Braids
Pick and drop braids offer a quick alternative to full-head braiding.
Plait the top length of your hair for about three inches only. Then leave the rest of your hair completely loose. The loose ends can be in soft waves or curls.
This style gives you the best of both worlds. You get the neat look of braids at your roots. But you avoid spending hours on a full braid installation.
Pick and drop braids work great for hot summer days. They keep hair off your neck while showing off your length.
French Curl Braids
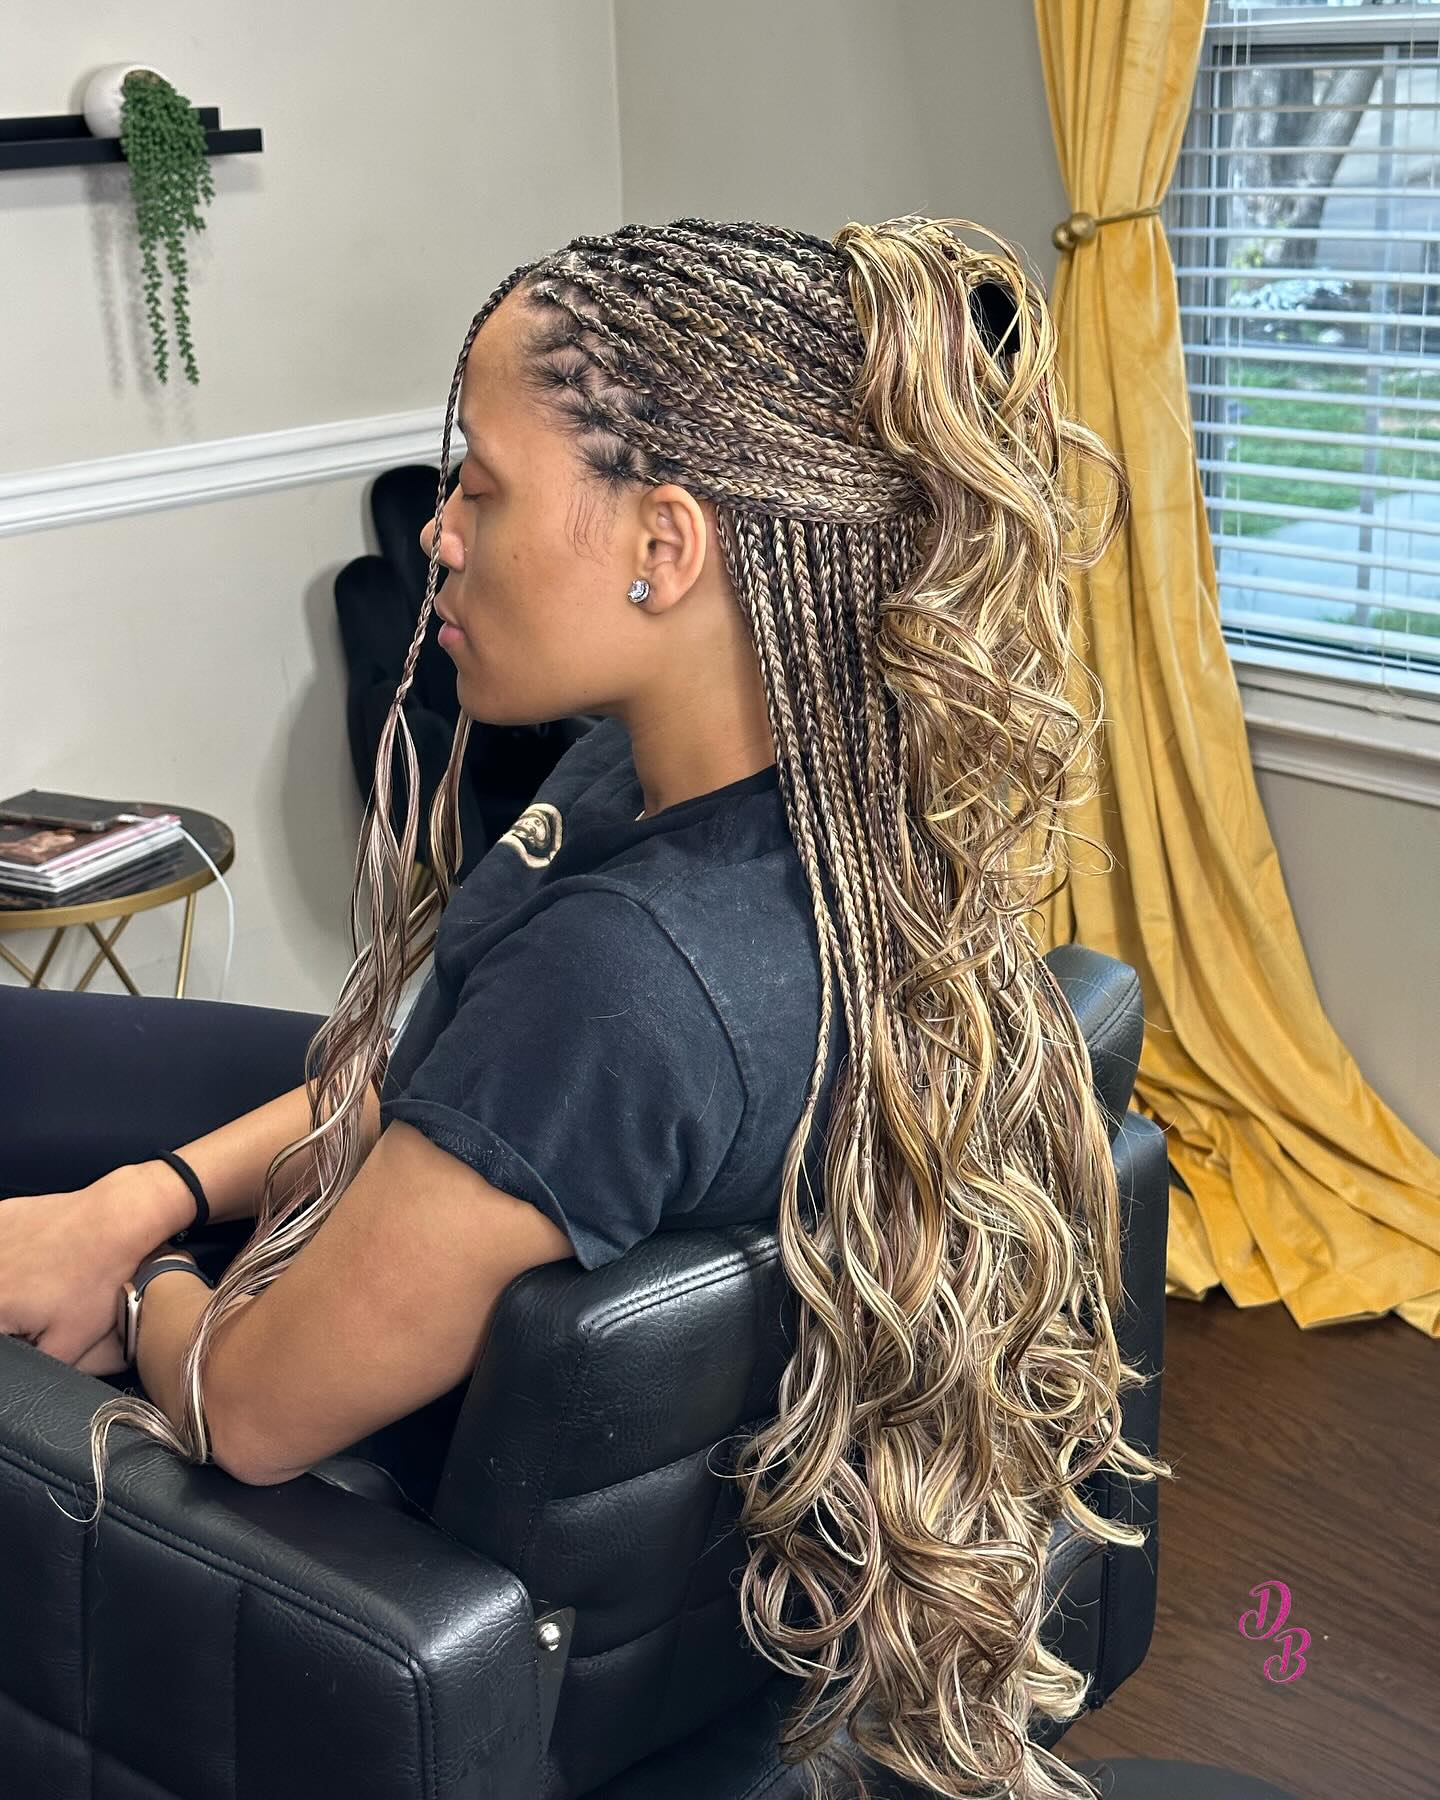
French curl braids create an elegant, feminine look with curly ends.
Braid box braids as you normally would down most of the hair. Leave loose curls at the very end of each braid instead. The curly ends bounce and move when you walk.
This style looks romantic and perfect for special events. You can use human hair for the curly ends. Or use synthetic pre-curled extensions for convenience. French curl braids photograph beautifully from every angle.
The combination of straight braids and curly ends feels fresh and modern.
Gypsy Braids
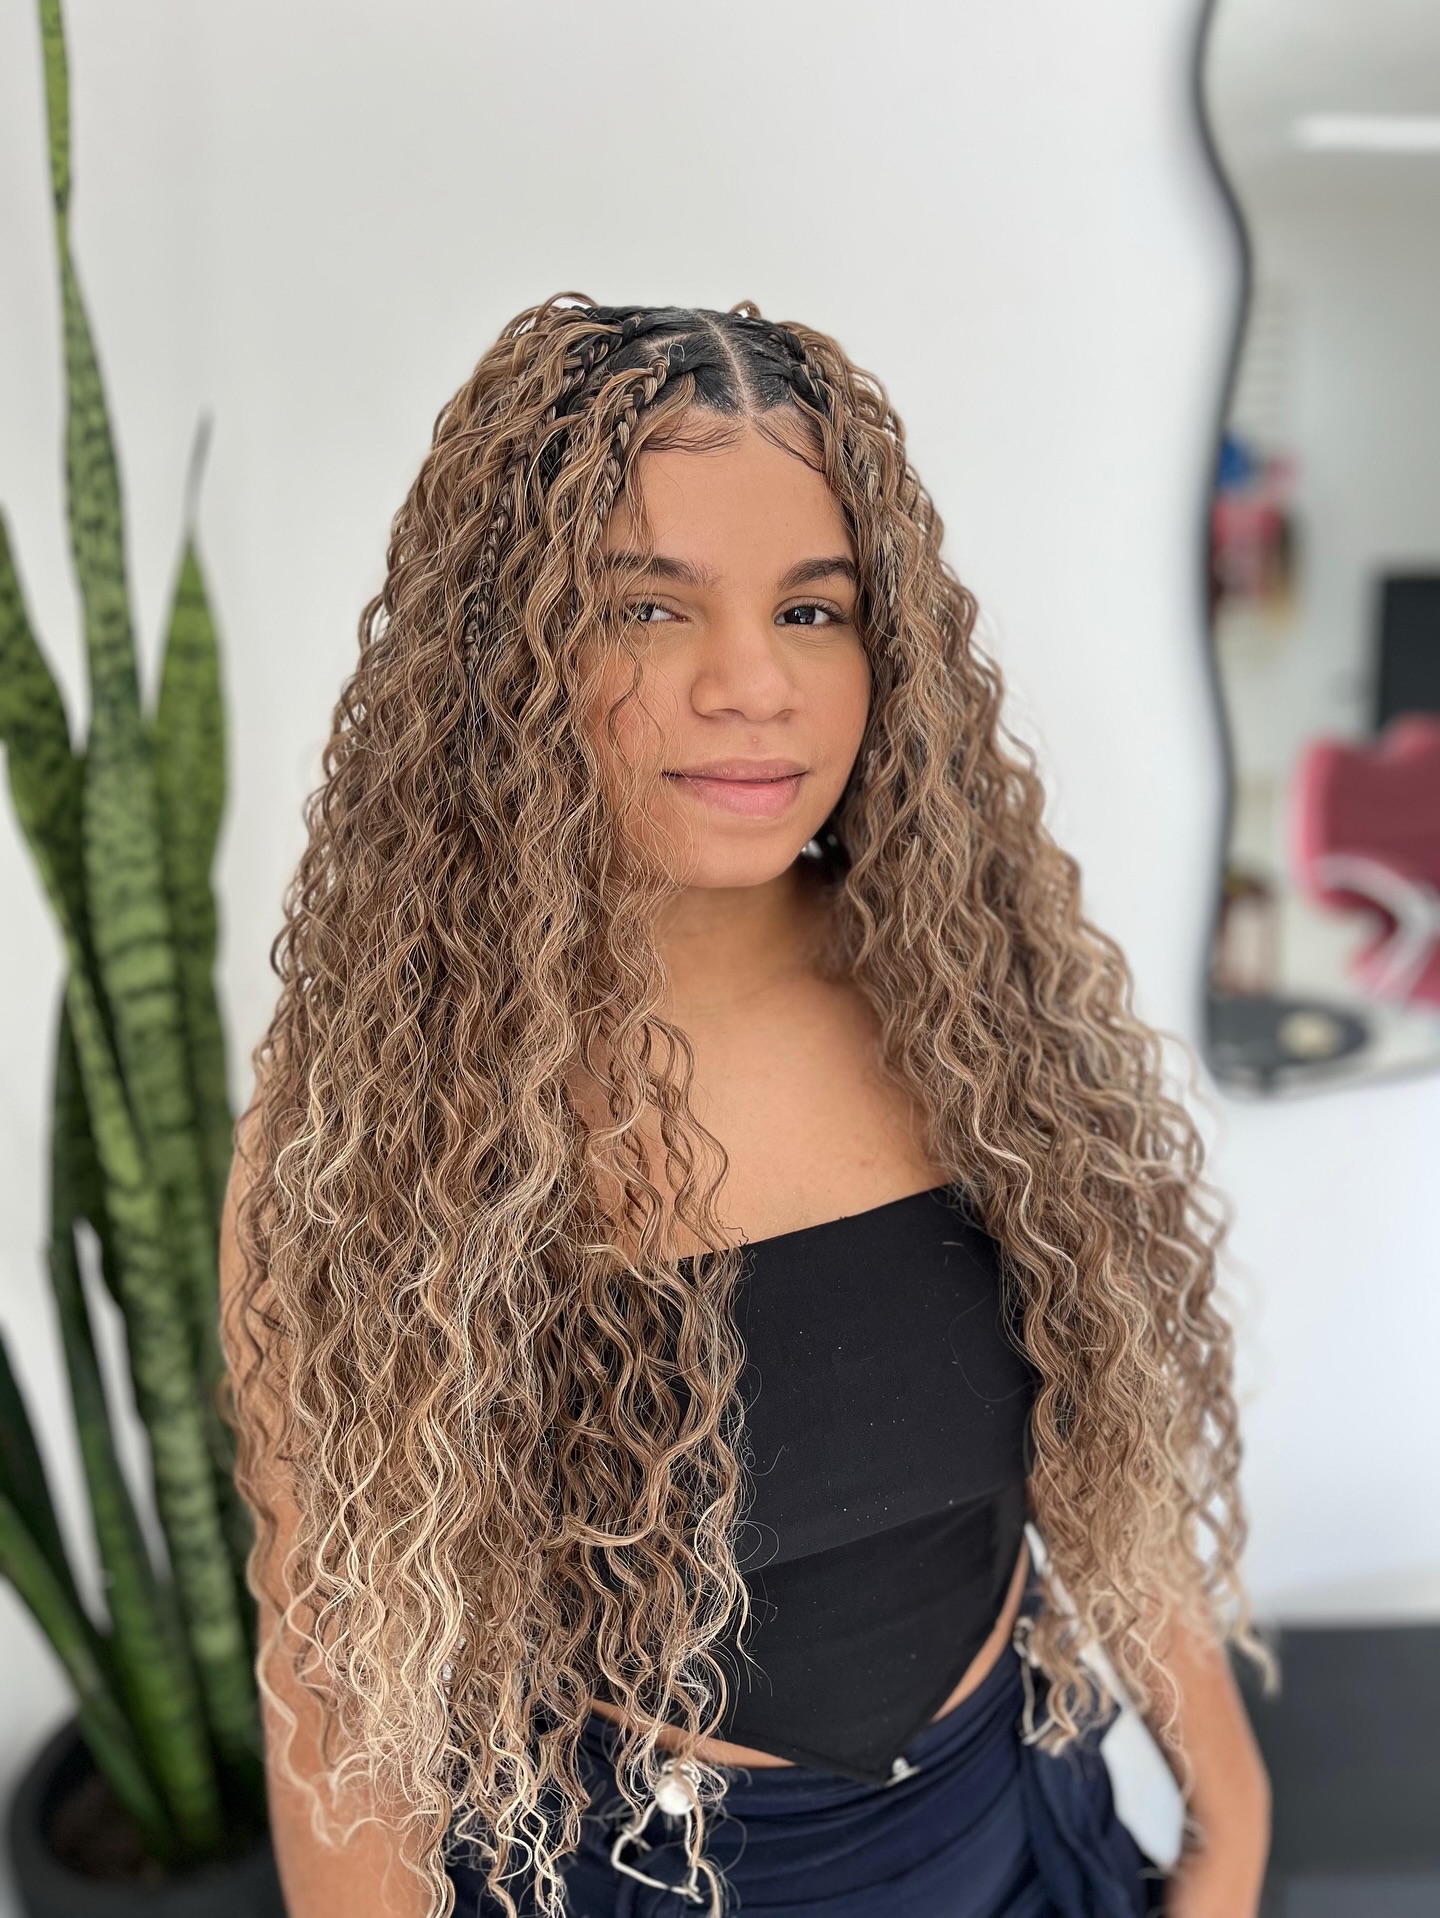
Gypsy braids deliver volume and texture in a full, lush style.
Create knotless braids as your base throughout your head. Then add curls throughout each individual braid as you go. The result is a head full of textured, voluminous braids.
This style looks thicker than regular knotless braids. The added curls create movement and softness throughout. Gypsy braids work well for those with thinner natural hair.
The curls disguise any sparse areas or uneven parts. This style makes a bold, beautiful statement wherever you go.
Bora Bora Braids

Bora Bora braids offer a tropical, beachy vibe for vacations.
Braid your natural hair together with wavy hair extensions. Continue braiding until you reach the length of your natural hair. Then let the remaining extensions flow completely free and wavy. The wavy ends cascade down like ocean waves.
This style looks amazing in photos and moves beautifully. Bora Bora braids work great for destination weddings or tropical trips.
The wavy ends feel lighter than fully braided extensions. You get length and volume without the heavy weight on your scalp.
Jumbo Braids
Jumbo braids make a bold statement with their oversized thickness.
These are larger, more voluminous versions of traditional braids. You will need extension hair to achieve this substantial look.
The thick braids stand out and demand attention immediately. Installation takes much less time than smaller braids.
You can finish a full head of jumbo braids in hours, not days. The larger size means fewer total braids on your head. This puts less tension on your scalp overall.
Jumbo braids look dramatic and modern for anyone wanting to stand out.
Peekaboo Braids
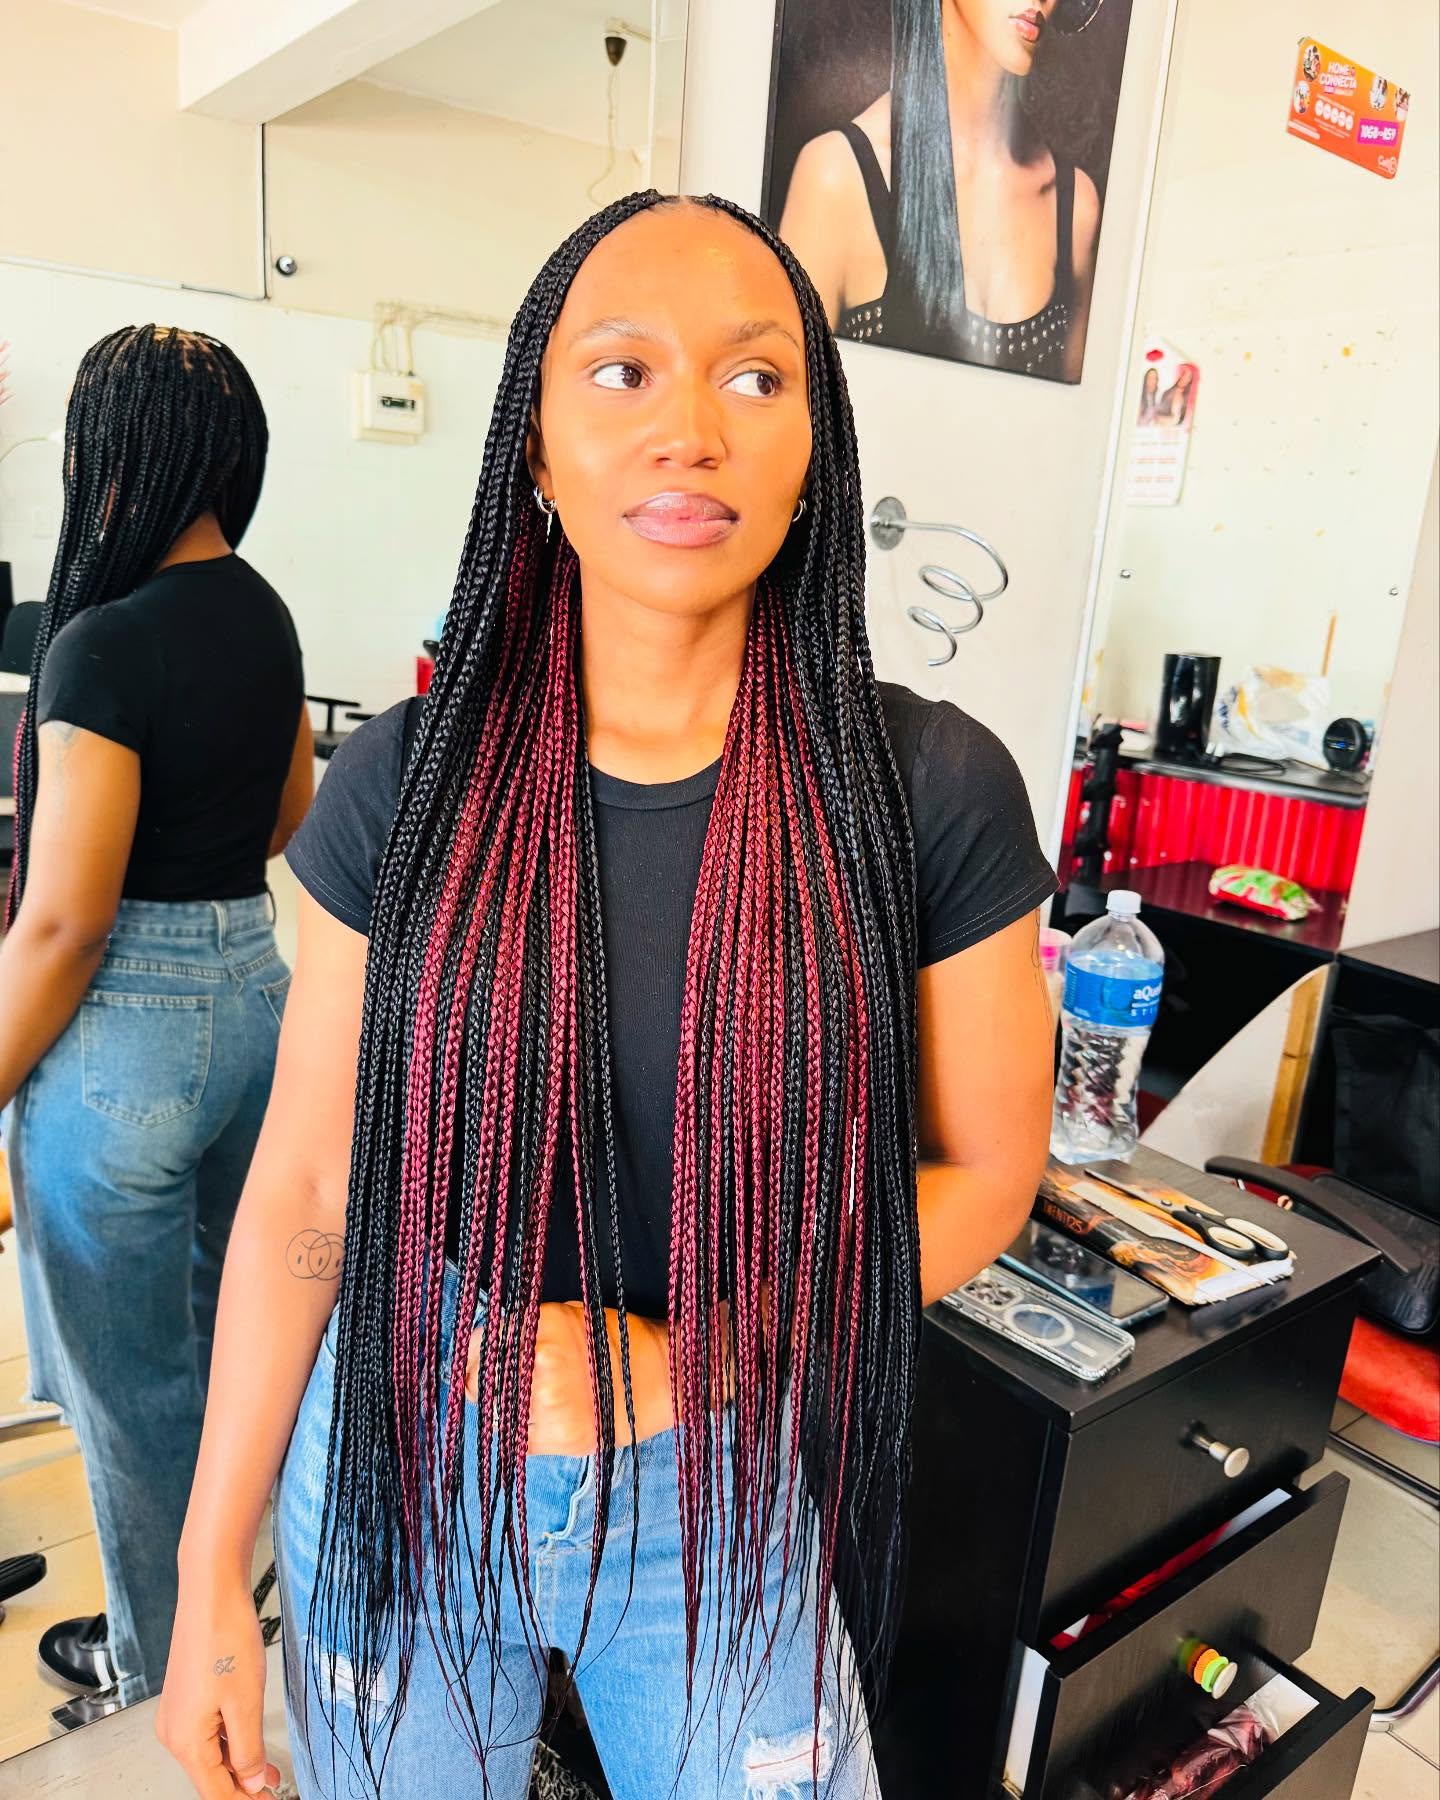
Peekaboo braids add a playful pop of hidden color to your style.
This refers to any braid style with a colorful surprise element. One section or a few individual braids use a different color. The rest of your hair remains a neutral or natural shade.
The colorful braids hide underneath or peek out unexpectedly. You can use bold reds, blues, purples, or pastel pinks. Peekaboo braids let you experiment with color temporarily.
You do not have to dye your natural hair at all. Just add colored extension hair to a few braids for fun.
Wrapping Up
Pick a braid style that fits your style.
Some take hours. Others take five minutes.
Short hair works for cornrows. Long hair suits box braids. The right braid protects your hair and looks great.
Start simple today. Get creative tomorrow.
Now go practice.